When it comes to capturing the beauty of buildings and structures, interior and exterior architectural photography require different techniques and approaches. As professional architectural photographers, we understand the nuances of both types of photography and are here to guide you through the process of capturing stunning images.
Architectural photography encompasses a wide range of subjects, from the intricate details of interior design to the grandeur of exterior facades. Whether you’re interested in showcasing a commercial space, a residential masterpiece, or a historic landmark, understanding the techniques and tips for both interior and exterior architectural photography is crucial.
In this comprehensive guide, we will explore the key differences between interior and exterior architectural photography and provide you with expert tips and techniques to elevate your photography skills. From finding the right vantage point and preparing the space to essential equipment, composition techniques, and mastering lighting, you’ll gain the knowledge and confidence to capture breathtaking architectural photos.
So, whether you aspire to be a professional architectural photographer or simply want to take stunning photos of your surroundings, join us as we delve into the world of interior vs. exterior architectural photography and unlock the secrets to capturing buildings at their best.
Key Takeaways:
- Interior and exterior architectural photography require different techniques and approaches.
- Understanding composition techniques, lighting, and equipment is essential for capturing stunning architectural photos.
- Preparing the space and finding the right vantage point are crucial for interior and exterior architectural photography, respectively.
- Mastering perspective correction and post-processing techniques can enhance the quality of architectural photos.
- With practice and experience, you can become a skilled architectural photographer capable of capturing buildings at their best.
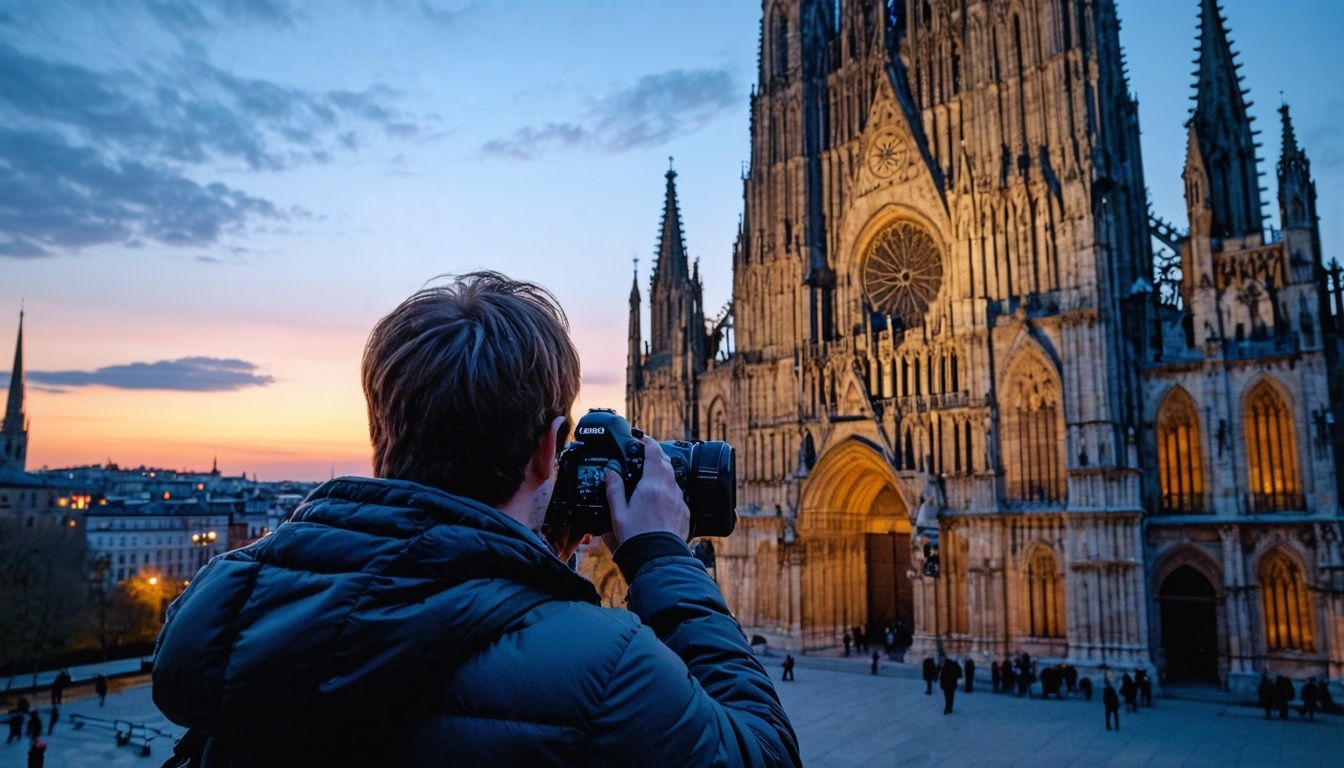
Finding the Right Vantage Point for Exterior Architectural Photography
When photographing exterior architecture, finding the right vantage point is crucial. Standing at eye level or finding a higher viewpoint can help avoid distortions in perspective. By choosing the optimal position, you can capture the true essence and grandeur of the building.
One effective technique for capturing exterior architecture is using a drone. Aerial photography provides a unique perspective, allowing you to showcase the building in its entirety from a bird’s-eye view. Drones enable you to explore different angles and heights, revealing architectural details that may be otherwise inaccessible.
When using a drone for architectural photography, it’s essential to comply with local regulations and obtain any necessary permits. Additionally, familiarize yourself with the operation and control of the drone to ensure smooth and safe flights.
In some cases, tall structures may require more specialized equipment such as cranes or elevated platforms. These tools provide the advantage of capturing the building from an elevated vantage point, minimizing distortion and emphasizing the scale and grandeur of the architecture.
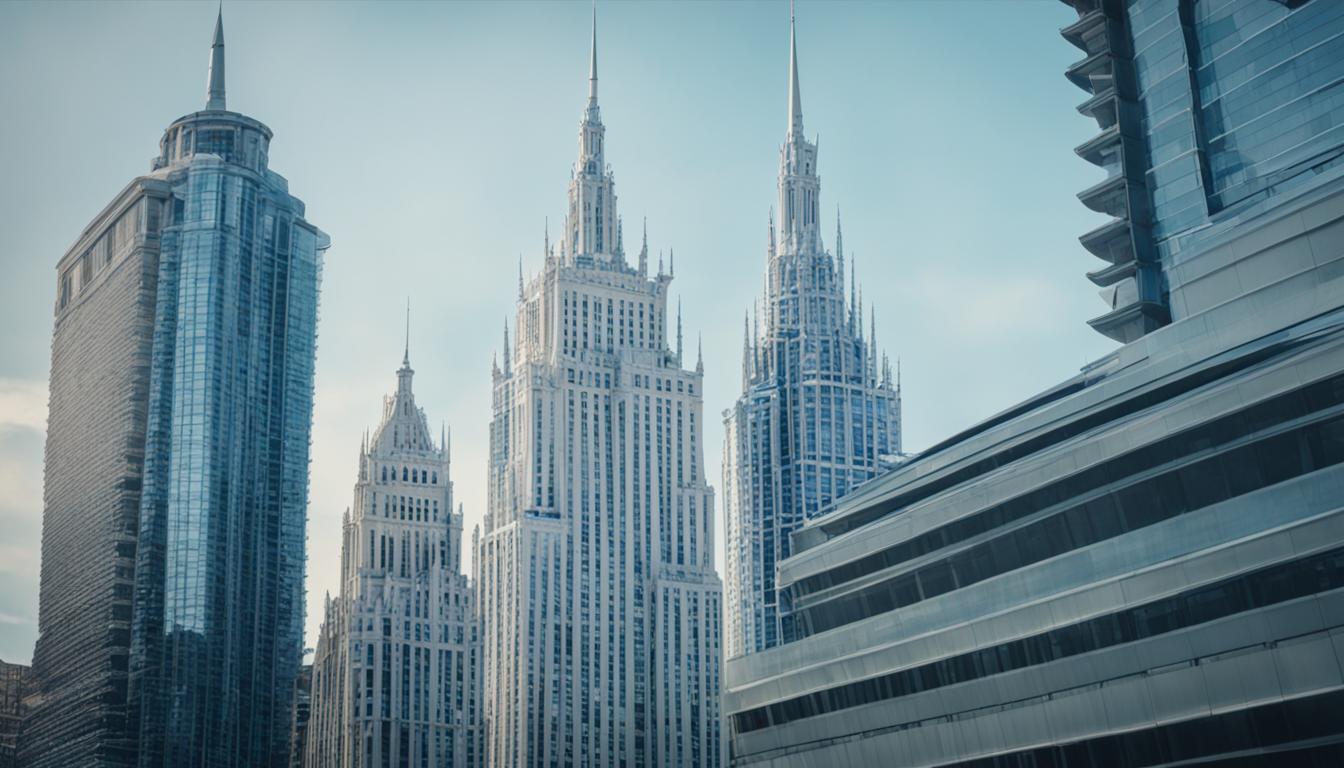
Choosing the right vantage point is key to capturing awe-inspiring exterior architectural photographs. It’s important to consider not only the height but also the angle and composition of the building. By exploring different perspectives, you can highlight the unique features and character of the architecture.
Keep in mind that careful consideration of the lines and symmetry of the building can greatly enhance the aesthetic appeal of your photographs. Pay attention to how the different elements of the architecture interact with each other, and use composition techniques such as leading lines and framing to create visually captivating images.
Pros and Cons of Different Vantage Points in Exterior Architectural Photography
| Vantage Point | Pros | Cons |
|---|---|---|
| Eye Level | – Provides a natural and relatable perspective – Shows details of the building at human scale |
– May introduce perspective distortion – May not capture the full height or grandeur of the structure |
| Higher Viewpoint | – Minimizes perspective distortion – Emphasizes the scale and majesty of the architecture |
– Requires specialized equipment or elevated location – May lose some details at ground level |
| Drone Photography | – Provides unique aerial perspective – Allows exploration of different angles and heights |
– Requires compliance with regulations and permits – Learning curve for drone operation and control |
By finding the right vantage point, whether it’s at eye level, from a higher viewpoint, or utilizing drones or cranes, you can capture breathtaking exterior architectural photographs that highlight the beauty and grandeur of buildings.
Preparing the Space for Interior Architectural Photography
When it comes to interior architectural photography, preparing the space plays a crucial role in capturing stunning images that showcase the design and atmosphere of the building. By paying attention to key details, such as furniture arrangement and cleanliness, you can create photographs that truly highlight the beauty of the interior.
Rearranging Furniture for a Visually Appealing Composition
One of the first steps in preparing the space for interior architectural photography is to consider the arrangement of furniture. By strategically rearranging furniture, you can create a more visually appealing composition that enhances the overall aesthetic of the image. Take the time to experiment with different arrangements, keeping in mind the lines and flow of the space.
TIP: Consider removing any unnecessary or bulky furniture to create a more open and spacious feel.
Thoroughly Cleaning the Space
Cleaning the space thoroughly is essential before photographing the interior. This ensures that there are no distractions or clutter that could take away from the overall appeal of the image. Pay attention to details such as dust, smudges, and fingerprints on surfaces, as these can easily show up in the final photograph.
TIP: Pay special attention to reflective surfaces, such as glass or mirrors, which tend to show smudges and fingerprints more prominently.
“By paying attention to key details, such as furniture arrangement and cleanliness, you can create photographs that truly highlight the beauty of the interior.”
Note: Images of clean, well-maintained spaces will allow viewers to better appreciate the architectural elements and design choices.
Creating a Welcoming Atmosphere
In addition to furniture arrangement and cleanliness, creating a welcoming atmosphere can greatly enhance the impact of your interior architectural photographs. Consider factors such as lighting, decorative elements, and the overall ambiance of the space. By paying attention to these details, you can create images that evoke a sense of warmth and invitation, making viewers feel connected to the space.
TIP: Experiment with different lighting techniques, such as natural light from windows or strategically placed artificial lighting, to create a desired mood for the photograph.
Example Table:
| Furniture Arrangement | Cleaning | Creating a Welcoming Atmosphere |
|---|---|---|
| – Experiment with different arrangements – Consider the lines and flow of the space |
– Clean all surfaces thoroughly – Pay attention to reflective surfaces – Remove distractions and clutter |
– Pay attention to lighting – Decorative elements – Overall ambiance of the space |
Example table showcasing key steps and considerations in preparing the space for interior architectural photography.

Essential Equipment for Architectural Photography
When it comes to capturing high-quality architectural images, having the right equipment is essential. As professional architectural photographers, we rely on a variety of tools to capture the beauty and intricacies of buildings and structures. In this section, we will explore the essential equipment needed for architectural photography and how each piece contributes to creating stunning images.
DSLR Camera
At the heart of every architectural photographer’s toolkit is a reliable DSLR camera. These cameras offer manual controls and high-resolution capabilities, allowing us to have full control over exposure, focus, and composition. With the ability to capture minute details and rich colors, a DSLR camera is a must-have for architectural photography.
Tripod
A tripod is an indispensable tool for architectural photographers. It provides stability and allows us to capture sharp, clear images, especially in low-light conditions or when using slower shutter speeds. With a tripod, we can set up the shot precisely and make slight adjustments without compromising the image quality.
Wide-Angle Lens
To capture the full scope of a building or structure, a wide-angle lens is essential. It allows us to capture a wider field of view and fit more of the scene into the frame. This lens is particularly useful when photographing large buildings or interiors where space is limited. It helps us create a sense of grandeur and convey the scale of the architecture.
Tilt-Shift Lens
Perspective distortion can sometimes be a challenge in architectural photography, especially when photographing tall buildings or capturing images from close distances. A tilt-shift lens is a valuable tool that allows us to correct perspective distortion and maintain straight lines and accurate proportions in our photos. It helps us achieve a more realistic representation of the architecture.
Drone Photography
In recent years, drone photography has become increasingly popular in architectural photography. Drones allow us to capture unique perspectives and angles that were not easily achievable before. They offer a bird’s-eye view of buildings and structures, showcasing their design in an innovative and captivating way. With a drone, we can capture stunning aerial shots and highlight architectural details from above.
By having these essential pieces of equipment in our arsenal, we can elevate our architectural photography to new heights. Each tool plays a vital role in capturing the essence and beauty of buildings and structures. As we move forward in this guide, we will delve deeper into techniques and tips for effectively using this equipment to capture awe-inspiring architectural images.
| Equipment | Key Features |
|---|---|
| DSLR Camera | Manual controls, high-resolution capabilities |
| Tripod | Stability for sharp images, versatility in low-light conditions |
| Wide-Angle Lens | Wider field of view, capture the full scope of buildings |
| Tilt-Shift Lens | Correction of perspective distortion, maintain accurate proportions |
| Drone | Capture unique perspectives and aerial shots |
Composition Techniques for Architectural Photography
Strong composition plays a vital role in creating impactful architectural photographs. By implementing various techniques, you can transform your images into visually appealing compositions that highlight the unique features of the building. Let’s explore some composition tips that can enhance your architectural photography:
Utilize Leading Lines
Leading lines are a powerful compositional tool that can guide the viewer’s eye and create visual depth in your photographs. Look for architectural elements such as staircases, hallways, or rows of columns that naturally lead the viewer’s gaze towards the main subject of the image.
Emphasize Symmetry
Symmetry can add a sense of balance and elegance to your architectural photographs. Seek out buildings with symmetrical features like doorways, windows, or facades. Position yourself directly in front of the subject to capture its symmetrical composition.
Experiment with Different Angles
Exploring different angles can provide a fresh perspective on architectural photography. Try shooting from low angles to emphasize the grandeur of a building or experiment with high angles to capture a unique overview. Don’t be afraid to get creative and find unconventional viewpoints.
Use Framing Techniques
Framing techniques can add depth and interest to your architectural photographs. Look for natural frames such as archways or trees to create a visually engaging composition. By framing the subject within these elements, you can draw attention to the building and create a sense of context.
Include Context
Incorporating the surrounding environment or context can provide a deeper understanding of the building’s purpose and aesthetic. Include nearby landmarks, people, or natural elements to add a sense of scale and narrative to your architectural photographs.
Remember, composition is subjective, and there are no strict rules to follow. Experiment, explore, and trust your creative instincts to capture compelling architectural photographs that evoke emotion and tell a story.
By applying these composition techniques, you can elevate your architectural photography and create captivating images that resonate with viewers. Stay tuned for our next section, where we’ll delve into mastering lighting in architectural photography.
Mastering Lighting in Architectural Photography
Lighting is a critical element in architectural photography that can make or break the quality of your images. Understanding how to utilize different lighting conditions and techniques can elevate your photographs to new heights. In this section, we will explore various lighting scenarios and provide valuable tips to help you master lighting in architectural photography.
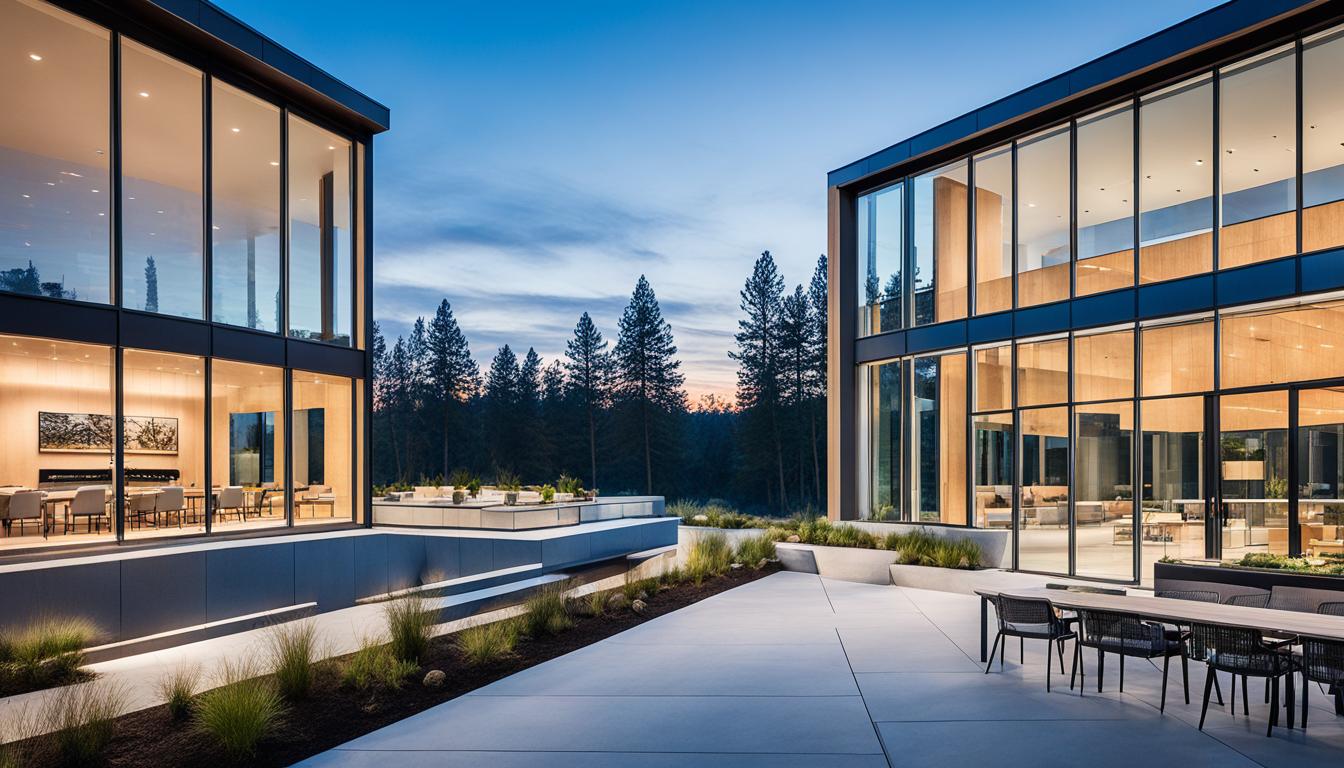
The Golden Hour and Blue Hour
Two magical times for architectural photography are the golden hour and the blue hour. The golden hour occurs shortly after sunrise or before sunset when the sun is low in the sky, casting a warm, golden light on the buildings. This soft, directional light creates a beautiful glow and enhances the colors and textures of the architecture.
The blue hour, on the other hand, is the period of twilight before sunrise or after sunset when the sky takes on a deep blue hue. During this time, the ambient light is still present, but it has a cool tone that can create a moody atmosphere in your images.
Both the golden hour and the blue hour provide architectural photographers with ideal lighting conditions. These moments present an opportunity to capture stunning photographs with dramatic lighting and captivating atmospheres. It’s important to plan accordingly and be prepared to shoot during these short but magical windows of time.
Overcast Days and Diffused Light
While golden hour and blue hour offer dynamic lighting, overcast days can also be advantageous for architectural photography. When the sky is covered in clouds, the sunlight becomes diffused, resulting in soft, even lighting without harsh shadows or extreme contrasts. This diffused light can help reveal subtle details and textures of the buildings, creating a clean, natural look for your images.
When shooting on overcast days, it’s essential to pay attention to the composition and framing of your shots. Since the lighting is more even, emphasizing interesting lines, shapes, and textures can help create visually engaging compositions.
Artificial Lighting and Light Painting
In addition to natural light, architectural photography often involves working with artificial lighting to enhance the atmosphere and highlight specific elements of the building. This could include interior lighting, spotlights, or even light fixtures designed as part of the architecture itself.
Another creative technique that can be used is light painting. Light painting involves using handheld lights or flashlights to selectively illuminate different parts of the building while using a long exposure. This technique allows you to paint with light, creating unique and artistic effects that can bring out the architectural details and create a sense of drama in your images.

Mastering lighting in architectural photography requires practice, experimentation, and an understanding of how light interacts with buildings and structures. By harnessing the power of natural light during the golden hour and blue hour, making the most of overcast days, and incorporating artificial lighting techniques, you can elevate your architectural photographs to a whole new level.
Dealing with Perspective and Distortion in Architectural Photography
Perspective distortion can be a significant challenge when capturing architectural photographs, especially when shooting from close distances or low angles. The distortion can result in buildings appearing skewed or leaning inwards, which can detract from the intended visual impact.
An effective technique for correcting perspective distortion is to use a tilt-shift lens. This specialized lens allows you to adjust the position of the lens elements, enabling you to correct the perspective and maintain vertical lines. By carefully aligning the lens, you can capture buildings with greater accuracy and eliminate unwanted distortion.
Another approach to minimize perspective distortion is to shoot from a higher vantage point. By elevating your position, whether it’s by using a ladder, a higher floor, or even employing aerial photography techniques with a drone, you can reduce the effects of perspective distortion. Shooting from a higher vantage point provides a more comprehensive view and can result in more visually appealing architectural photographs.
Post-processing techniques in software like Adobe Lightroom or Photoshop can also help correct perspective and distortion. These tools offer features such as perspective correction and lens distortion correction that can be useful in refining your architectural images. By applying these adjustments in post-processing, you can further enhance the accuracy and visual quality of your photographs.
Overall, correcting perspective distortion in architectural photography requires a combination of careful shooting techniques, specialized lenses, and post-processing skills. By applying these approaches, you can capture architectural images that accurately represent the intended design and leave a lasting impression.
| Perspective and Distortion | Tips |
|---|---|
| Use a tilt-shift lens | Adjust the lens elements to correct perspective distortion |
| Shoot from a higher vantage point | Minimize perspective distortion by capturing the building from an elevated position |
| Utilize post-processing software | Apply perspective correction and lens distortion correction to refine your images |
Conclusion
Mastering the art of architectural photography requires technical skill, creativity, and attention to detail. Whether capturing the interiors or exteriors of buildings, understanding the unique challenges and employing the right techniques is essential. As professional architectural photographers, we have shared expert tips that will help you showcase the beauty and essence of every structure.
By using high-quality equipment such as DSLR cameras, tripods, wide-angle lenses, and even drones, you can capture stunning images that truly capture the architectural marvels. Paying attention to composition techniques, such as leading lines, symmetry, angles, framing, and context, will bring out the best in your photographs.
Lighting is another critical aspect of architectural photography. The golden hour and blue hour provide magical light that enhances colors and details, offering a soft and dramatic atmosphere. Artificial lighting and techniques like light painting can also be explored to create captivating images.
With practice and experience, you can become a skilled professional architectural photographer. Continually honing your craft and pushing the boundaries of creativity will enable you to capture buildings at their best and tell their stories through the lens of your camera.
FAQ
What is the difference between interior and exterior architectural photography?
Interior architectural photography focuses on capturing the design and atmosphere of the inside of a building, while exterior architectural photography is all about showcasing the building’s exterior and its relationship with its surroundings.
How do I find the right vantage point for exterior architectural photography?
Finding the right vantage point involves standing at eye level, finding a higher viewpoint, or using tools like drones or cranes for tall buildings. The goal is to capture the building from an angle that minimizes distortions in perspective and highlights its lines and composition.
What do I need to do before photographing the interior of a building?
Preparation is key for interior architectural photography. This may involve rearranging furniture to create a visually appealing composition and thoroughly cleaning the space to remove distractions or clutter.
What equipment do I need for architectural photography?
Essential equipment includes a DSLR camera with manual controls and high-resolution capabilities, a tripod for stability, wide-angle lenses for capturing the full scope of a building, tilt-shift lenses for correcting perspective distortion, and drones for unique angles and architectural details.
What are some composition techniques for architectural photography?
Strong composition is crucial. Techniques include utilizing leading lines, emphasizing symmetry, experimenting with different angles, using framing techniques, and including context to create visually appealing and balanced images.
How does lighting impact architectural photography?
Lighting plays a crucial role. The golden hour and blue hour provide soft, dramatic light that enhances colors and details. Overcast days offer diffused light that reduces harsh shadows. Understanding artificial lighting and techniques like light painting can also help create stunning architectural images.
How can I deal with perspective and distortion in architectural photography?
Perspective distortion can be minimized by using a tilt-shift lens or shooting from a higher vantage point. Alternatively, post-processing techniques in software like Adobe Lightroom or Photoshop can be used to correct perspective and distortion.
How can I become a skilled architectural photographer?
Mastering architectural photography requires a combination of technical skill, creativity, and attention to detail. By understanding the unique challenges of each type of photography, using the right equipment and composition techniques, and gaining experience through practice, you can capture buildings at their best and become a skilled architectural photographer.
How Can Interior and Exterior Architectural Photography Techniques Be Applied to Client Relations in the Field?
When navigating architectural photography relations, understanding the client’s vision is crucial. Interior techniques can showcase the atmosphere and functionality of a space, while exterior techniques highlight the building’s design and integration with its surroundings. Clear communication and collaboration are essential to ensure the photos align with the client’s expectations.