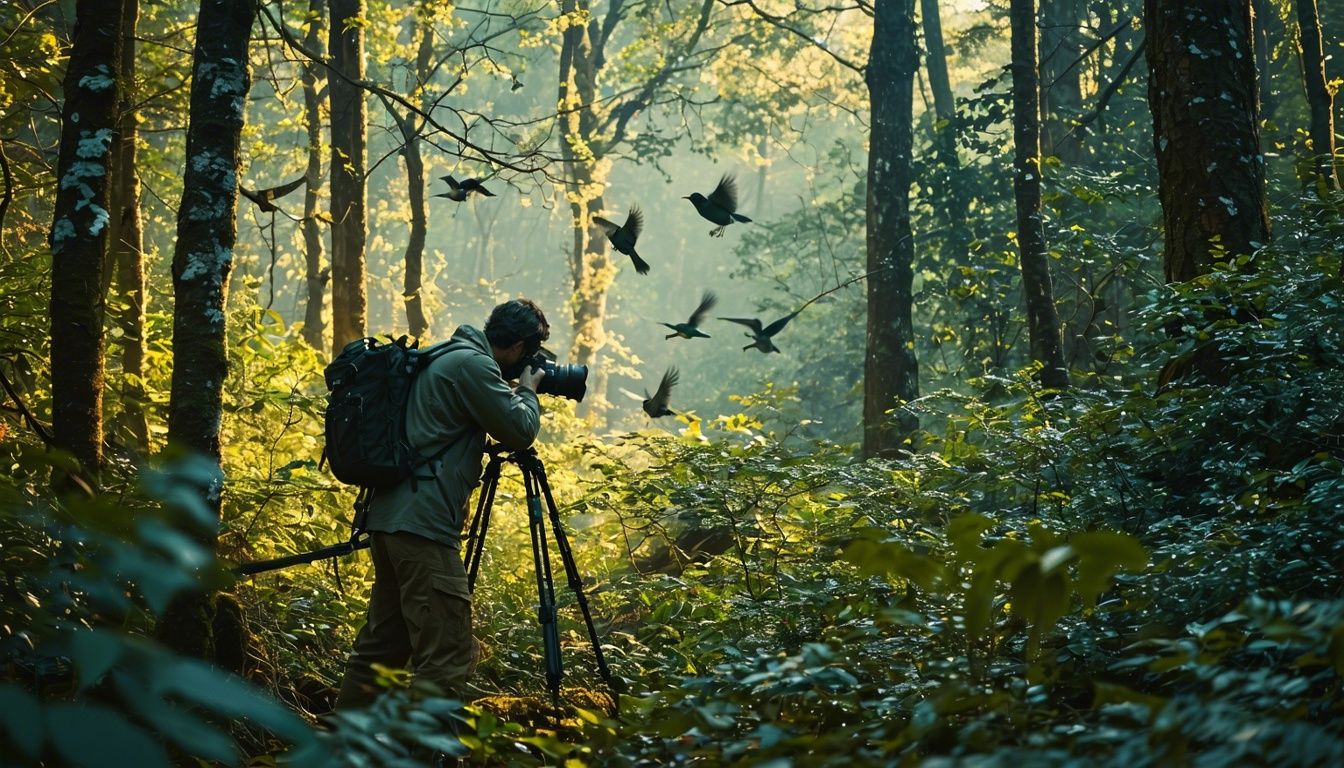
When it comes to wildlife photography, there is no denying the power of natural light. Utilizing natural light effectively can make a significant difference in capturing stunning and authentic shots of wildlife in their natural habitats. Understanding the techniques and tips for harnessing natural light can elevate your wildlife photography to the next level. In this article, we will explore expert insights and strategies for maximizing the use of natural light in wildlife photography.
By utilizing the three key characteristics of natural light – intensity, direction, and color, you can create breathtaking images that truly showcase the beauty and essence of wildlife. Whether you’re shooting in harsh mid-day light, golden hour light, or diffused light on an overcast day, understanding these essential elements will help you make the most of every lighting situation.
Throughout the article, we will also delve into specific examples from wildlife photography in Newfoundland, illustrating how different lighting conditions can enhance your captures. From photographing puffins in low-light conditions to capturing the mesmerizing effects of side lighting on seabirds, these examples will inspire you to experiment with natural light and push the boundaries of your wildlife photography.
Remember, honing your observation skills and continuously practicing in diverse lighting scenarios is key to mastering the art of utilizing natural light in wildlife photography. The more you explore, experiment, and learn, the better you will become at capturing those incredible moments in the wild.
Key Takeaways:
- Understanding the three key characteristics of natural light – intensity, direction, and color – is essential for maximizing the use of natural light in wildlife photography.
- Harsh mid-day light, golden hour light, and diffused light on overcast days each offer unique opportunities for capturing wildlife in different lighting situations.
- Observing and practicing in diverse lighting scenarios will help you develop a strong instinct for utilizing natural light effectively.
- Examples from wildlife photography in Newfoundland illustrate the power of natural light in enhancing your captures.
- Continuously experimenting and learning from your experiences will allow you to push the boundaries of your wildlife photography and capture breathtaking moments in the wild.
The Intensity of Available Light
When it comes to wildlife photography, understanding and harnessing the intensity of available light is essential for capturing stunning images. Different lighting conditions can dramatically impact the mood, contrast, and overall quality of your photographs. Let’s explore three key types of natural light: harsh mid-day light, golden hour light, and diffused light.
Harsh Mid-Day Light
Harsh mid-day light refers to the strong and direct sunlight that occurs when the sun is high in the sky. This type of light can create intense shadows and high contrast, which may not be favorable for wildlife photography. However, with the right techniques and composition, you can still capture beautiful images under this lighting condition.
“In the middle of the day, when the sun is at its highest, shadows become more pronounced and the light can appear harsh. It’s important to work with the available light and make the necessary adjustments to your camera settings and composition to ensure a well-exposed and balanced image.”
Golden Hour Light
Golden hour light refers to the soft and warm light that occurs during the early morning and late afternoon. This type of light is beloved by photographers for its magical and glowing qualities. During this time, the sun is low on the horizon, creating long and soft shadows that add depth and dimension to your wildlife photographs.
“The golden hour provides a fantastic opportunity to capture wildlife in a warm and ethereal light. The soft, golden tones can enhance the natural beauty of your subject, providing a captivating and enchanting atmosphere in your photographs.”
Diffused Light
Diffused light refers to the soft and evenly spread light that occurs on overcast days. This type of light is like photographing under a giant softbox, as it minimizes shadows and results in a more muted and evenly lit scene. Diffused light is ideal for showcasing intricate details and capturing the subtle nuances of wildlife.
“On an overcast day, when the clouds act as a natural diffuser, the light becomes soft and diffused, giving your subjects a gentle glow. This type of lighting is perfect for capturing textures, patterns, and intricate details without the harsh shadows created by direct sunlight.”
| Lighting Condition | Description |
|---|---|
| Harsh Mid-Day Light | Strong and direct sunlight with intense shadows and high contrast. |
| Golden Hour Light | Soft and warm light that occurs during the early morning and late afternoon. |
| Diffused Light | Soft and evenly spread light on overcast days, creating minimal shadows. |
The Direction of Lighting
When it comes to wildlife photography, the direction of lighting is a crucial factor that can greatly impact the overall mood and visual effects of your images. By understanding and utilizing different lighting directions, you can add depth, dimension, and drama to your wildlife photographs.
Front Lighting: One of the most commonly used lighting directions in wildlife photography is front lighting. This occurs when the sun is directly behind you, illuminating your subject evenly. Front lighting enhances the details and colors of your subject, resulting in well-lit and well-exposed images.
Side Lighting: Side lighting is another effective lighting direction to consider when photographing wildlife. This occurs when the sun illuminates the location from your right or left side, creating beautiful shadows and highlights on your subject. Side lighting adds depth, texture, and a sense of dimension to your images, making them visually captivating.
Backlighting: Backlighting is a dramatic lighting direction that can create stunning effects in wildlife photography. This occurs when the sun is positioned behind your subject, resulting in a rim of light around it. Backlighting emphasizes the shape and silhouette of your subject, creating a sense of mystery and depth in your images.
Understanding the different lighting directions and how they interact with your subjects can help you create dynamic and visually-appealing wildlife photographs. Experimenting with different lighting angles and observing how they affect your images will allow you to capture unique and compelling moments in the wild.
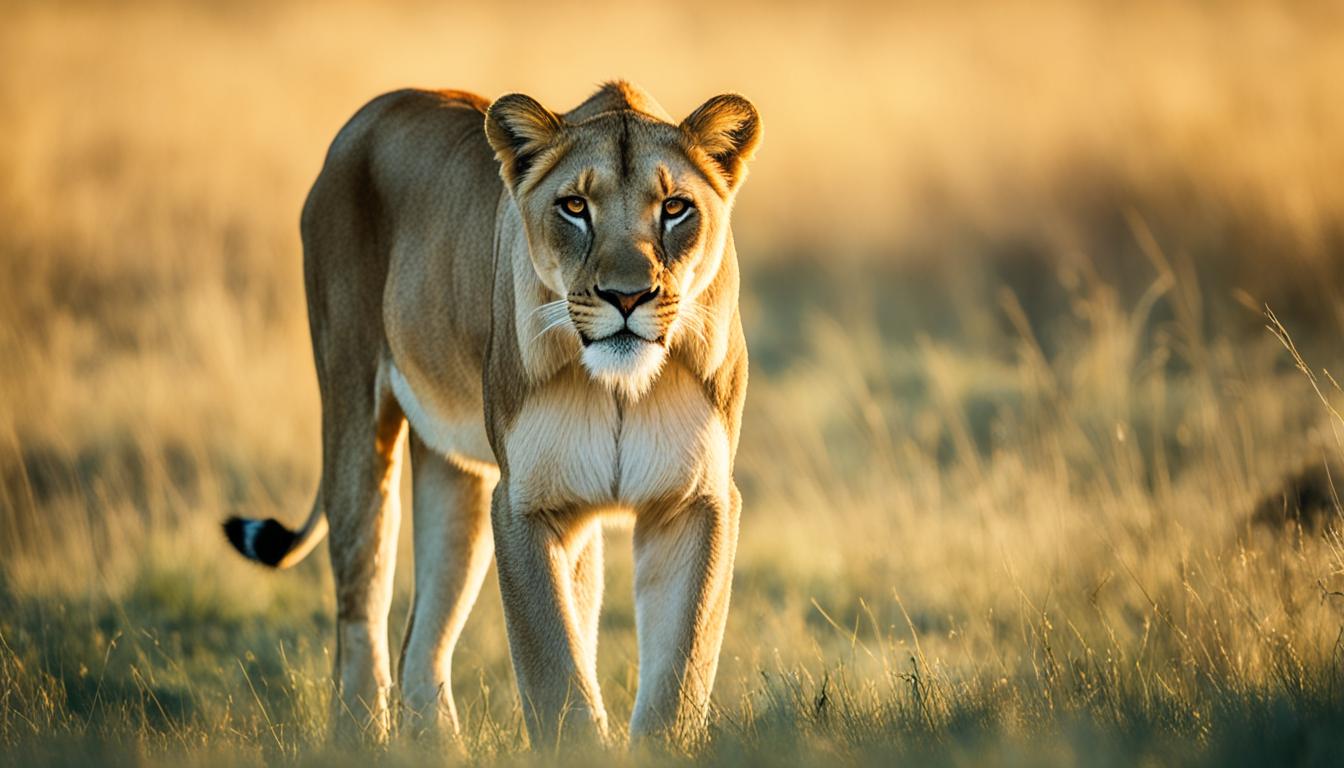
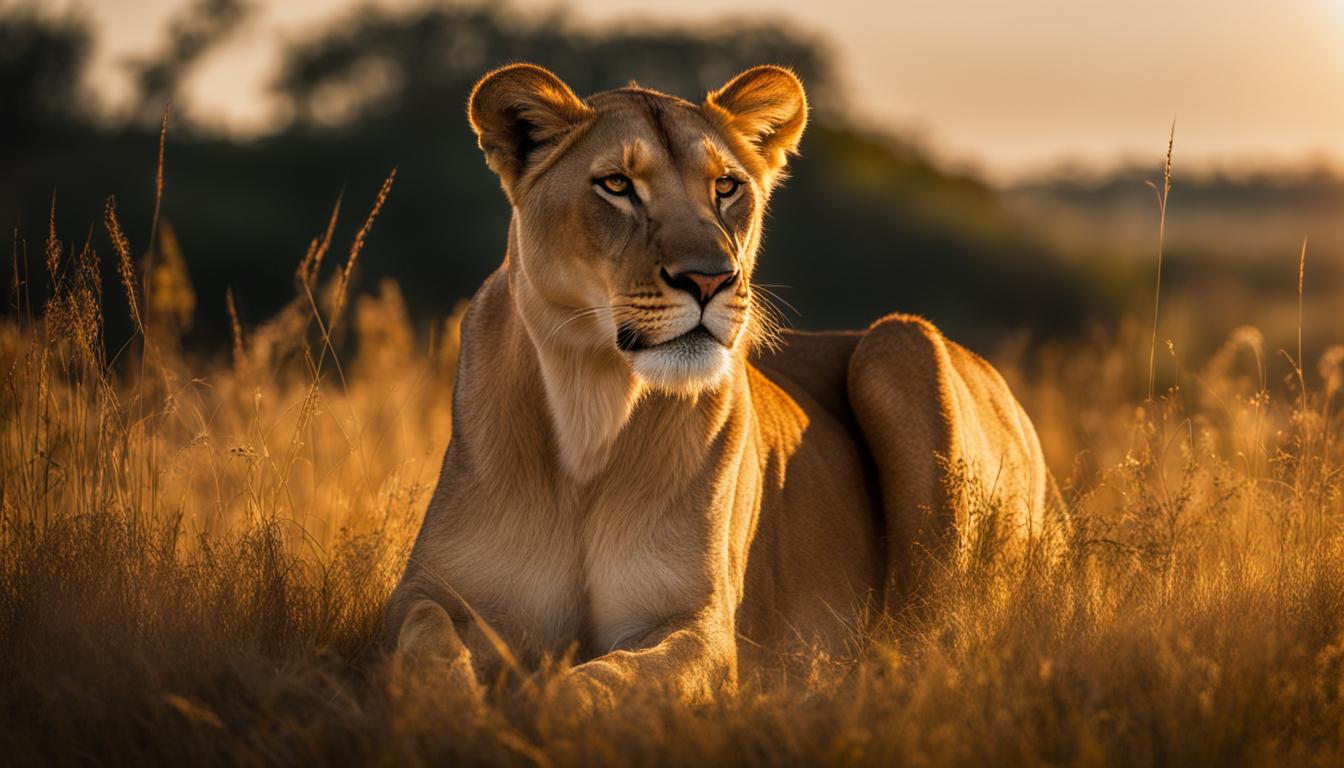
Example:
“I remember capturing a majestic lion during the golden hour with side lighting. The sunlight filtered through the tall grass, casting beautiful shadows across the lion’s face and creating a sense of power and grace in the image. The combination of side lighting and the lion’s intense gaze made this photograph truly captivating.”
– Wildlife Photographer, Jessica Patel
| Lighting Direction | Characteristics | Effects on Wildlife Photography |
|---|---|---|
| Front Lighting | Sun directly behind the photographer | Evenly lit subjects, enhanced details and colors |
| Side Lighting | Sun from the right or left side | Beautiful shadows and highlights, added depth and dimension |
| Backlighting | Sun positioned behind the subject | Rim of light, emphasized shape and silhouette, dramatic effect |
The Color of Available Light
In wildlife photography, the color of available light can greatly influence the mood and atmosphere of your photographs. Understanding how the color of light affects your images enables you to make creative decisions and evoke the desired emotions in each shot. Let’s explore how different colors of light can impact your wildlife photography.
Cool Tones: Overcast Days
Cool tones are often associated with overcast days, when the sky is covered in clouds and diffuses the sunlight. These lighting conditions create a soft and serene atmosphere in your photographs. The cool blue and gray tones can evoke a sense of tranquility, making them ideal for capturing peaceful moments in nature.
Warm Tones: Direct Sunshine
Warm tones are produced by direct sunshine, providing a golden or orange hue to your images. This type of light adds warmth and vibrancy to your photographs, enhancing the natural beauty of the wildlife. Warm tones can create a sense of energy and vitality, bringing your subject to life.
“The color of light sets the mood and creates an emotional connection with your audience. By harnessing the different colors of available light, you can tell captivating stories through your wildlife photography.” – John Thompson, Wildlife Photographer
Experimenting with these different colors of light allows you to explore a range of emotions and aesthetics in your wildlife photography. Whether you choose the cool tones of overcast days or the warm tones of direct sunshine, understanding how to utilize the color of light will elevate the impact of your images.
Using Natural Light in Newfoundland Wildlife Photography
To illustrate the use of natural light in wildlife photography, let’s explore some captivating examples from wildlife photography in Newfoundland. By harnessing the power of natural light, photographers can capture breathtaking moments in various lighting situations that add depth, mood, and impact to their photographs.
One such example is capturing the low-light conditions of the evening when photographing puffins. As the sun begins to set, the soft and diffused light casts a warm glow on these charming birds. This lighting situation creates a serene and ethereal atmosphere, enhancing the beauty of the puffins against the rugged Newfoundland landscape.
Another awe-inspiring moment to capture is the warm glow of the setting sun on whale tails. As twilight begins to take hold, the golden hour light immerses the scene with a magical ambiance. The gentle light caresses every detail of the majestic whale tails, creating a captivating and evocative image that transports the viewer to the breathtaking shores of Newfoundland.
“Photography is an art of observation. It’s about finding something interesting in an ordinary place… I’ve found it has little to do with the things you see and everything to do with the way you see them.” – Elliott Erwitt
Understanding how to utilize natural light in wildlife photography allows us to capture the living beauty that surrounds us. It’s about seizing the right moment, the perfect lighting situation, and using it to showcase the remarkable creatures and their environments.
In the next section, we will delve into the techniques and tips for photographing puffins in low-light conditions, where adjusting camera settings becomes crucial to achieving stunning results.
Tips for Photographing Puffins in Low Light
When photographing puffins in low-light conditions, such as during the evening, it’s important to adjust your camera settings accordingly. These tips will help you capture stunning images of these charismatic seabirds even in challenging lighting situations.
1. Use a Wide Aperture
Set your camera to a wide aperture, such as f/5.6 or f/4, to maintain a shallow depth of field. This will help keep the focus on the puffins, creating a pleasing blur in the background and emphasizing the details of these fascinating birds.
2. Adjust Shutter Speed and ISO
Since low-light conditions require longer exposure times, it’s essential to adjust your shutter speed accordingly. Experiment with slower shutter speeds to capture the movement of the puffins gracefully. Additionally, increase your ISO setting to compensate for the lack of light, ensuring proper exposure in your images.
3. Pay Attention to the Histogram
The histogram is a valuable tool that provides a graphical representation of the tonal range in your image. When photographing in low light, keep an eye on the histogram to ensure a well-balanced exposure. Avoid clipping the shadows or highlights, as this can result in lost detail.
Tips for photographing puffins in low light:
- Use a wide aperture for a shallow depth of field
- Adjust shutter speed and ISO for correct exposure
- Pay attention to the histogram for a well-balanced exposure
By following these tips, you’ll be able to capture stunning images of puffins in low-light conditions. Now, let’s take a look at some examples showcasing the beauty of side lighting on these seabirds.
The Beauty of Side Lighting on Seabirds
Side lighting adds drama and mood to your wildlife photography, especially when capturing stunning shots of seabirds. By positioning yourself and your subject with the light coming from the right or left, you can enhance the textures and details of the bird’s plumage, as well as create captivating shadows and highlights. This lighting technique is particularly effective for capturing wing movement, as the side light creates a sense of motion and brings your images to life.

Highlighting textures and details
When photographing seabirds with side lighting, the directional light emphasizes the feathers’ textures and details, showcasing the intricacy and beauty of their plumage. The shadows and highlights created by the side light add depth and dimension, giving your images a three-dimensional feel.
Capturing wing movement
Side lighting is particularly well-suited for capturing the dynamic movement of seabirds in flight. The light streaming from the side accentuates the wing movement, showcasing the grace and agility of these fascinating creatures. The resulting images have a sense of energy and action, immersing viewers in the moment.
By mastering side lighting techniques in wildlife photography, you can create visually captivating images that evoke emotion and tell compelling stories of the natural world.
The Magical Effects of Backlighting
Backlighting can create magical effects in wildlife photography, especially during sunrise or sunset. When you position yourself and your subject with the sun at your back, you can capture stunning silhouettes and rim lighting that add depth and drama to your images.
“Silhouettes can be particularly effective in highlighting the shapes and contours of bird species,”
“Rim lighting, on the other hand, can illuminate the feathers and create a beautiful glow.”
To make the most of backlighting, consider the overall shape and composition of your subject. By using backlighting techniques, you can create visually striking and captivating photographs that showcase the beauty of birds in their natural habitat.
Comparing Silhouettes and Rim Lighting in Bird Photography
| Aspect | Silhouettes | Rim Lighting |
|---|---|---|
| Effect | Highlights shapes and contours | Illuminates feathers and creates a beautiful glow |
| Composition | Focuses on the outline of the subject | Emphasizes the subject’s features and details |
| Mood | Dramatic and mysterious | Ethereal and enchanting |
| Lighting | Subject in front of a bright background | Subject with the light source behind |
| Example | A heron in silhouette against a vibrant sunset | A seagull with its feathers illuminated by the setting sun |
Maximizing Natural Light during Blue Hour
Blue hour, the period of time just before sunrise or after sunset, offers a unique opportunity for capturing beautiful and ethereal light in your wildlife photography. During this time, the ambient light is still powerful enough to create usable images, while the low light conditions create a soft and tranquil atmosphere.
To make the most of blue hour, it’s recommended to have a high-end camera and lens with a wide aperture to allow more light in. Additionally, using a tripod or stabilizing your shots can help achieve sharp images in low-light situations.
During blue hour, the natural light takes on a cool blue tone, creating a peaceful and dreamlike quality in your photographs. This unique lighting condition enhances the details and textures, giving your wildlife images a captivating and enchanting feel.
Capturing the Beauty of Blue Hour
When photographing during the blue hour, it’s important to consider the following tips:
- Plan your shoot in advance: Check the sunrise and sunset times in your location to determine the timing of blue hour. Arrive early to set up your equipment and scout the area for the best compositions.
- Use a sturdy tripod: As the light levels drop during the blue hour, longer exposure times are required. Using a tripod will prevent camera shake and allow for sharper images.
- Experiment with different compositions: Blue hour light can create a magical atmosphere. Look for interesting elements in the scene, such as silhouettes, reflections, or leading lines, to create visually stunning compositions.
- Make use of the surrounding environment: Blue hour is a great time to incorporate the natural elements surrounding your wildlife subject, such as water bodies, trees, or dramatic skies, to add depth and context to your images.
- Adjust your camera settings: Since blue hour is a low-light condition, you may need to make adjustments to your camera settings. Increase your ISO to a manageable level, open up your aperture to allow more light in, and adjust your shutter speed accordingly to achieve proper exposure.
- Shoot in RAW format: Shooting in RAW allows for greater flexibility during post-processing, especially in adjusting the white balance and bringing out the subtle nuances of the blue hour light.
By maximizing the potential of blue hour, you can create striking and captivating wildlife photographs that stand out from the rest. Seize the opportunity to capture the unique lighting conditions during this magical period of the day and unleash your creativity.
Artificial Light in Wildlife Photography
While natural light is the primary focus in wildlife photography, there are instances where artificial light can be used to enhance your images. One example is using flash to fill in shadows or add a catch light to your subject’s eyes.
By strategically using flash, you can overcome challenging lighting situations and bring out important details in your wildlife photographs. Whether you’re shooting in low-light conditions or dealing with harsh shadows, artificial light can help you achieve the desired effect and ensure a well-exposed image.
When using flash, it’s crucial to do so sparingly and with caution. Overusing artificial light can result in unnatural-looking images that strip away the beauty and authenticity of wildlife photography. The key is to maintain a balance between natural and artificial light, preserving the integrity of the scene while enhancing specific elements.
Here are a few tips for using flash in wildlife photography:
- 1. Be mindful of the distance: The distance between your subject and the flash can significantly affect the lighting and exposure. Experiment with different flash-to-subject distances to achieve the best results.
- 2. Adjust flash output: Most flash units allow you to adjust the power output. Use this feature to control the intensity of the flash and avoid overpowering the natural light in the scene.
- 3. Diffuse the light: To create a more natural look, consider using diffusers or bouncing the flash off surfaces such as walls or reflectors. This softens the light and helps avoid harsh shadows.
- 4. Use flash as fill light: In situations where the subject is backlit or in shadow, using flash as fill light can help balance the exposure and bring out details in both the subject and the background.
Remember, the goal of using artificial light in wildlife photography is to enhance, not overpower, the natural lighting conditions. By using flash strategically and thoughtfully, you can create captivating and well-lit images while maintaining the integrity of your wildlife subjects.
The Importance of Observation and Practice
Observing and understanding natural light is a fundamental aspect of wildlife photography. By closely observing the intensity, direction, and color of light in different environments, we can learn how to make the most of each lighting situation.
Practice in the field is also crucial for honing our skills and adapting to different lighting conditions. The more we practice, the more we become familiar with the way natural light interacts with our subjects. This allows us to anticipate and capture the perfect moment when the light creates a truly magical effect.
Continuously experimenting and learning from our experiences is key to developing a strong instinct for utilizing natural light in wildlife photography. Each new encounter with different lighting conditions presents an opportunity for growth and improvement.
By incorporating these principles of observation and practice into our wildlife photography, we can elevate our skills to the next level and create compelling images that truly capture the beauty of the natural world.
So let’s get out there, observe the natural light, practice our techniques, and hone our skills to become masterful wildlife photographers.

| Benefits of Observation and Practice | How to Incorporate Observation and Practice into Your Workflow |
|---|---|
|
|
Conclusion
In conclusion, harnessing the power of natural light is vital for capturing breathtaking and authentic wildlife photographs. By understanding the intensity, direction, and color of natural light, photographers can manipulate these elements to their advantage, creating images that are full of depth, mood, and impact.
Observation and practice play crucial roles in mastering the art of utilizing natural light in wildlife photography. By studying the different lighting scenarios and continuously experimenting, photographers can refine their skills and adapt to various lighting conditions. Remember, the key is to never stop learning and to keep pushing the boundaries of your creativity.
So, armed with this knowledge, it’s time to venture out into the wild and embrace the beauty of natural light. Let it guide you in capturing incredible moments and telling captivating stories through your wildlife photography. Discover the wonders that await you as you harness the power of natural light in your photographs.
FAQ
How important is natural light in wildlife photography?
Natural light is essential for capturing stunning and natural shots of wildlife in their natural habitats. It helps create depth, mood, and impact in your photographs.
What are the key characteristics of natural light in wildlife photography?
The key characteristics of natural light in wildlife photography are intensity, direction, and color.
How does the intensity of light affect wildlife photography?
The intensity of available light in a scene plays a crucial role in wildlife photography. It can create strong shadows and high contrast or provide a warm and glowing quality to your images.
What are the different lighting directions in wildlife photography?
The different lighting directions in wildlife photography are front lighting, side lighting, and backlighting.
How does the color of light affect wildlife photography?
The color of available light in a scene can have a significant impact on the mood and atmosphere of your wildlife photography. It ranges from cool tones on overcast days to warm tones caused by direct sunshine.
Can you give an example of utilizing natural light in wildlife photography in Newfoundland?
Yes, in Newfoundland, you can capture puffins with the low-light conditions of the evening or the warm glow of the setting sun on whale tails.
What are some tips for photographing puffins in low light?
When photographing puffins in low-light conditions, it’s important to adjust your camera settings accordingly and pay attention to the histogram for a well-balanced exposure.
How can side lighting enhance wildlife photography?
Side lighting can create a sense of drama and mood in your wildlife photography by highlighting textures, capturing beautiful shadows and highlights, and adding depth and dimension to your images.
What are the advantages of backlighting in wildlife photography?
Backlighting can create magical effects in your wildlife photography, such as stunning silhouettes and rim lighting, emphasizing the shape and creating a dramatic effect.
How can you maximize natural light during blue hour?
To make the most of blue hour, it’s recommended to have a high-end camera and lens with a wide aperture and use a tripod or stabilize your shots for sharp images in low-light situations.
Can artificial light be used in wildlife photography?
Yes, artificial light can be used to enhance wildlife photography, such as using flash to fill in shadows or add a catch light to your subject’s eyes. However, it should be used sparingly and with caution to maintain a natural look and feel.
How important is observation and practice in utilizing natural light in wildlife photography?
Observation and practice are crucial in wildlife photography. By closely observing the intensity, direction, and color of light in different environments and continuously learning from experiences, you can develop a strong instinct for utilizing natural light in wildlife photography.
How Can Natural Light Techniques Be Applied to Night Wildlife Photography?
When practicing expert night wildlife photography, utilizing natural light techniques can make a significant difference in the outcome of your photos. Using moonlight, starlight, or artificial light sources combined with long exposure settings can help capture stunning images of nocturnal animals in their natural habitats.