Many struggle to capture the energy of live music in photos. Concert photography is an art that demands skill and the right equipment. This article provides expert tips for shooting breathtaking concert photographs, from securing a photo pass to adjusting camera settings for low light conditions.
Get ready to elevate your photography game.
Key Takeaways
- For great concert photos, use a digital SLR camera with prime lenses like 50mm and 85mm. This gear helps in low light.
- Shoot in manual mode to control your settings. Use a high ISO, low aperture, and fast shutter speed for sharp images without flash.
- Capture the show’s vibe by focusing on different angles, crowd reactions, and band interactions.
- Edit your shots in RAW format using software like Adobe Lightroom to adjust clarity and color balance.
- Follow concert photography rules, respect others at the venue, and build a portfolio to show off your best work.
Essential Gear for Concert Photography

For concert photography, you need a good camera and the right lenses. Make sure your camera can handle low light and capture sharp images fast.
Digital SLR Camera
A Digital SLR camera stands out for its ability to snap high-quality shots fast. These cameras let you adjust settings on the fly, perfect for the unpredictable light and action at concerts.
They are ideal for capturing sharp images of fast-moving band members in dimly lit venues. With a DSLR, photographers get clear photos even with low stage lighting.
Using a DSLR means you can easily switch between prime lenses like the 50mm or 85mm, allowing more control over your composition. High ISO capabilities in these cameras reduce grain in your shots, making them cleaner despite challenging lighting conditions.
My experience confirms that using a digital SLR at live music events dramatically improves the quality of concert photography, ensuring moments are captured with clarity and vibrancy.
Prime Lenses (50mm, 85mm)
Prime lenses, like the 50mm and 85mm, are must-haves for concert photography. The 50mm lens is both versatile and affordable, making it a great choice for capturing the entire scene or wider crowd shots.
With its wide aperture, it excels in low-light conditions found at concerts. This means you can take sharp photos even when the light is dim without having to use a flash.
On the other hand, the 85mm lens is perfect for close-up shots of performers. Its longer focal length lets you zoom in on artists from afar, capturing emotions and details that draw viewers into your photo story.
Like the 50mm, it performs well in low light due to its wide aperture. Using these lenses allows photographers to shoot impactful images that convey the energy of live music events without intrusive gear blocking views or disturbing others around them.
High ISO Capabilities
After talking about prime lenses, we see how important High ISO settings are in concert photography. Concerts often happen in low-light places. This makes it hard to snap clear shots without a flash.
Using high ISO settings fixes this. It lets photographers use fast shutter speeds to catch quick movements on stage. Good settings to start with are ISO 1600 or 3200.
High ISO also helps avoid using the flash, which can ruin the natural lights of a concert and distract performers. But high ISO might make photos grainy, called noise. Still, tools like Adobe Lightroom help reduce this noise during post-production, making your pictures look better.
Mastering the art of high ISO shooting opens up new possibilities for capturing concerts’ energy.
Gear Essentials for Concert Photography
A good digital SLR camera is your starting point for concert photography. You need one with a 50mm lens. This setup works well in low-light conditions, like concerts. Also, having lenses that can reach different angles and distances helps you capture the whole scene or zoom in on the lead singer’s emotions.
For example, an 85mm lens is perfect for close-ups from afar.
Bring extra batteries and memory cards to the show. Concerts can last hours, and running out of power or space ruins your shot at capturing unforgettable moments. High ISO capabilities are also crucial because they let you shoot in dim light without losing detail.
This means your camera should handle high ISO settings well, making it easier to get sharp photos even when artists move quickly on stage. Moving forward, understanding how to secure access to concerts will be key in applying these gear essentials effectively.
An Introduction to Concert Photography
Equipped with the right gear, photography enthusiasts are now ready to explore the pulse and excitement of concert photography. This genre demands a unique blend of timing, technique, and creativity, challenging photographers to capture moments that encapsulate the essence of live music.
Concert photography is not just about snapping pictures; it’s a competitive field where building a client list becomes crucial over time. For starters, understanding how to maneuver through low-light environments with your camera settings can make or break your shots.
Masters in this field often rely on manual mode adjustments to control their shutter speed and aperture priority mode effectively while dealing with fast-moving subjects under challenging lighting conditions.
To stand out in concert photography, one must master shooting in RAW format for maximum editing flexibility later on—Lightroom and Photoshop become invaluable tools here. Another key aspect is learning how to secure access through photo passes by networking with publications and promoters.
Essential too is knowing when to click through the viewfinder without relying on flash photography which can disrupt the atmosphere or artist performance. As you aim your lens towards electric interactions between artists or capturing wide-angle perspectives using lenses suitable for low-light scenarios like 50mm primes or ultra-wide angles, ensure that each frame tells a story of emotion and expression—a feat easily said than done but achievable with persistence and practice.
Securing Access to Concerts
Getting into concerts to take pictures starts with a photo pass. Make friends with magazines and show promoters to get one.
Obtaining a Photo Pass
To secure a photo pass, you must get approval from the band’s PR team. This is for editorial shots. Often, passes are limited. They go to top magazines first. Sometimes, you hear back just days before the show.
Connect with bands and organizers early to increase your chances.
Networking plays a big role too. Reach out to music magazines and local papers that cover concerts. Offering to shoot for them can open doors for pass access. It’s all about who you know in this field.
Networking with Publications and Promoters
After you get a photo pass, it’s time to talk to magazines and show organizers. Magazines need pictures for their stories. Show organizers want their events to look good. You offer them what they need.
Start by sending emails or messages on social media. Show them your best photos and tell them why you’re a great choice for their next concert.
Your camera captures the music’s soul.
Meet local bands and offer to take photos at their shows. They often know promoters who plan bigger concerts. Building these relationships can lead to more photo opportunities at larger venues.
Always share your work online, like on a blog or Instagram, so people see your talent. This way, promoters find you too!
Getting Access: Photography Passes and Permissions
To get into the music photo pit, you need a pass. Start a blog or work with local newspapers and online publications. They often look for photographers. You cover shows and they give you access.
It’s a trade. Local blogs focus on city events while national ones aim for big concerts.
Networking is key. Meet people in the industry—band members, promoters, or other photographers. Share your work online and at local music venues to get noticed. Once you land assignments from publications, they secure photo passes for you.
This lets you shoot right in front of the stage, where all the action happens.
Camera Settings for Optimal Concert Photos
Getting the right camera settings is key for amazing concert photos. Play with manual mode, keep your aperture low, and push up your ISO to catch every moment in low light.
Manual Mode Adjustments
Switching to manual mode on your camera lets you control settings like exposure and focus. Start by setting a low aperture to let in more light for sharp, detailed shots. Then, adjust the shutter speed so it’s fast enough to catch quick movements without blur.
This often means speeds of at least 1/200th of a second. High ISO settings are also crucial in dark venues. They help capture clear images even with limited lighting but watch out for too much grain.
Using spot metering allows you to measure light based on a specific part of the scene, perfect for concerts where stage lights vary dramatically. In my experience, spot metering works best when aiming directly at the artist’s face or central action point on stage.
These adjustments—aperture, shutter speed, ISO, and metering—are key tools I rely on during live music events to ensure each photo captures the energy and emotion of the performance accurately.
Low Aperture and Fast Shutter Speed
Choose a low aperture number like f/1.8 or f/2.8 for your shots. This trick lets in more light, catching the vibe of live music brilliantly. Pair it with a quick shutter speed of 1/200 sec or faster to freeze action without blur.
Fast-moving artists and unpredictable lighting demand this combo for clear, vivid photos.
Mastering concert photography is about balancing light and speed: low aperture captures the mood, fast shutter freezes the moment.
By setting your camera this way, you capture not just images but stories — each musician’s leap and every strum vibrantly frozen in time. The result? Photos that make viewers feel the beat as if they were there, amidst the crowd and chaos of a live show.
High ISO and Spot Metering
After adjusting your camera’s aperture and shutter speed, setting a high ISO is next. This lets you shoot in low light without losing quality. High ISO settings like 1600 or 3200 work well here.
Spot metering helps too. It makes sure the artist’s face is well lit, even if the stage lights change.
Using high ISO helps avoid blurry photos when artists move fast. Choose spot metering to focus on important spots, like a singer’s expression or guitarist’s fingers. These settings help capture clear and vivid concert shots, no matter how dark or bright the stage is.
Camera Settings for Low Light and Fast Action
In low light and fast action, like concerts, settings matter a lot. Use a high ISO setting to catch more light. This helps in dark places. Pick the lowest aperture number your lens allows; it lets in more light too.
Fast shutter speeds freeze motion, so aim for at least 1/250th of a second to get sharp pictures of moving artists.
Experts always shoot raw images for quality edits later. Spot metering mode is key to focus lighting on the subject well. These camera tweaks ensure you capture every detail from drum kits’ rapid beats to rock bands’ swift moves.
Next, learn how noise impacts your shots at high ISOs…
Handling Noise: High ISO Shooting Tips
After mastering camera settings for low light and fast action, dealing with noise becomes crucial. High ISO is necessary in low-light concert environments. It lets you capture clearer images without a flash.
But high ISO also brings noise. Shoot in RAW format to deal better with this issue during editing.
Adobe Lightroom is your go-to tool for reducing noise post-shooting. Adjusting exposure, contrast, and color balance helps too. Editing skills can turn a noisy photo into a clear image.
The right edit turns high ISO challenges into vibrant concert shots.
Flash vs. No Flash in Concert Photography
Using flash in concert photography often spoils the shot. It can blind performers and annoy them. Photos turn out with too much light and lose their natural feel. Instead, skip the flash to keep the stage’s real glow.
This choice makes pictures look better without hurting anyone’s eyes or feelings.
Moving on, let’s explore composition tips for making those no-flash shots stand out even more.
Composition and Shooting Techniques
In composition and shooting techniques, focus on the mood and movement. Find angles that show off the vibe and actions of the performers. Use your gear to catch light in a way that tells a story.
Play with perspective to make viewers feel like they’re part of the scene. Want to learn more? Keep reading for tips on bringing concert photos to life!
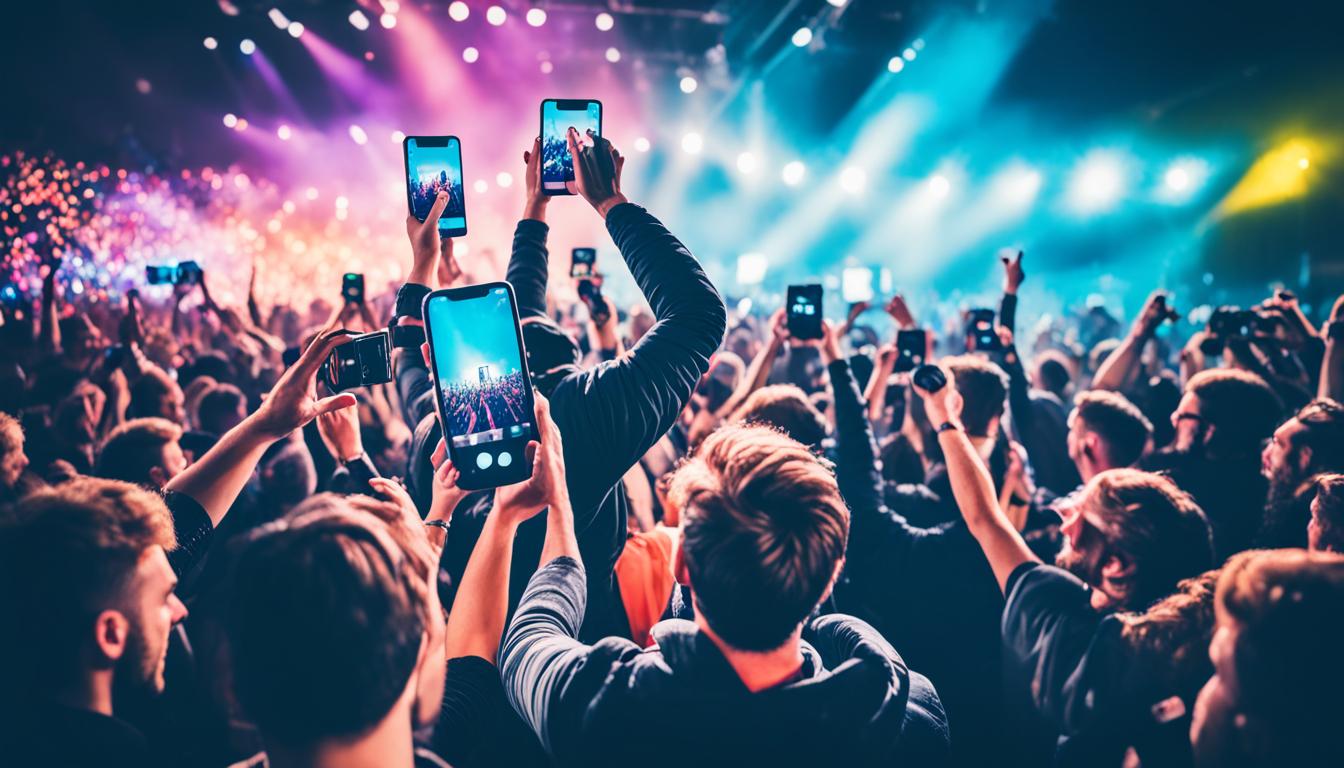
Capturing the Atmosphere
To capture the atmosphere at concerts, focus on more than just the performers. Pay special attention to stage lighting and crowd reactions. Bright lights can create dramatic silhouettes of musicians against colorful backdrops.
Snapping photos at moments when the audience cheers or sings along adds life to your images. Using a digital camera with high ISO capabilities lets you shoot in low light without losing detail.
Shoot from different spots to get varied angles that show off the energy of live music. Close-ups reveal artists’ emotions, while wider shots include fans and venue details, making viewers feel like they’re part of the scene.
Avoiding flash preserves the natural vibe created by concert lighting and keeps your pictures authentic.
The key to great concert photography is not just who but what you see through the lens.
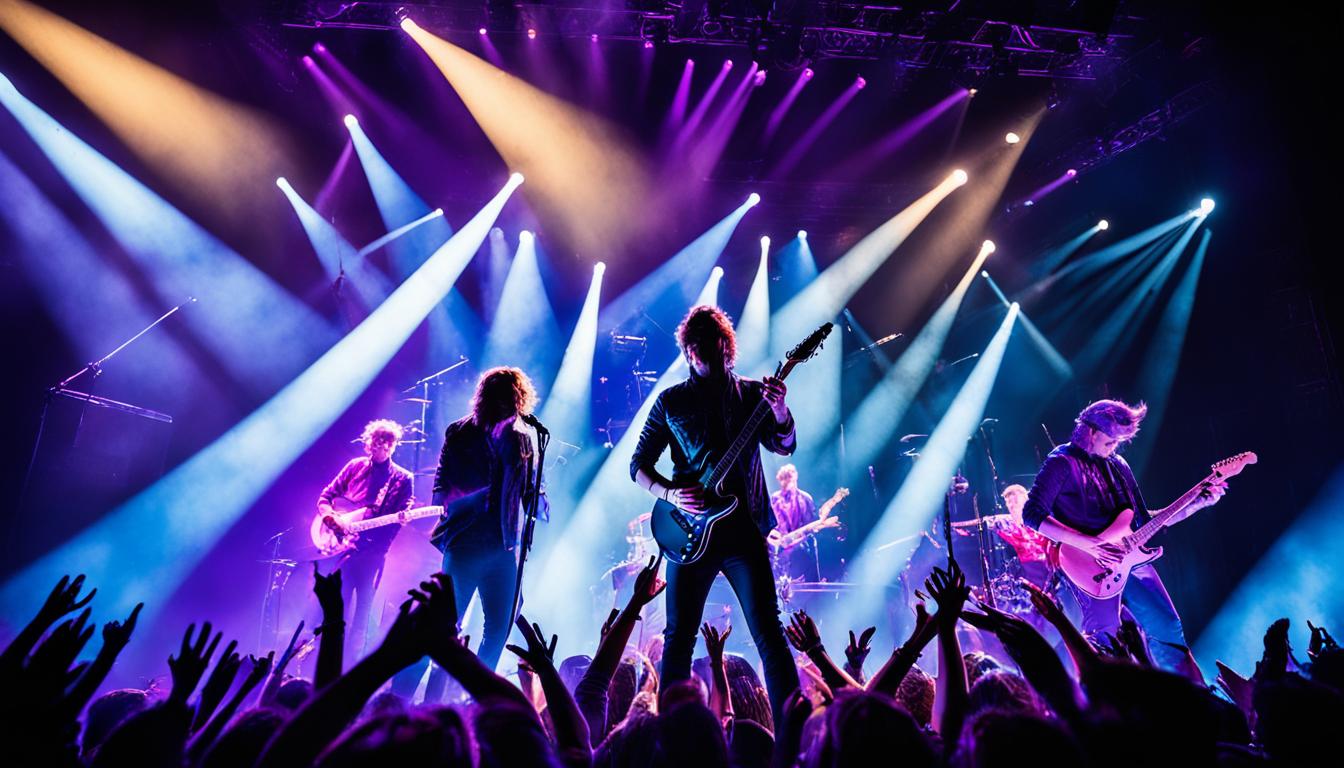
Focus on Dynamic Angles and Artist Interaction
Capture band members talking or playing together. This shows how they connect, making photos come alive. Try shooting from low or high spots for new views that grab attention. Use a digital SLR camera with a prime lens, like 50mm or 85mm, to catch sharp details even in dim light.
Shoot fast to get lively shots of artists moving and interacting with fans. A high ISO setting helps keep images clear without flash, keeping the mood right. Move around the venue, taking pictures from different angles to show the full energy of the concert.
Avoiding Flash to Preserve Ambient Light
Using flash washes out the natural vibe of concert scenes. It kills the mood set by stage lights. For sharp photos, rely on your camera’s ISO sensitivity and manual exposure controls instead.
Adjust these to match the lighting without a flash.
Quick moves are key in low light. Keep your shutter speed fast enough to freeze action but slow enough to let in ambient light. This way, you capture the energy and emotion on stage as it really looks and feels.
High ISO helps here, making your camera more sensitive to light without needing flashes that can ruin the atmosphere.
Composition Tips for Dynamic Concert Photos
Frame your shots with the rule of thirds in mind to catch vibrant concert moments. Place musicians and their equipment at interesting points within your viewfinder. This makes for a dynamic photo that pulls viewers into the scene.
Look for moments of artist interaction or crowd reactions, these elements add energy and emotion to your images.
Experiment with different angles and perspectives. Shoot from low down to capture the vastness of the venue or get close-ups of guitars and drums. Every perspective tells a part of the story, from the sweat on a drummer’s brow to the excitement in front row faces.
Mixing up your viewpoints keeps your photos engaging and varied, offering a full experience of the concert atmosphere.
Techniques for Capturing the Energy of Live Music
Use fast shutter speeds to freeze motion. This technique ensures that each jump, strum, or drum hit looks sharp in your photos. Wide apertures allow more light in, making it easier to capture details even in dim concert lights.
Key moments like a guitar solo or an emotional expression from the singer are perfect for memorable shots. Look for these and snap quickly.
Next, focus on the energy around you. Crowds jumping, hands waving, and musicians moving rapidly on stage add life to your photos. Mix these with close-up shots of artists’ expressions and interactions.
This variety tells the full story of the concert’s energy and excitement. Now, let’s talk about editing those live music shots for clarity and color balance.
Post-Production Tips
Edit your concert photos for better color and clear details using software like Adobe Lightroom.
Editing RAW Files for Clarity and Color Balance
Shooting in RAW lets you fix photos better later. This format saves all image info, which gives you more control during editing. You can adjust clarity and color balance easily with software like Adobe Lightroom or Capture One.
These tools help make colors look real and details sharp.
After shooting a concert, first step is to check each photo’s clarity and colors. Use sliders in your editing software to change brightness, contrast, and saturation until everything looks right.
For instance, if lights on stage were too bright or dim, you can fix this without ruining the photo’s quality.
Next up is choosing the best shots for sharing…
Essential Software and Tools for Editing
For editing concert photos, Adobe Lightroom and Photoshop are a must. These programs help you clear up noise and make colors look right. After shooting in low light, your pictures might be grainy.
Use the noise reduction feature in these tools to fix that. Sharpening helps too, making every detail pop.
Tools like these turn good shots into great ones. From adjusting exposure to tweaking color balance, they offer everything you need for top-notch images. I’ve used them on all my work and seen a big difference.
With practice, you can get faster at using them, saving time while improving quality.
Post-Processing Concert Images for Maximum Impact
After taking photos at a concert, edit them for clarity, color balance, and exposure. Adobe Lightroom helps make these adjustments without losing the show’s real feel. Fixing colors and light makes your pictures vivid.
Adjust shadows and highlights to make details pop. Always shoot in RAW format so you can change much without ruining quality.
Editing is key to show what really happened on stage. Use tools like noise reduction to keep images sharp even at high ISO settings common in low-light concerts. Sharpen edges lightly for a crisp look but avoid overdoing it; this keeps photos natural.
With these steps, concert images will stand out, capturing the energy and emotion of live music effectively.
Concert Photography Etiquette and Best Practices
After fine-tuning your images for maximum effect, mastering concert photography etiquette and best practices is critical. Always respect venue rules and attendee privacy. This means no blocking views with equipment or impeding the experience of others.
Secure a photo pass for access and stay within designated areas to avoid disturbing performers or fans.
Keep safety top of mind—avoid risky spots or angles that could harm you, performers, or the concert-goers. Use gear like DSLRs and prime lenses efficiently to minimize movement and distraction.
Networking with weekly newspapers or publications can also provide valuable opportunities for access while teaching you industry standards of conduct.
In practice, I’ve learned that maintaining a low profile helps capture genuine moments without interference. Following these guidelines ensures not just great photos but also good relationships within the music community.
Building a Portfolio in Concert Photography
Creating a strong portfolio in concert photography is essential. Show your best work. Make sure every image is high-quality and edited well. Your portfolio needs pages about you and how to contact you.
This helps potential clients get to know you.
Use images from different concerts to show your skill range. Include shots of big arenas and small venues. Show you can capture the energy of live music with your camera gear, like digital SLR cameras and prime lenses.
Editing tools help make your photos look their best.
Make it easy for people to see your talent. Use clear, stunning pictures that catch the eye. Add details about each photo, like the band’s name or concert location.
This way, anyone looking at your portfolio will see right away how good you are at photographing concerts.
From Pit to Print: Sharing Your Concert Photography
Share your concert photography on platforms like Instagram and Facebook. This gets people to see your work. Make posts often and use hashtags about the band or concert. It helps more people find your photos.
Work with music magazines or websites, too. They might print your pictures or put them online. A personal blog is another good spot to share stories behind your shots. Tell what happened at the concert or how you took a certain photo.
People enjoy these insights along with the visuals.
Use tools like Adobe Lightroom for editing before sharing. Good edits can make a big difference in how professional your images look online and in print.
Social Media Strategies for Concert Photographers
Concert photographers can show off their work on Instagram and Facebook. These platforms are great for sharing pictures with fans and potential clients. Use hashtags and geotags to make sure more people see your photos.
This helps get more eyes on your talent.
To engage with followers, talk to them in the comments and share stories behind the photos. Sharing stories about capturing moments at concerts of bands like Guns N’ Roses or with artists similar to Iggy Pop makes your work interesting.
It also shows you know the music scene well. Using a mix of wide-angle and telephoto lenses captures different parts of the concert experience. Make sure you post a variety of shots to keep followers interested.
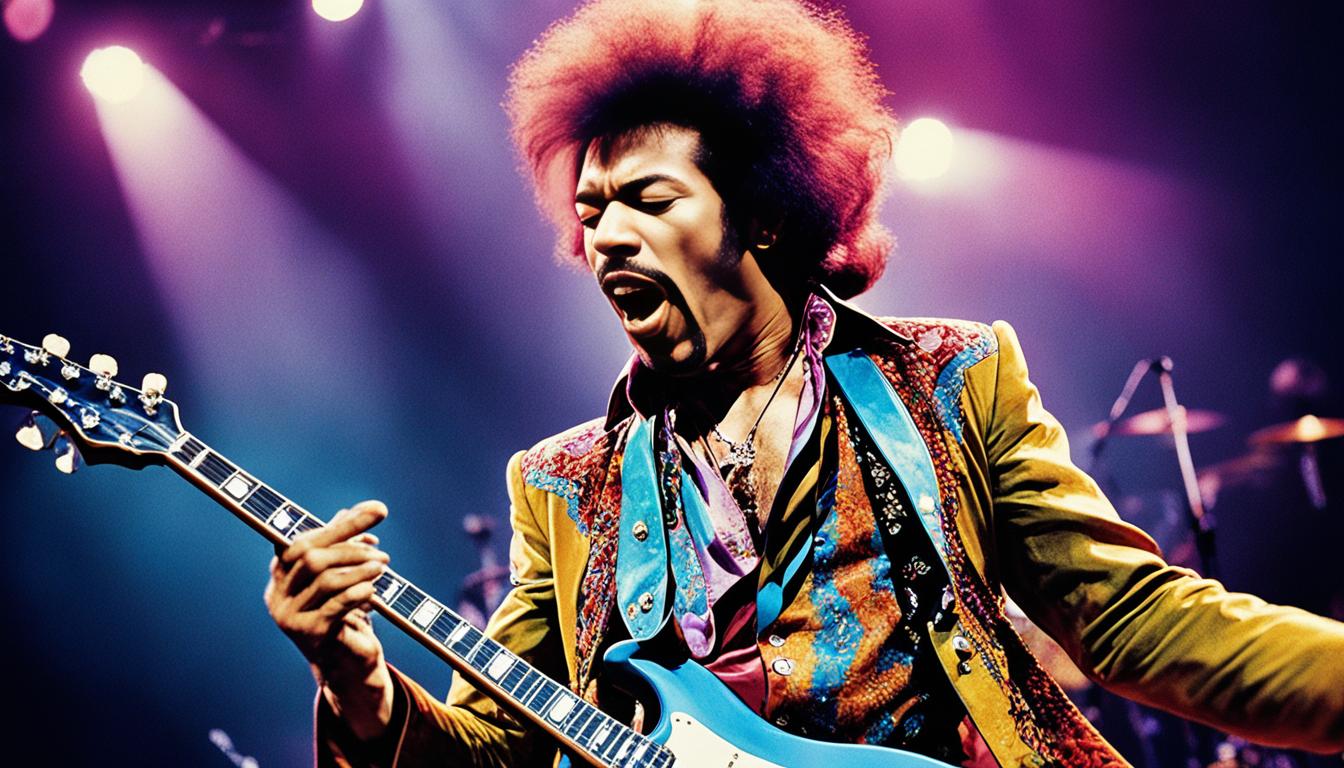
Iconic Concert Photographs and Their Stories
Iconic concert photos capture moments that tell stories beyond the music, drawing viewers into a unique experience. Study famous shots to learn how experts freeze emotion and energy.
They often use digital SLR cameras, high ISO settings, and prime lenses like 50mm or 85mm for clarity even in low light. These techniques allow them to preserve the raw intensity of live performances without relying on flash, which can ruin the natural ambiance.
Photographers gain access to concerts through photo passes obtained by networking with publications and promoters. This step is crucial for getting up close to bands onstage. Once there, they might adjust camera settings manually—opting for low apertures and fast shutter speeds—to capture dynamic angles and artist interactions vividly.
Editing these RAW files later enhances color balance and clarity, making each image a piece of history that fans and music lovers cherish.
Storytelling Through Concert Photography
Moving from the stories behind iconic photos, we explore how concert photography itself tells a powerful story. Concert photographers capture moments that go beyond simple snapshots.
They seize the emotions, expressions, and energy of both performers and audiences. This creates a narrative inviting viewers to feel as if they were there.
To tell these stories, photographers use digital SLR cameras with prime lenses like 50mm or 85mm and adjust their camera settings for low light. High ISO capabilities allow them to catch every detail without losing quality.
They focus on dynamic angles and interactions between artists, creating series of images that together narrate the entire event’s atmosphere. Their work turns music into visual stories that echo long after the last note has faded.
The Challenges of Outdoor Concert Photography
Outdoor concert photography means dealing with unpredictable lighting and weather. You must adjust your camera for natural light during the day and fast action at night. Protective gear keeps equipment safe from rain or dust.
High ISO capabilities are vital to capture clear shots in varying conditions.
Light changes quickly outdoors, from bright sunlight to dark evenings. Photographers change settings often to keep up. They use digital SLR cameras, prime lenses like 50mm and 85mm, and modify aperture and shutter speed for each shot.
This ensures photos stay sharp and well-lit no matter the challenge outside.
Concert Photography in Small Venues vs. Large Arenas
In small venues, photographers get close to musicians. This means using a 50mm or 85mm lens can capture great shots without needing to move much. The challenge is the low light but you can adjust by setting your camera’s ISO high.
In big arenas, it’s different. Here, you’ll need longer lenses like a 200mm to get close-up photos from far away. Positions are more planned and getting the right spot matters a lot.
Experience shows small venues let photographers feel the music up-close and personal. Arenas offer spectacular wide shots with strobes and full frame cameras capturing every detail from distance.
Each venue type presents its own lighting challenges; small venues often have dimmer lights while large arenas use complex lighting setups that change quickly. Managing crowds also varies; in smaller spaces, moving around is easier than in crowded arenas where finding a good angle takes strategy and patience.
Concert Photography Legal Considerations
To take pictures at concerts, you must know the rules about copyright and photo permissions. Laws say you can’t use photos of bands or their music without getting OKs first. You need a photo pass for most concerts which tells what you can do with your pictures.
Always ask before clicking through your camera.
It’s important to respect everyone’s privacy at the show too. This means not posting photos of people without asking them if it’s alright. Each band or venue might have different rules about taking and using photos, so always check first.
Breaking these rules could get you in trouble, like being asked to leave or even legal actions against you. So, make sure to understand and follow all these laws to enjoy concert photography safely.
Advanced Lighting Techniques for Concert Photography
Master advanced lighting techniques to take your concert photos from good to great. Know the stage’s light setup beforehand. This knowledge lets you predict where and how light hits, ensuring your shots capture every detail vividly.
Use stage lights creatively—side lights and backlights add drama, highlighting musicians against dark backgrounds. Experiment with different exposures to find the right balance; too little light loses details, while too much can wash out the scene.
Shoot in RAW format for more control during editing. Adjust colour balance carefully to match the concert’s vibe—cool tones for electronic sets, warm ones for acoustic performances.
Diverse angles offer fresh perspectives; shoot from the sides, behind, or above the crowd when possible. Each position offers unique lighting opportunities that standard front-facing shots miss.
Apply these tactics confidently at every show, and watch your concert photography skills soar.
Capturing Emotion and Expression in Concert Photography
After mastering advanced lighting techniques, the next step involves capturing emotions and expressions in concert photography. This means focusing on key moments that show feelings of performers and their connection with the audience.
You need to aim your camera at close-up shots to get these emotions up close. Look for smiles, intense focus, or shared looks between band members.
It’s also crucial to watch how artists interact with fans during a song or in quieter moments. These interactions can tell a powerful story about the concert experience. Use prime lenses like 50mm or 85mm for sharpness in low light.
Set your camera to high ISO without fear; it helps catch details even in dim settings. Catching emotion isn’t just about faces – it’s about telling a story through every shot you take at the concert.
Conclusion
Mastering concert photography is no small feat. It demands a keen eye for detail, quick reflexes, and the right tools—like a digital SLR camera and prime lenses. Secure your spot at gigs through networking and photo passes.
Master manual settings to tackle low light and fast action. Embrace RAW format for post-production power with tools like Adobe Lightroom or Photoshop. With practice, creativity, and these tips, you’re set to capture live music’s magic.
Your journey from pit to print begins now—document the energy, emotion, and stories unfolding on stage.
FAQs
1. How can I master concert photography?
Mastering concert photography involves researching the band, using appropriate equipment like wide or ultra-wide angle lenses, compact cameras or even smartphone cameras, and knowing when to use features like auto-focus.
2. What are some expert tips for capturing live music brilliance?
Some tips include avoiding overexposed shots by adjusting your camera settings correctly…using a monopod or tripod for stability…and studying the work of professional music photographers such as Chad Smith.
3. Can I sell my concert photos as stock photos?
Yes, you can! However, it’s important to ensure that you have the necessary permissions from the band and venue before selling any images…
4. Is it better to use a wide-angle lens or an ultra-wide-angle lens for concert photography?
Both types of lenses can be useful in different situations. A wide-angle lens is great for capturing the whole stage while an ultra-wide-angle lens allows you to capture more of the crowd and atmosphere at concerts…choose based on what best suits your style and vision.