Struggling to capture stunning architectural photos? Architectural photography showcases buildings, interiors, and cityscapes. This article gives you tips and gear recommendations to improve your shots.
Get ready to take amazing photos!
Key Takeaways
- Use cameras with big sensors and changeable lenses to get sharp photos of buildings.
- Try shooting at sunrise or sunset for the best light, and use different weather to add mood.
- Wide-angle and tilt-shift lenses help capture whole buildings clearly without bending lines.
- Adding people in your pictures shows how big or important a building is.
- Practice flying drones to take unique pictures from above and try night photography for a new view on architecture.
Essential Gear for Architectural Photography

For architectural photography, grabbing the right gear is key. Think cameras with large sensors and lenses that let you see wide views—they’re your best friends.
Best Cameras
For architectural photography, the best cameras are those with interchangeable lenses and full-frame sensors. These types capture details sharply across entire buildings. Use settings like ISO 100 and an aperture between f/8 to f/14.
Also, aim for a shutter speed around 1/125th of a second. This setup helps in getting clear shots without blur.
Next up, let’s focus on choosing the right lenses to make your images stand out.
Recommended Lenses
For architecture photography, you need the right lenses. A wide-angle lens helps capture big buildings and spaces easily. Many photographers also use tilt-shift lenses to fix perspective distortion.
This means straight lines stay straight, not bent or angled weirdly in photos. These specialty lenses let you control the view and depth of field better.
Using these lenses makes a huge difference in how professional your photos look. With a wide-angle lens, you can show off the size and detail of an architectural work without moving too far back.
Tilt-shifts are great for getting rid of unwanted lean in tall structures, making them appear as they do to the eye.
Supporting Accessories
Capturing architecture requires more than just a camera and lens. The right accessories can turn a good photo into a great one.
- Tripods ensure sharp images, especially in low light or for long exposures. They help keep your camera steady for high-definition clarity.
- Flashes light up dark interiors or details, providing the necessary brightness where shadows prevail.
- Angle finders make it easy to shoot from low angles without straining your neck, perfect for tall buildings.
- Cable release or remotes let you take photos without touching the camera, reducing shake and improving image quality.
- Polarizing filters enhance skies and minimize reflections on windows, giving exteriors that extra pop.
- Strobes offer more powerful lighting options than flashes, ideal for large interior spaces.
- Post-processing software like Lightroom and Photoshop is crucial for tweaking images—adjusting shadows, enhancing colors, and correcting distortions.
- Reflectors bounce light back onto subjects, softening shadows and highlighting architectural details even without extra lights.
- Zoom lenses with varying focal lengths give flexibility in framing shots without changing your position—essential for capturing both exterior architecture photography and detailed close-ups.
10 .A wide-angle lens captures expansive structures entirely without needing to step back too far, making them indispensable for both exterior and interior shots.
Each accessory plays its part in transforming architectural photography from simple snapshots to artful compositions that tell a story through buildings and spaces.
Essential Gear Guide for Architectural Shots
After exploring supporting accessories, let’s focus on the must-have gear for architectural photography. This list ensures you capture stunning architecture with precision and ease.
- Choose a DSLR or mirrorless camera with a full-frame sensor to catch more details and better light.
- Wide angle lenses are key for capturing the full scope of buildings without moving too far back.
- A tilt-shift lens corrects perspective distortions and keeps lines straight, essential for tall structures.
- Tripods offer stability for sharp images, especially in low light or when using long exposure times.
- Polarizing filters enhance sky contrast, reduce reflections from windows, and make colors pop.
- Bring a telephoto lens to zoom in on architectural details or shoot from a distance.
- Use a speedlite or external flash to light up dark areas without introducing noise.
- Invest in photo editing software like Photoshop for post-processing needs such as HDR techniques and removing unwanted elements.
- Carry extra batteries and memory cards to avoid running out of power or storage at critical moments.
- A drone can capture unique aerial perspectives of buildings, showcasing their layout and surrounding area.
This equipment guide sets photographers up for success in architectural photography by emphasizing tools that address common challenges while enhancing creativity and detail capture.
Techniques for Capturing Great Architecture
To snap amazing buildings, you need the right tips. Learn more to see how!
Optimal Lighting Conditions
Light makes or breaks architectural photos. The best time to shoot is during the golden hour, just after sunrise or before sunset. This light adds warmth and depth to buildings, highlighting textures and colors.
Weather plays a big role too. Cloudy days can soften shadows and distribute light evenly, while rain adds a dramatic effect, making surfaces reflect and glow.
Shoot in various weather conditions to see how different elements change the mood of your photographs. For example, fog can blur lines and create a mysterious feel around structures.
Always check the forecast before planning your shoot but be ready for unexpected weather changes—they might lead to unique shots.
Creative use of photography lenses like wide-angle or tilt-shift helps control perspective in architecture photography—next we’ll explore how these tools can alter viewpoints for more dynamic images.
Creative Angles and Perspectives
After mastering optimal lighting conditions, shifting your focus to creative angles and perspectives opens up new vistas in architectural photography. This approach adds depth and brings a unique character to your shots.
- Use a tilt-shift lens to correct perspective distortion, ensuring straight lines stay true, crucial for tall buildings.
- Explore low angle shots to make structures appear more imposing, emphasizing their height and grandeur.
- Find symmetry by carefully positioning yourself in the center of buildings, using shapes and patterns to create visually appealing images.
- Implement wide-angle lenses for interior architecture photography; they capture more of the scene, perfect for tight spaces.
- Try photographing from high vantage points; drones or tall buildings offer unique views that highlight the layout of the surroundings.
- Include people in your shots for scale and context, showcasing how humans interact with architectural spaces.
- Experiment with reflections on glass surfaces or water bodies near structures, adding an artistic element to your photographs.
- Use a fish-eye lens for dramatic curvature effects, especially useful in panoramic photography to give viewers a sense of being enveloped by the architecture.
- Focus on details like doorways, windows, and ornaments with shallow depth of field shots to emphasize texture and craftsmanship.
Each technique provides a fresh perspective on architectural marvels, turning familiar scenes into extraordinary photo opportunities.
Including Human Elements
Switching from finding unique angles, adding people in shots brings buildings to life. People show how big or small a structure is. This gives everyone looking at the photo a sense of scale and context.
For example, capturing someone walking through a massive gateway can highlight its grandeur.
This method works well for both beginners and pros. You just need your camera and maybe a friend as your subject. By placing them near or far from the architecture, you create depth.
It’s simple yet effective – your photos tell more about the building’s purpose and size without needing words.
Tilt-Shift Magic for Architectural Photography
After including human elements in your shots, tilt-shift lenses bring a unique touch to architectural photography. These specialty lenses correct the perspective control issue, making buildings appear straight rather than leaning.
The magic of these lenses lies in their ability to fix converging vertical lines that normally distort when photographing tall structures. For photographers aiming for precision, using a tilt-shift lens is not just an option; it’s a necessity.
Tilt-shift lenses offer more than correction; they enable creativity and depth in images. With them, photographers manipulate focus and depth of field, producing photos where the architecture stands out vividly against blurred surroundings.
This effect sets professional images apart from amateur snapshots. From personal experience, mastering a tilt-shift lens opens doors to capturing stunning architecture with clarity and artistic flair.
Tilt-shift lends magic to architectural photography by turning simple buildings into imposing structures.
Mastering Architectural Detail Photography
Mastering architectural detail photography means zooming in on the little things that make buildings special. Look for symmetry and shapes that stand out. These details can turn into abstract artwork through your lens.
Gear up with a camera that has interchangeable lenses to get sharp images of these features. A tilt-shift lens works wonders here, letting you adjust perspective right in-camera, cutting down on distortion.
For the best shots, find the sweet light of dawn or dusk. This soft light highlights textures and details beautifully. Use a tripod to keep your camera steady for crisp photos. Pay attention to how shapes and lines guide your eye through the image.
Adding people can also bring scale and life to your detail shots, making them more dynamic. Always aim for clarity and purpose in each photo, showcasing architecture’s beauty one detail at a time.
Overcoming Common Challenges
Facing tough problems like bending lines and unwanted stuff in photos? Learn ways to fix these and snap better building shots. Keep reading for more tips!
Dealing with Distortion
Distortion messes up straight lines in architecture photos, making buildings look bent or skewed. Tilt-shift lenses fix this by letting photographers adjust the lens plane relative to the image sensor.
This technique straightens out the lines, keeping buildings looking true to life. For those without tilt-shift lenses, editing software like Photoshop and Lightroom comes to the rescue.
They have tools that can correct these distortions post-shoot.
Using a tilt-shift lens or editing software needs practice but guarantees your architectural shots stay realistic and free from warped lines. Start with understanding how these tools work—Photoshop offers guides on using its transform functions effectively while experimenting with a tilt-shift lens shows you how much you can control perspective right from your camera.
Removing Unwanted Elements
Editing software like Photoshop and Lightroom are key for architectural photographers. They use cloning tools to clean up photos, removing people or distractions that take away from the building’s beauty.
It makes the shot look cleaner and more focused on architecture.
Photoshop’s clone stamp tool lets you copy parts of a photo over unwanted items, making them disappear. In my own work, I’ve used this to remove everything from cars in front of a historic home to modern signs cluttering a traditional street scene.
It requires patience but ensures your focus remains on the architectural subject.
Mastering cloning techniques can transform an ordinary photo into a standout piece.
Next, let’s talk about post-processing tips…
Post-Processing Tips
In post-processing, using HDR techniques and Photoshop can really make your architecture photos stand out. Learn how to bring the best out of your shots….
HDR Techniques
HDR, or high dynamic range, is a game-changer for balancing tone and exposure in architectural photography. It especially shines in scenes with high contrast where shadows and lights vary greatly.
By combining multiple photos of the same scene taken at different exposures, HDR creates a final image rich in detail across all areas. Photographers capture this range using bracketing on their DSLRs or cameras with full-frame sensors.
The key to mastering HDR lies in taking at least three shots: one properly exposed, another underexposed, and a third overexposed. Software then blends these images together seamlessly.
Tools like Photoshop come into play here, allowing photographers to adjust the merged image further to achieve that perfect balance of light and shadow. This technique ensures that details lost in dark shadows or bright highlights are recovered, producing photos that closely mirror how our eyes see the world around us.
Effective Use of Photoshop
Photoshop stands as a vital tool for fixing distortions in architectural photography. With its wide array of features, photographers can easily straighten lines and eliminate unwanted elements from their shots.
For instance, using the lens correction filter helps correct perspective distortions caused by camera lenses. This ensures buildings stand tall and straight, just as they do in real life.
Knowing when to use Photoshop is crucial for achieving professional-looking results.
Next, blending modes in Photoshop allow photographers to merge different exposures of the same scene into one image. This technique is especially useful for balancing lighting conditions across an image, ensuring both the sky and building details are perfectly exposed.
By mastering these techniques, photographers can elevate their architectural images from good to breathtaking.
Enhance Your Builds: Post-Processing Techniques for Architectural Images
Moving from mastering Photoshop, let’s now focus on boosting your architectural shots through post-processing. This step turns good photos into stunning displays of architecture.
- Use HDR photography for dynamic range expansion. This makes sure both the brightest and darkest parts of your image look clear.
- Apply lens filters digitally to correct color balance and enhance sky detail without affecting the rest of the photo.
- Leverage Photoshop’s clone and healing tools to remove unwanted items like wires or trash from your shot.
- Experiment with black and white conversion to highlight shapes, lines, and textures in architectural photography.
- Adjust the perspective in editing software to fix any tilt or distortion problems from wide-angle lenses.
- Utilize autofocus points carefully during shooting for sharper images; refine sharpness further in post-processing.
- Fine-tune aperture priority settings in post-production to manage depth of field and focus on key elements effectively.
- Explore Lightroom presets designed for architecture to speed up editing workflow while maintaining high-quality results.
- Merge multiple exposures manually or through software to create a single image that captures the full detail of interior spaces without overexposure or underexposure.
- Integrate human elements by layering photos taken at different times to bring life and scale into your architectural images.
These techniques ensure every pixel counts, transforming standard shots into works of art worthy of Andrew Prokos or Julius Shulman, leading fine art photographers known for their captivating takes on buildings and structures.
Exploring Specialized Photography Techniques
Explore a world where cameras fly and night turns into art. Here, lenses capture history and black and white colors show off buildings in new ways.
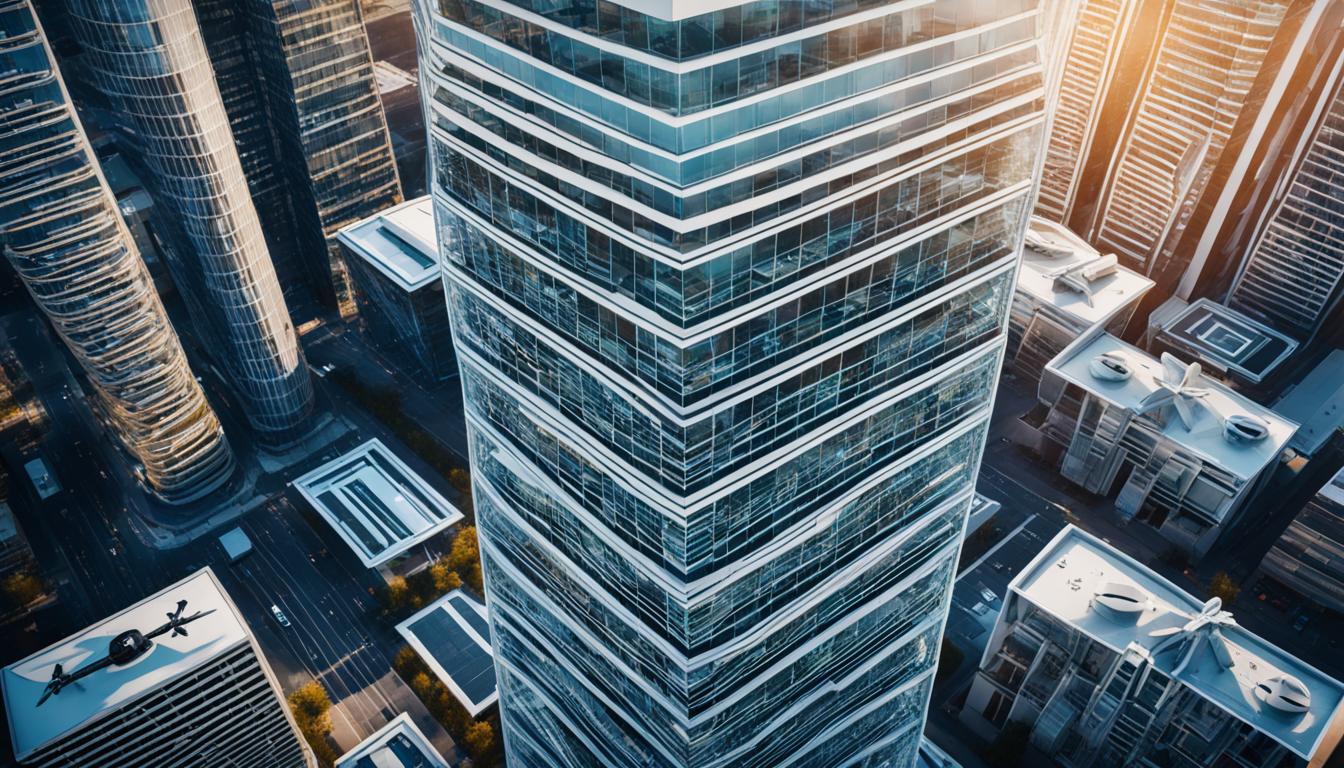
Expert Drone Photography for Architecture Guide
Drones change how we capture architecture. They let us take photos from the sky, showing buildings in a new way. Here’s what you need to know:
- Choose the right drone. Not all drones are good for taking pictures of buildings. You want one with a stable hover and a high-quality camera.
- Learn the rules. Before flying, find out what the laws say in your area. Some places have strict rules about where you can fly drones.
- Plan your shoot time carefully. The best light for architectural photos is early morning or late afternoon when shadows bring out details.
- Master drone controls. Practice flying your drone to get smooth, steady shots that make buildings look great.
- Use different angles to show off architecture in unique ways. Fly high for an overview or close-up to capture texture and depth.
- Include people for scale and life. A photo of a building becomes more interesting when you see how people use and interact with the space.
- Edit your photos like a pro. Use software like Photoshop to correct colors, adjust lighting, and remove unwanted items from your images.
With these steps, you can take amazing photos of buildings from above, adding a new dimension to your photography skills.
Night Photography in Architecture: Tips & Insights
Night photography in architecture captures buildings under a different light. It requires a good understanding of artificial lighting and how it interacts with structures.
- Use a camera with interchangeable-lens for flexibility in capturing various architectural sizes and details. Full frame sensors are ideal, as they perform better in low-light conditions.
- Choose lenses wisely. Wide-angle lenses help capture the whole building, while a telephoto lens can pick up distant details.
- Bring supporting accessories, like tripods, to keep your camera steady for long exposures.
- Scout locations during the day to plan your shots. Look for interesting lighting and compositions you can revisit at night.
- Wait for the “blue hour” for stunning photos. This is the time right after sunset or just before sunrise when the sky has a deep blue hue.
- Experiment with long exposures to capture trails of light from cars or illuminate detail in low light.
- Include human elements, such as people walking by or standing still, to give life and scale to your shots.
- Play with artificial lights available on site to highlight textures and features of the architecture.
- Use tilt-shift lenses to correct perspective distortions common in tall buildings photographed from the ground.
10.hide unwanted elements through clever angles or post-processing in software like Photoshop.
Each point leads you closer to mastering night photography in architecture, offering fresh perspectives on familiar landscapes under the cloak of nightfall.
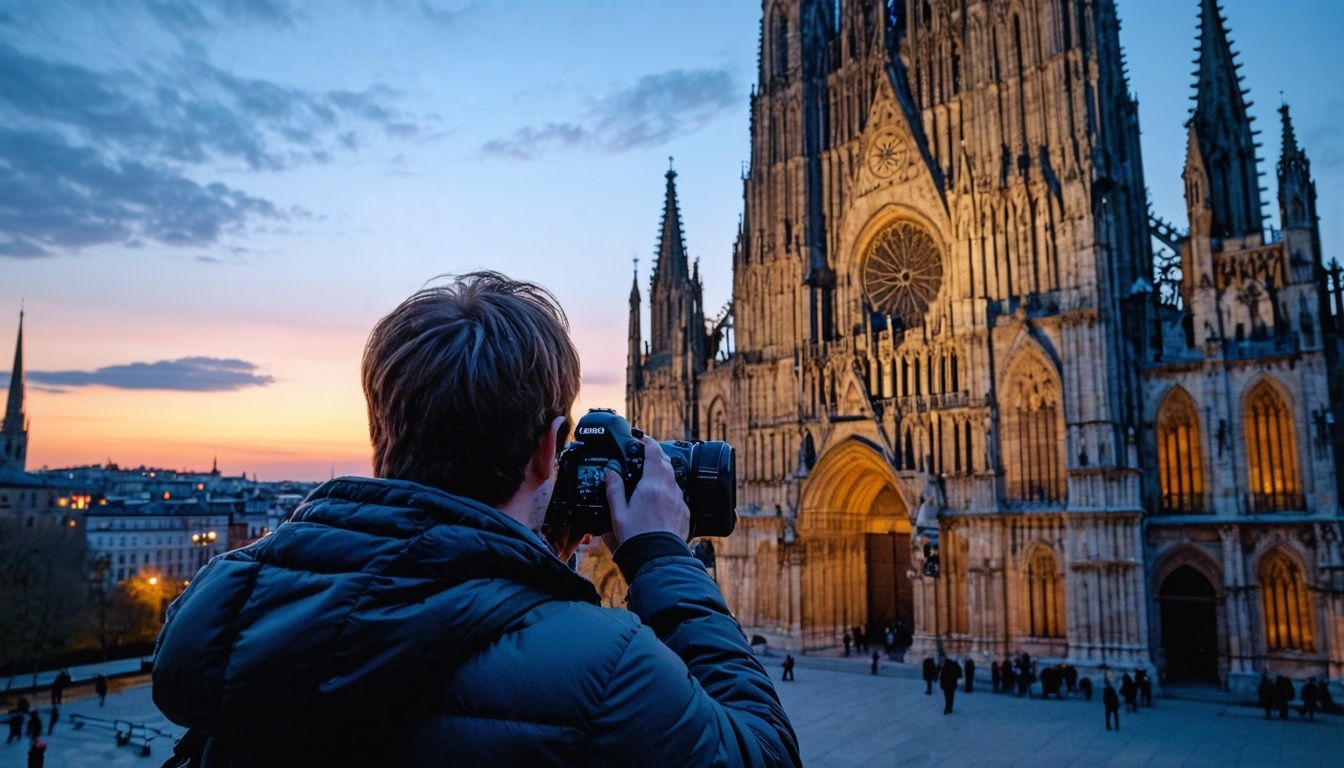
Capturing Time: Historical and Cultural Heritage Photography
Capturing Time: Historical and Cultural Heritage Photography shows how structures change. This type of photography tells stories of the past through buildings.
- Use a high-quality interchangeable-lens camera to get clear, detailed shots of ancient structures.
- Choose lenses that capture wide scenes or intricate details depending on the site, like wide-angle or macro lenses for close-up textures.
- Early morning or late afternoon light makes historical sites look their best. The soft light adds mood.
- Find unique angles to show well-known places in new ways. Climb stairs or shoot from low down.
- Include people to give scale and life to your photos. Show how humans interact with these spaces today.
- A tripod helps avoid blurry images, especially in low light inside old buildings.
- Learn about the place before you go. Knowing its history can inspire your shots.
- Use subtle editing to enhance but not change the real feeling of ancient sites.
- Share your photos online on platforms like Flickr for feedback and exposure.
Taking pictures of historical and cultural heritage requires respect for the past and skill with your camera today.
Exploring Elegance in Black and White Architectural Photography
Shifting from historical and cultural heritage to black and white architectural photography brings a fresh perspective. This style turns buildings, interiors, exteriors, facades, and architectural details into art prints that stand out for their elegance.
The magic lies in how it uses shapes and contrasts instead of colors.
Black and white images strip away distractions, focusing on the essence. They highlight lines, textures, light play – showcasing architecture photographer’s skill in seeing beyond the obvious.
It challenges photographers to think differently about composition and lighting. With just a Canon camera or similar quality gear, anyone can start this journey. But mastering it takes practice and an eye for detail that appreciates the subtle interplay between shadow and light.
Such photography isn’t just about removing color; it’s about deepening appreciation for structural beauty through high contrast visuals that tell stories without words. Those who explore this genre learn to capture and see architecture in new ways – as a dance of darkness and brightness where every angle matters.
Legal and Professional Considerations
7. Legal and Professional Considerations: Knowing the law matters in architectural photography—make sure you have permission for your shots, especially when people’s spaces are in the picture.
Now, go explore more tips!
Navigating Legal Considerations in Architectural Photography
Taking pictures of buildings might seem simple, but legal stuff matters a lot. Always check property rights and ask for permissions before you start shooting. This way, you avoid trouble with the owners or the law.
Some places also have rules about using tripods or drones. Make sure to find out these details first.
For photos meant for sale, like limited edition prints, it’s key to get all rights clear and in writing if possible. Each print should be signed, numbered, and come with a Certificate of Authenticity to prove its value and legality.
Keeping these things in mind ensures your work stays respected and problem-free.
Navigating Architectural Photography Client Relations
After understanding legal concerns in architectural photography, focusing on client relations is key. Managing expectations and delivering high-quality work matter most here. Clear communication sets the stage for successful projects.
Photographers must discuss details before starting—sharing ideas about angles, lighting, and specific elements to include or avoid.
Effective interaction with clients keeps misunderstandings at bay. Using clear terms, be upfront about timelines, costs, and what the final product will look like. Feedback loops are vital; they allow adjustments based on the client’s input throughout the project.
This approach ensures satisfaction and builds trust for future collaborations.
Enhancing Your Architectural Photography Portfolio
Making a strong portfolio shows off your best architectural shots. Keep shooting and learning to catch the eye of more clients.
Crafting Your Architecture Portfolio with Ease
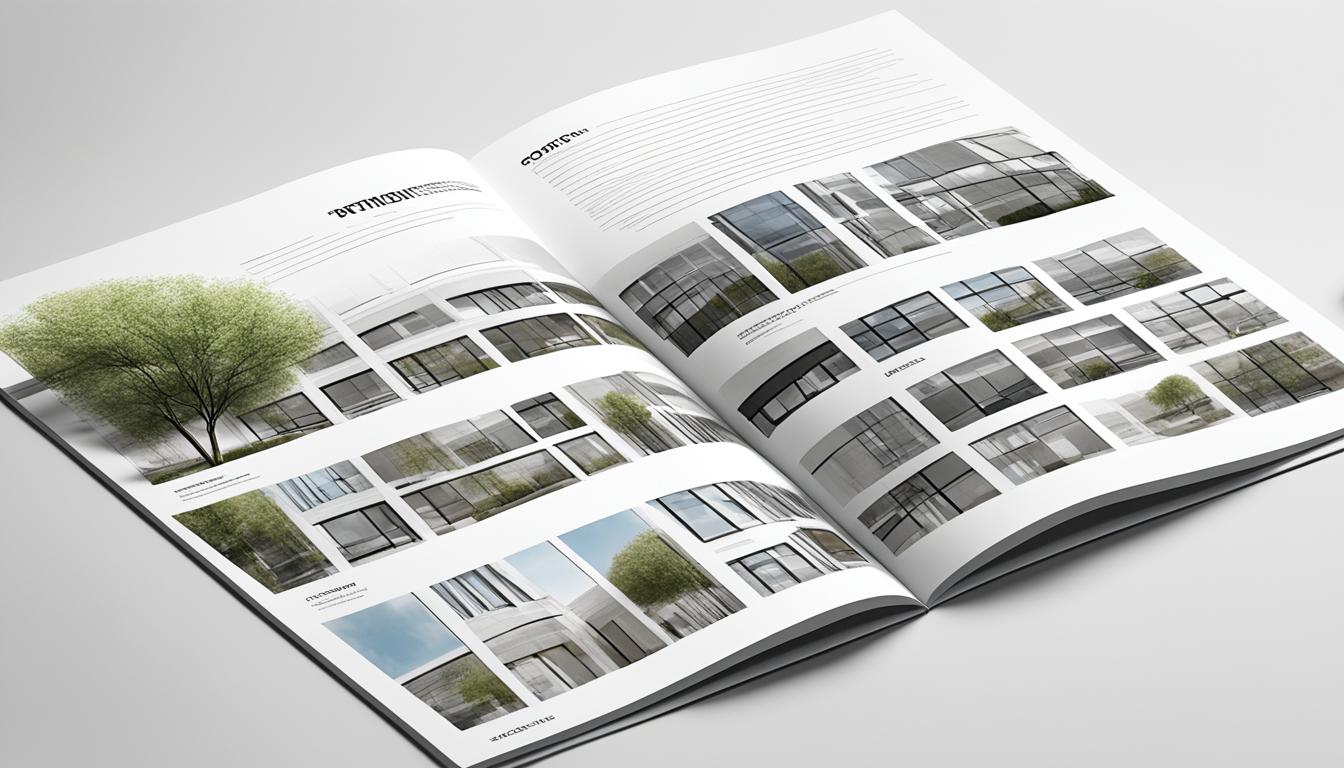
Creating a standout architecture portfolio showcases your range of skills. It lets potential clients or employers see the quality and variety of your work. Here’s how to do it:
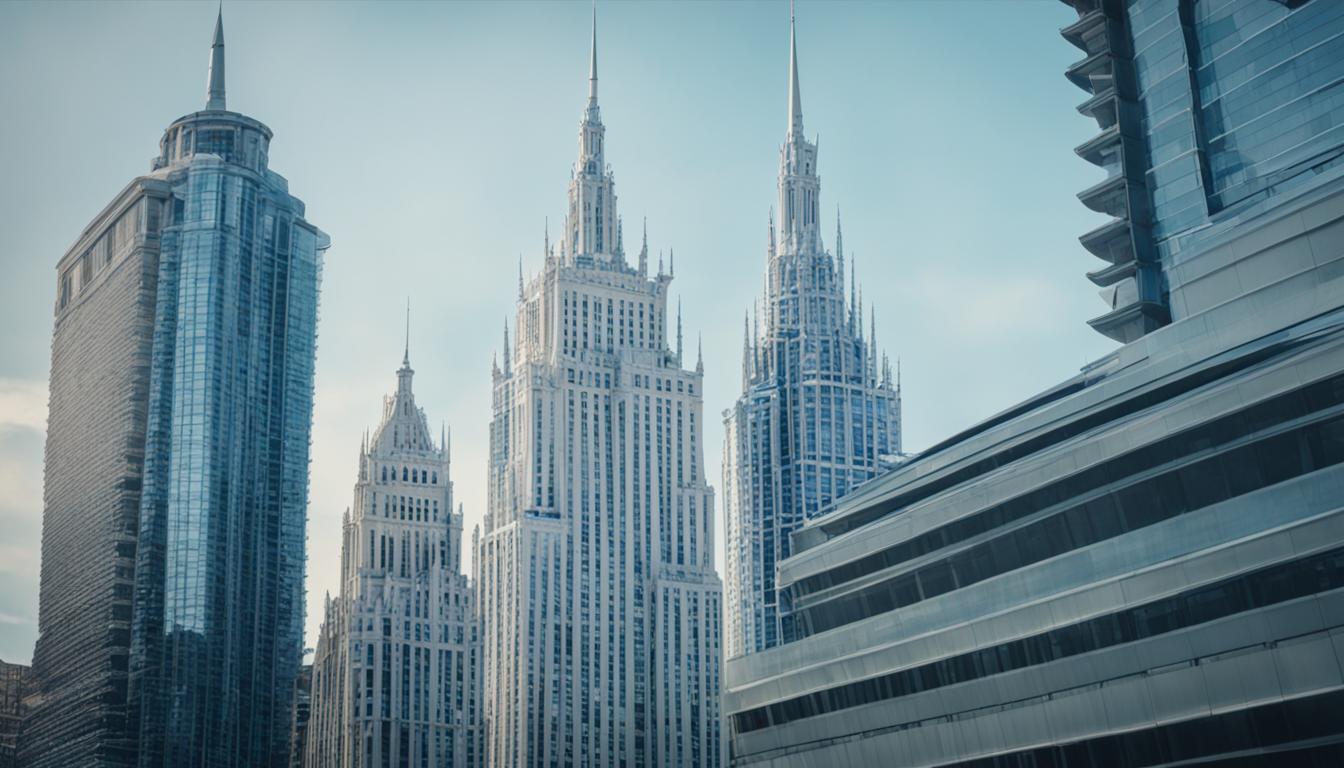
- Select images that represent a wide range of buildings and styles. Include Art Deco, Gothic, Modernist, Neoclassical, Sacred places, and shots from global cities like NYC, Washington DC, London, and Dubai.
- Focus on diversity by adding interior and exterior shots, facades, and architectural details to demonstrate your versatility.
- Use shoot-through umbrellas when capturing interiors to soften light and reduce harsh shadows for a more flattering image.
- Optimize your photos for web viewing in case you plan to publish your portfolio online—resize images to ensure fast loading times while maintaining high quality.
- Employ effective post-processing techniques using Photoshop to correct lens distortion and enhance the dynamics of your buildings’ images for a polished look.
- Compile feedback from peers or mentors familiar with architectural photography; their insights can help refine your selection.
- Organize your portfolio into categories based on architecture styles or locations for easy navigation—this will help viewers grasp the breadth of your experience quickly.
- Make it personal by including a few lines about each project detailing the location, design elements highlighted, and any challenges overcome during the shoot.
- Update regularly with new projects to keep your portfolio fresh and demonstrate ongoing commitment to mastering architectural photography.
Now let’s move onto expert drone photography tips for capturing stunning aerial views of architectural wonders.
Expert Architectural Photography for Real Estate
Expert architectural photography showcases properties in their best light. It’s a powerful tool for real estate sales, highlighting features that attract potential buyers. Here are essential tips:
- Choose the right camera. DSLRs and mirrorless cameras offer the best image quality.
- Opt for wide-angle lenses. They capture more of the scene, making spaces look larger.
- Use a tripod for sharp images, especially in low light.
- Plan shoots during golden hours for natural light that enhances textures and colors.
- Include human elements subtly to give a sense of scale and liveliness.
- Employ HDR techniques to balance bright skies with darker interiors.
- Master Photoshop to remove unwanted objects and enhance your photos’ appeal.
- Create prints up to 80 inches tall or 120 inches wide for impressive presentations.
- Mount photos on dibond substrate face-mounted with ultra-clear acrylic for durability and elegance.
- Utilize tilt-shift lenses to correct perspective distortion – a common issue in architectural shots.
Incorporating these practices will elevate your real estate photography, drawing more interest and higher offers from buyers.
Conclusion
Mastering architectural photography takes practice and the right tools. Cameras with interchangeable lenses capture high-quality images. Tripods, flashes, and editing software like Photoshop enhance shots further.
Techniques matter too—like using light well, finding unique angles, and including people for scale. Stick to these essentials. Your portfolio will grow strong. Together, these tips ensure stunning architectural photos every time.
FAQs
1. What does privacy mean in architectural photography?
Privacy, in this context, means not invading personal spaces or capturing private property without permission. Always respect boundaries.
2. How do portrait photographers adapt to architectural photography?
Portrait photographers bring a unique perspective, focusing on light and composition to highlight buildings’ beauty. Their skills in capturing emotions help them show the structure’s character.
3. Can cookies affect my online portfolio of architectural photos?
Yes, cookies track how visitors interact with your site; they can slow down loading times if not managed well. Keep your browser clean for faster access to your work.
4. Why is it important to keep your browser updated for photography?
An updated browser ensures you see the latest tools and galleries correctly; it helps secure your online portfolio from threats.