Struggling to take your aerial photos to the next level? Drones like the DJI Phantom 4 and Mavic Air have changed the game, making stunning aerial shots accessible. Our guide provides essential tips on everything from choosing the right drone to mastering post-processing techniques.
Get ready to capture breathtaking views!
Key Takeaways
- Pick the right drone for your needs, considering camera quality and flight time. DJI and GoPro have good options for beginners.
- Learn local drone laws to fly safely and respect others’ space. Always check rules before flying, especially near airports or landmarks.
- Shoot photos in RAW format to capture more detail. Use editing software like Photoshop to make your photos look better.
- Use advanced techniques like the Rule of Thirds for great composition. Try different angles and times of day for unique shots.
- Deal with challenges like bad weather by planning ahead. Keep extra batteries handy and maintain your drone well for best performance.
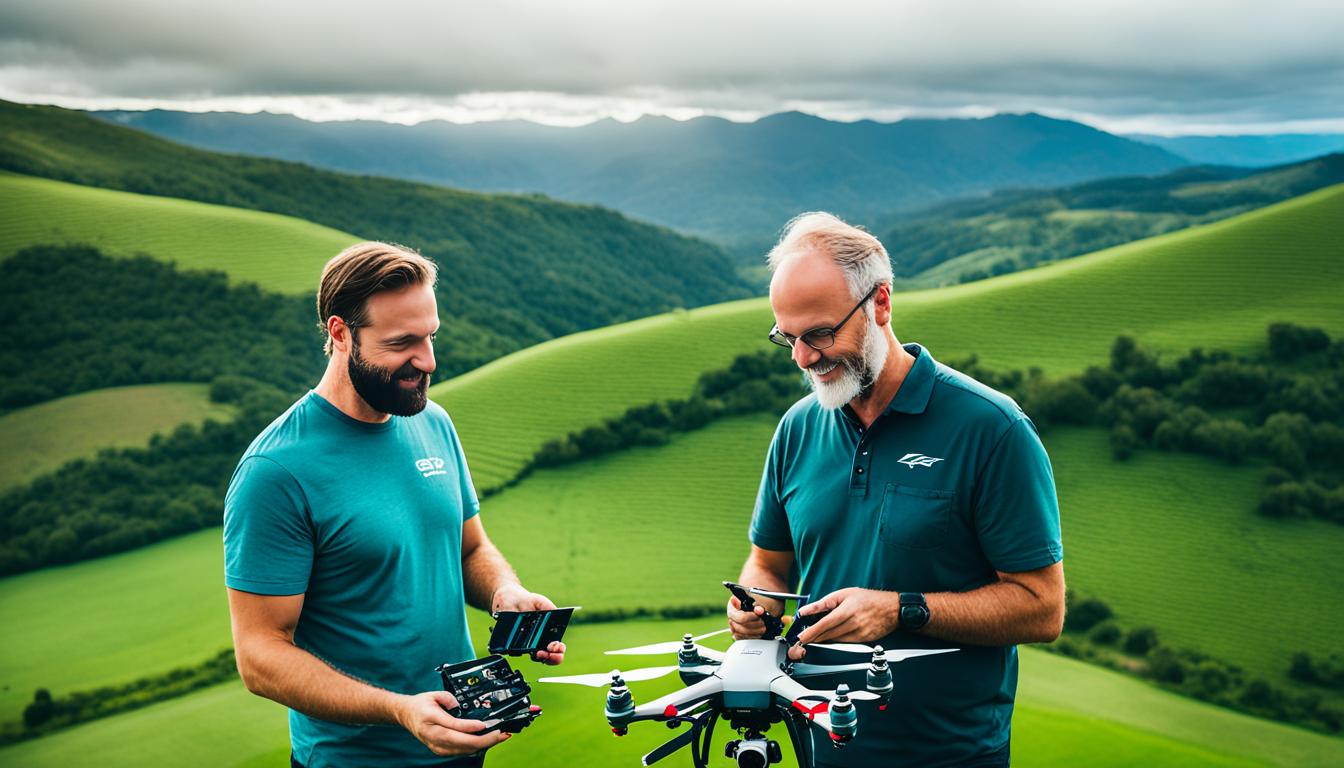
Choosing the Right Drone

Picking the right flying camera means looking at what you need and how skilled you are. Think about its features, like battery life or camera quality, and limits – some might not do well in strong winds or have short flight times.
Based on photographic needs and skills
DJI and GoPro drones cost a few hundred dollars, making them great for beginners. These drones come with smart modes, geofencing, and the ability to send images directly to your smartphone.
Such features make flying easier and let you focus on taking beautiful aerial photos. As you fly more, your photography skills will get better.
Entry-level drones are perfect for starters but upgrade as your skills improve. Flying hours matter a lot in drone photography. The more you practice, the better your aerial images will become.
Smart tracking helps you take smooth shots even if you’re new to this. Start simple, then move up as you learn what works best in different lights and settings.
Consider drone features and limitations
Drones for aerial photography have cameras with up to 20 megapixels. Yet, they pack smaller sensors than those in DSLR cameras. This means while you can capture high-resolution photos from the sky, the detail might not match what a DSLR can offer.
Also, many drones let you stream live video to your smartphone. But drones built mainly for flying may not take pictures as well as those designed specifically for photography. For higher quality shots, attaching a camera like a GoPro is an option.
Choosing the right drone involves balancing its abilities with your needs. If long flights are crucial for catching every sunset and sunrise, check battery life closely—some drones fly longer on a single charge than others.
And if capturing swift sports action is your goal, look for models that excel in stable flight and quick maneuvering. Weather conditions affect flights too; some drones handle wind better than others.
The best drone does not just fly well but also meets your creative demands without compromise.
Best Drones for Photography: Choose Wisely
Choosing the right drone affects your photography. Both DJI and GoPro offer entry-level drones that won’t break the bank.
- DJI Mavic Pro stands out for its high resolution and portability, making it a top choice for aerial imagery. This model captures sharp photos and has a good battery life.
- GoPro’s flying camera models are easier to attach to different mounts, offering flexibility in angles and shots. They excel in capturing action-packed scenes with clarity.
- Consider drones with intelligent flight modes for creative shots. These features help in framing the perfect photograph without constant manual adjustments.
- Look into drones that support RAW format to get the most detail out of your images. Editing RAW files in Photoshop or Lightroom brings out finer details in shadows and highlights.
- Check if the drone has ND filters compatibility to manage exposure times better, especially during bright days or for long exposure photography.
- Drones with auto-exposure bracketing allow you to capture multiple exposures of the same scene at once, useful for achieving high dynamic range (HDR) images.
- Pay attention to drones that offer adjustable aperture settings; this allows more control over the depth of field and exposure, crucial for artistic shots.
- Also, check flight time per charge; longer flights mean more opportunities to capture the right moment from different perspectives.
- Ensure your chosen drone supports SD cards with ample storage space, saving you from frequently swapping cards during shoots.
- While selecting, be aware that weather conditions influence drone performance; some models handle wind and cooler temperatures better than others.
- Explore models with built-in cameras offering wide-angle lenses, which can capture larger areas without needing to fly too far from the subject.
- For night photography lovers, drones equipped with features that enhance low-light performance are essential— they improve image quality under moonlight or urban lights.
By choosing wisely among these options, photographers can immensely enhance their aerial photo capabilities and bring unique perspectives into their work.
Essential Pre-Flight Preparations
Before you fly, know the rules. Check local laws and your drone’s gear to make sure everything’s ready.
Understanding local drone laws
Flying drones come with strict rules. The FAA says you need to register drones weighing between 0.55 and 55 lbs in the USA. This law helps keep everyone safe in the skies. You must also know about no-fly zones, especially near airports and during certain times of the day like past civil twilight without a waiver.
FAA regulations govern flight times, ensuring that pilots fly their drones safely.
I learned quickly to check local drone laws before I even plan my photography trips. In some places, flying at specific heights or close to landmarks is forbidden. Getting familiar with these rules isn’t just about following laws; it’s about respecting others’ safety and privacy while capturing amazing aerial shots.
Pre-flight checklist and equipment checks
A pre-flight checklist ensures a safe and successful flight. Essential add-ons like extra batteries and propeller guards make a big difference.
- Check the drone’s battery level; ensure it’s fully charged.
- Inspect propellers for any damage; replace if necessary.
- Confirm SD cards have enough space for new photos.
- Adjust camera settings to RAW format for high-quality images.
- Set white balance according to current light conditions.
- Verify drone’s GPS signal is strong for location tracking.
- Calibrate the drone’s compass to prevent flight issues.
- Test remote control connections with the drone for responsiveness.
- Pack extra batteries for extended shooting sessions.
- Include neutral density filters to manage exposure in bright conditions.
- Ensure firmware is up-to-date for optimal performance.
- Plan flight path considering local laws and no-fly zones.
From personal experience, taking these steps before flying has saved me from many potential problems, making each flight smooth and productive.
Drone Photography Laws: Stay Informed & Compliant
Drone photography requires you to follow FAA rules strictly. If your drone weighs between 0.55 and 55 lbs, you must register it with the FAA. This step is non-negotiable for anyone looking to take aerial photographs in the USA.
The regulations also cover flight times, including a need for waivers if flying past civil twilight, ensuring safety during all operating hours.
Knowing these rules keeps you legal and safe. Before every flight session, check local laws to avoid fines or worse. For example, some areas have strict no-fly zones or require special permissions for drone flights near landmarks or airports.
Always update yourself on these guidelines before taking off to ensure that both your drone adventures and stunning photography sessions comply fully with current laws and conditions.
Fly Smart: Traveling with Drones Tips & Regulations
Staying informed about drone photography laws sets a solid groundwork. Next, smart flying while traveling with drones means paying close attention to various regulations and tips. Every country has its own set of rules for UAVs (Unmanned Aerial Vehicles).
For example, the Federal Aviation Administration oversees drone flights in the United States. You must register your drone if it weighs more than 0.55 pounds.
Before you fly, check local restrictions and no-fly zones to avoid fines. Airports, national parks, and military bases often have strict no-drone areas. Also, always keep your drone within sight and under 400 feet to ensure safety.
Flying during golden hour brings out the best in your aerial shots but plan around weather conditions like high winds or clouds that can affect stability and image quality. Pack extra batteries for longer flight times and carry all necessary gear in a sturdy case when on the move.
Mastering drone photography goes beyond just capturing images; it’s about understanding where and how you can fly.
Keep these essentials in mind: Register your UAV where required, learn local flight restrictions by heart, choose safe weather conditions for flights, pack wisely for travel with backup batteries—these steps will enhance both your experience and photographic results from above.
Mastering Drone Camera Settings
Getting your drone’s camera settings right makes all the difference. Shoot in RAW to catch every detail, and adjust shutter speed for clear shots—key moves for great aerial photos.
Shooting in RAW format
Shooting in RAW format lets you capture all the data from your drone camera. This means more details and a wider range of colors. It’s key for photo editing because it gives you control to fix exposure, white balance, and color temperature.
Using DJI drones as an example, shoot both JPG and RAW files. This combo balances image quality with manageable file sizes.
RAW files are big but worth it for editing power. They let you pull back details in shadows or highlights. For settings, set your drone camera to auto white balance and pick a normal style or truecolor profile.
These choices offer a good starting point for post-production work on images like adjusting hues or sharpening edges.
Quick camera settings for optimal results
Set your drone camera to shoot in RAW format. This lets you capture more details and edit images easily. For colors that look the same every time, use manual white balance. Instead of auto exposure, go for automatic settings to get the right light in your photos.
Use neutral density (ND) filters for shots with longer exposures. They help control the light entering the lens without affecting colors. This is great for capturing smooth water or clouds during daylight.
By adjusting these settings, you get sharp and vibrant aerial photos.
Drone Photography Basics: Getting Started Guide
To kick off your drone photography journey, make sure you set the camera to shoot in RAW image format. This gives you more control during post-production, allowing adjustments without losing quality.
Use auto white balance for quick shots but switch to manual white balance for consistent colors outdoors. This ensures natural tones across various lighting conditions.
For exposure, stick with automatic settings to get images that are neither overexposed nor underexposed. Optimal results often come from experimenting and finding what setting works best in different environments.
Applying these basic adjustments will significantly improve your aerial shots right from the start.
Now let’s move on to mastering those essential pre-flight preparations…
Advanced Composition Techniques
To take your drone shots from good to great, learn some advanced tricks. Play with the rule of thirds and try new angles…this will make your photos stand out.
Utilizing the Rule of Thirds
The Rule of Thirds is key in drone photography. Imagine your image divided into nine equal parts by two horizontal lines and two vertical lines. Place important elements where these lines intersect or along them.
This technique makes photos more balanced and interesting to viewers. For instance, when capturing landscapes, position the horizon on one of the horizontal lines rather than in the middle of your shot.
This simple act can transform a good photo into a great one.
Using this rule helps highlight patterns and formations from aerial views that are not visible from the ground. It’s not just about balance but also about drawing the viewer’s eye to specific parts of your photo, like a winding river or a unique building among many.
By doing so, you capture stunning shots that stand out. Always aim to use these composition techniques—like leading lines and golden ratios—together with the Rule of Thirds for even more compelling images.
Experimenting with different aspect ratios and angles
Try different shapes and views. Change how wide or tall your photo is. This can make your pictures stand out. Look at things from new angles too. Shoot from up high, down low, or tilt the camera for a slanted look.
Each choice changes how your photo feels.
Shooting straight down shows patterns you can’t see from the ground. Use Google Earth to find cool places to take photos of these hidden designs. Think about using wide angles for big scenes and narrow ones for details.
Next, learn how light changes your shots during different times of the day.
Changing perspectives can transform an ordinary scene into an extraordinary photograph.
Elevate Your Shots: Advanced Composition Techniques in Drone Photography
Use the Rule of Thirds to make your photos stand out. Imagine your image divided by two horizontal and two vertical lines. Place important elements where those lines meet. This technique grabs viewers’ attention, making images more lively.
Experiment with different angles and aspect ratios for unique views. Shooting straight down reveals hidden patterns on the ground not seen from eye level. Changing aspect ratios can alter a photo’s feel, offering new perspectives to explore in drone photography.
Capturing the Perfect Shot
Capturing the perfect shot with your drone involves planning the light and time. Use Tripod Mode for clear shots. Get ready to snap amazing photos!
Planning the lighting and time of day
Good light makes drone photos shine. The best time for this is the golden hour, right after sunrise or before sunset. This light adds warm tones and long shadows to your shots, creating depth.
Midday sun can be harsh, causing overexposure in photos.
For stable shots, use Tripod Mode during these times. It slows down the drone’s movements for smoother videos and sharper images. I’ve found early mornings are less windy too, making it easier to control the drone.
Early morning flights in golden hour light bring out the magic in aerial photography.
Using Tripod Mode for stable shots
Trip to mode on DJI unmanned aircrafts makes your videos smooth and slow. This setting is perfect for taking stable shots without shakes or jitters. It’s like having a virtual tripod in the sky, ensuring your images stay sharp and clear.
To get those professional-looking photos, switch your camera drone to this mode. The difference is clear right away. Even with the slight movements that come from flying, your shots stay steady.
This feature is a game-changer for aerial photography, making it easier to capture stunning landscapes or detailed cityscapes from above.
Mastering Drone Flight for Stunning Aerial Shots
Mastering drone flight unlocks stunning aerial shots. Key maneuvers like pull-away and fly-up-tilt-down bring scenes to life. Use DJI’s Tripod mode for smooth videos. This mode slows down the UAV, making footage stable and cinematic.
Fly drones during golden hours for best light. Plan your angles with composition rules in mind. Shoot RAW for high-quality images you can tweak later. Try different heights and distances to find unique views on common subjects.
Post-Processing Techniques
After you take your drone photos, editing can make them even better. Use software like Adobe Photoshop to adjust colors and use effects making your pictures pop.
Basic editing tips for drone photography
Editing drone photos starts with the right software. Most photographers use Photoshop or Lightroom for this task. Both programs help to adjust colors, lighting, and sharpness. For great results, always shoot in RAW format.
This lets you make bigger changes without losing quality.
Next, focus on the light and mood of your images. Use Lightroom’s filters and presets to add style or correct issues. Play with exposure settings to brighten or darken your photo as needed.
Don’t forget about composition – cropping can help strengthen your picture’s impact by removing unwanted parts.
Exporting pictures is the final step. Save your edited photos as JPEG files for sharing online or printing them out—keeping their quality strong but file size manageable.
Using filters and presets to enhance images
Filters and presets are tools you use after taking a picture. They help make your photos look better or different. Think of them like magic wands that can change colors, light, or even the mood of your photo with just one click.
For example, using a graduated filter tool in Lightroom lets you adjust parts of your photo without changing the whole thing. This is great for making skies look more dramatic.
Presets are like shortcuts to give your photos a certain style quickly. Instead of adjusting settings one by one, you can apply a preset and transform your photo instantly. Many photographers share their own presets, so you can get the same look as theirs in your shots.
Plus, playing with different presets can teach you a lot about what each editing slider does in programs like Lightroom or Photoshop. It’s not just about saving time; it’s also about learning and getting creative with your images.
Elevate Your Shots: Post-Processing Drone Photos
Enhancing drone photos starts with using powerful software like Adobe Lightroom. This tool lets you correct lens distortion, a common issue in aerial shots. You also get to work with the RAW image files your drone captures.
These files hold more detail, making your edits better.
Lightroom shines with its batch editing capability and graduated filter tool. Batch editing saves time by applying adjustments to many photos at once. The graduated filter is great for fixing skies or any part of your photo that needs a gentle touch-up.
Applying these techniques elevates your photography, producing images that stand out for their clarity and balance.
Overcoming Common Challenges
Facing bad weather and short battery life can make drone photography hard. Learn to beat these problems with smart planning and careful maintenance.
Dealing with weather conditions
Weather can make or break your drone photography. High winds and cloudy skies are big challenges. Plan to fly on clear days for the best shots. Check the forecast before you go out.
Your drone’s battery life matters too. Some last 7-10 minutes, while others go for 20-25 minutes. Know how long yours can fly to avoid surprises in the air. Longer flights mean more chances for perfect photos, so pick a drone with good battery life.
Managing battery life and flight time
Most drones fly for 30 minutes or less. Always bring extra batteries. Some only last 7-10 minutes, while others can go 20-25 minutes. To keep shooting longer, swap these power cells quickly.
Know your drone’s flight time limit before starting. This ensures you don’t lose power mid-air.
Plan your shots and know the area to save battery. Use energy-saving modes if your drone has them. These tips help manage short flight times and long photo sessions.
Now, let’s tackle overcoming common challenges…
Drone Maintenance 101: Tips and Best Practices
To keep your drone flying high and capturing stunning photos, regular maintenance is key. Start with the basics: inspect propellers for damage before and after each flight to prevent in-air problems.
Clean lenses and sensors gently to avoid scratches that could ruin your shots. Make sure batteries are fully charged and store them in a cool, dry place when not in use.
Stay ahead with firmware updates—they fix bugs and improve performance. Test flights in open areas teach you how the drone behaves under various conditions while minimizing crash risks.
Follow these steps, using tools like screwdrivers for tightness checks and cloths for cleaning, ensuring your drone stays ready for its next photo adventure.
Drone Photography Techniques and Ideas
Explore new heights and capture breathtaking views with drone photography—get creative with panoramic views, discover the magic of night skies, or snap wildlife in their natural setting.
Explore urban landscapes from above or improve real estate appeal… The possibilities are endless. Keep exploring to find more innovative ways to elevate your imagery game!
Creating Panoramic Images with Drones Simplified
Creating panoramic images with drones requires a simple yet effective approach. First, choose a drone that supports high-resolution capturing, like ones equipped with cameras offering large barrel distortion and wide fisheye lenses.
These features are essential for covering vast landscapes in single shots. Next, plan your flight path to ensure the drone moves smoothly across the scene you intend to capture. Flying at a steady speed helps maintain consistency across frames.
For best results, use software tools such as Photoshop or Lightroom for stitching together the captured frames into one seamless panorama. This post-production stage lets you correct color balance, enhance details using noise-reduction techniques, and adjust exposure for uniform brightness throughout the image.
I found taking multiple overlapping photos at different focal lengths greatly improves the final output’s depth and detail.
Today’s technology makes it easier than ever to create stunning panoramas that offer viewers an immersive experience of any landscape. Moving on, let’s explore how night drone photography can elevate your visual storytelling further by capturing breathtaking views under the stars.
Night Drone Photography: Essential Tips & Tricks
After exploring panoramic shots, night drone photography brings its own magic. Night skies transform scenes with vivid colors and dramatic contrasts. For stunning night shots, first master your drone’s camera settings.
Shoot in RAW format to capture more details in low light. This gives you better quality for editing later.
Use long exposures to let more light into your camera sensor. This trick creates bright photos even at night. But keep your drone steady with Tripod Mode or a similar feature to avoid blurry pictures.
Filters like neutral-density can also help manage light entering the lens, ensuring clear shots without glare.
Know the kelvin scale for managing white balance in nighttime environments. It helps adjust the warmth or coolness in your photos, making them look natural despite artificial lights.
For dynamic scenes, try slow-motion video capturing frames per second (fps) to add an exciting element to footage captured under the moonlight. Keep these tips in mind: shoot in RAW, use long exposures wisely, stabilize your drone for clarity, and adjust kelvin values for perfect white balance at night.
Elevate Your Game: Wildlife Photography with Drones
Using drones for wildlife photography changes the game. It lets you capture animals and birds from angles not possible before. To get the best shots, scout locations with Google Earth first.
This shows where wildlife gathers without disturbing their natural habitat. Keep your drone high enough to avoid scaring animals but low enough for clear shots. Use RAW format to catch every detail in the morning or late afternoon light for stunning colors.
For sharp images, set your drone camera to a low ISO and fast shutter speed to freeze motion. Try different perspectives by changing heights and angles slowly to find unique views of nature’s beauty.
Flying a drone requires practice. So, keep trying until you get that perfect shot of animals in their environment.
Next up, let’s talk about how drones can transform urban landscapes into breathtaking aerial photographs.
Elevate Your View: Urban Drone Photography Tips
Urban drone photography opens up new angles and perspectives in cityscapes. For sharp images, shoot at higher resolutions. This captures the intricate details of buildings and streets.
Always check your drone’s battery life before flying; you don’t want it to run low while capturing a sunset over skyscrapers. Use Google Earth to scout interesting urban locations from above.
Plan shots around golden hours—early morning or late afternoon—for soft lighting on structures. Set your drone camera to RAW format for high-quality post-production editing with tools like Photoshop or Lightroom.
Experiment with aspect ratios for dynamic compositions that highlight urban geometry—tall buildings against wide skies make striking scenes. Fly safely by knowing local laws, ensuring you capture the beauty of cities without trouble.
Elevate Your Images: Landscape Photography with Drones
Landscape photography with drones changes how we capture the Earth’s beauty. With a drone, you reach places your feet can’t take you. Fly it high to catch wide fields and deep valleys or hover over a waterfall for a mesmerizing top-down view.
Use Google Earth to find those hidden gems where few photographers have ventured. For striking photos, shoot during the golden hour when the light softens and enriches colors.
Master composition by applying the rule of thirds; place interesting elements like a lone tree or winding river at intersecting lines for balance. Experiment with different aspect ratios to see what best frames your landscape.
Always shoot in RAW format to get every detail from shadows to highlights, ensuring your images have depth and life after post-processing with tools like Lightroom or Photoshop, adding filters that make colors pop or adjusting exposure for perfect balance.
This approach guarantees breathtaking landscapes that stand out in any collection, sharing new perspectives of familiar places through aerial shots that captivate viewers’ imaginations.
Elevate Your Property Sales with Drone Photography
Drone photography changes how we sell properties today. Aerial shots give potential buyers a bird’s-eye view, showcasing the entire property and its surroundings in one glance. For real estate agents, drones are powerful tools.
They capture not just the house but also the neighborhood, nearby amenities, and unique landscapes. This wide perspective makes listings stand out online where most buyers first look.
Using drones for property sales means more than just taking high pictures. It involves planning shots during golden hours for soft lighting, using RAW format for the best quality images, and applying post-production skills to enhance these photos further with software like Photoshop or Lightroom.
Filters and presets can adjust specific parts of a photo without affecting others thanks to tools like the graduated filter in Lightroom. Experience shows that well-crafted drone images can speed up sales by attracting more viewers and engaging them better than standard ground-level photos ever could.
Elevate Your Game: Sports and Action Photography with Drones
Sports and action photography reach new heights with drones. Capture moments from above that traditional cameras can’t. With drones, you get dynamic angles of athletes in motion, making every shot unique.
For the best results, use drones with high frames-per-second rates to freeze fast action. Include features like optical zoom for close-ups without disturbing the scene.
Shoot during golden hours for soft light that enhances textures and colors on the field or track. Experiment with long-exposure shots for creative effects like light trails at night games.
Always plan your flight path to avoid missing key moments. Next up, see how wildlife photographers are using drones to bring nature closer than ever before.
Conclusion
Master drone photography with essential tips and unlock stunning aerial shots. Choose the right flying camera, learn the laws, and master your skills. Drones let you capture amazing photos from the sky – different angles, unique views.
Keep practicing. Your best shot is waiting up there.
FAQs
1. What’s the best shutter speed for drone photography?
Use fast shutter speeds to capture sharp images from high above. This stops motion blur, making your aerial shots crisp.
2. How do neutral-density filters improve drone photos?
Neutral-density filters control light entering your lens, allowing longer exposure without overexposure… They enhance image quality under bright conditions.
3. Can I use post-production to fix my drone photos?
Absolutely, yes! Post-production tools let you retouch and adjust colors—think HSL (Hue, Saturation, Lightness) adjustments—to make those aerial shots pop.
4. Should I shoot in JPG or RAW with my drone camera?
Shoot in RAW for quality and flexibility in post-editing. Unlike JPG files, RAW captures all image data received by the sensor, giving you more to work with during editing.
5. Why is field of view important in drone photography?
Field of view affects how much of the scene your camera captures… A wider field of view grabs more landscape but can distort edges; choose based on what suits your shot best.