You want to freeze time at events, capturing moments that last forever. Event photography plays a crucial role in documenting significant occasions like weddings and corporate gatherings.
This article will guide you through the essential tips for snapping unforgettable images, ensuring no special moment slips away unnoticed. Discover how to make every shot count….
Key Takeaways
- Talk to the event planner and client to know what moments are important. This helps make a list of must-take photos.
- Pick the right camera, lenses, and extra gear like batteries and memory cards. These tools help take sharp pictures.
- Learn how to quickly change camera settings and keep an eye out for special moments to capture candid shots well.
- Use good light when you can. Try shooting in early morning or late afternoon for softer images.
- Always ask people if it’s okay before taking their photo, especially in private places. This respects their privacy.
Essential Preparations for Event Photography

Before snapping photos at any event, making a plan is key. Talk to the event organizer, set clear goals with your client, and list all must-capture moments—it sets you up for success.
Coordinate with the event planner
Talk to the event planner early. You need all key details about the corporate events or weddings you’ll photograph. This chat sets everything straight – from schedules to must-have shots.
For example, knowing the timeline helps you catch every important moment without missing a beat.
Use what you learn from them to meet your client’s needs perfectly. If they expect candid photographs, plan your positions and timing ahead of the day. By understanding these expectations clearly, you deliver exactly what clients want, making both you and them happy with the outcome.
Understand client expectations
After coordinating with the event planner, it’s crucial to focus on the client’s needs. Clients expect clear outcomes from their event photographers. They want memories captured in a style that matches their vision.
Talk to them about what moments they value most. Ask for examples of photos they like.
Create a shot list based on the client’s preferences.
This step ensures no important detail is missed during the event. Whether it’s wedding photography or a commercial photographer working on an architectural project, understanding these expectations sets the stage for success.
It guides your work and helps meet deliverables firmly agreed upon by both parties.
Develop a comprehensive shot list
Developing a comprehensive shot list ensures you capture every important moment. It meets the client’s preferences and captures both big events and small details.
- Meet with the event planner to align on key moments. This includes ceremonies, speeches, and performances.
- Ask clients about must-have photos. These often involve group shots, venue images, and special traditions.
- List scheduled items with their times. Note the first dance, cake cutting, and award presentations.
- Include small details in your list. Capture decorations, food setups, and architectural features of the venue.
- Plan for candid shots of guests enjoying themselves. Look for laughs, dances, and spontaneous hugs.
- Identify areas with good lighting for portraits. This helps plan where to take key shots ahead of time.
7.Show examples from past events to help clients decide what they like. Use Instagram or an e-mail portfolio for easy sharing.8.Decide on backup spots for bad weather if the event is outdoors. Have indoor locations ready just in case.
9.Add notes on any special gear needed for specific shots. This might include lenses for low light or drones for aerial views.
Next up: We’ll talk about essential equipment every event photographer needs to bring along.
Working with Clients: Planning and Communication Tips
To capture memorable moments, photographers must plan and communicate effectively with clients. Setting clear expectations about deliverables ensures both parties are satisfied.
- Always meet with the client early to talk about the event’s details. This includes the type of event, whether it’s a wedding or a corporate gathering.
- Ask the client what moments they value most. Some might want candid photos, while others prefer posed shots.
- Create a detailed shot list together. Include must-have photos like key speakers at a conference or the first dance at a wedding.
- Discuss any extra shots you plan to capture beyond their request list. This shows initiative and dedication to your work.
- Confirm event schedules, including start and end times, to make sure you capture all important moments.
- Go over any special requirements for the event, such as low-light conditions or space limitations, so you can prepare appropriately.
- Agree on how and when you’ll deliver final images. Clients appreciate knowing when they’ll see their photos.
- Address pricing clearly with your client before the event starts; include details on packages or any additional costs for extra hours.
Next, we’ll explore recommended equipment for event photography to ensure top-quality captures.
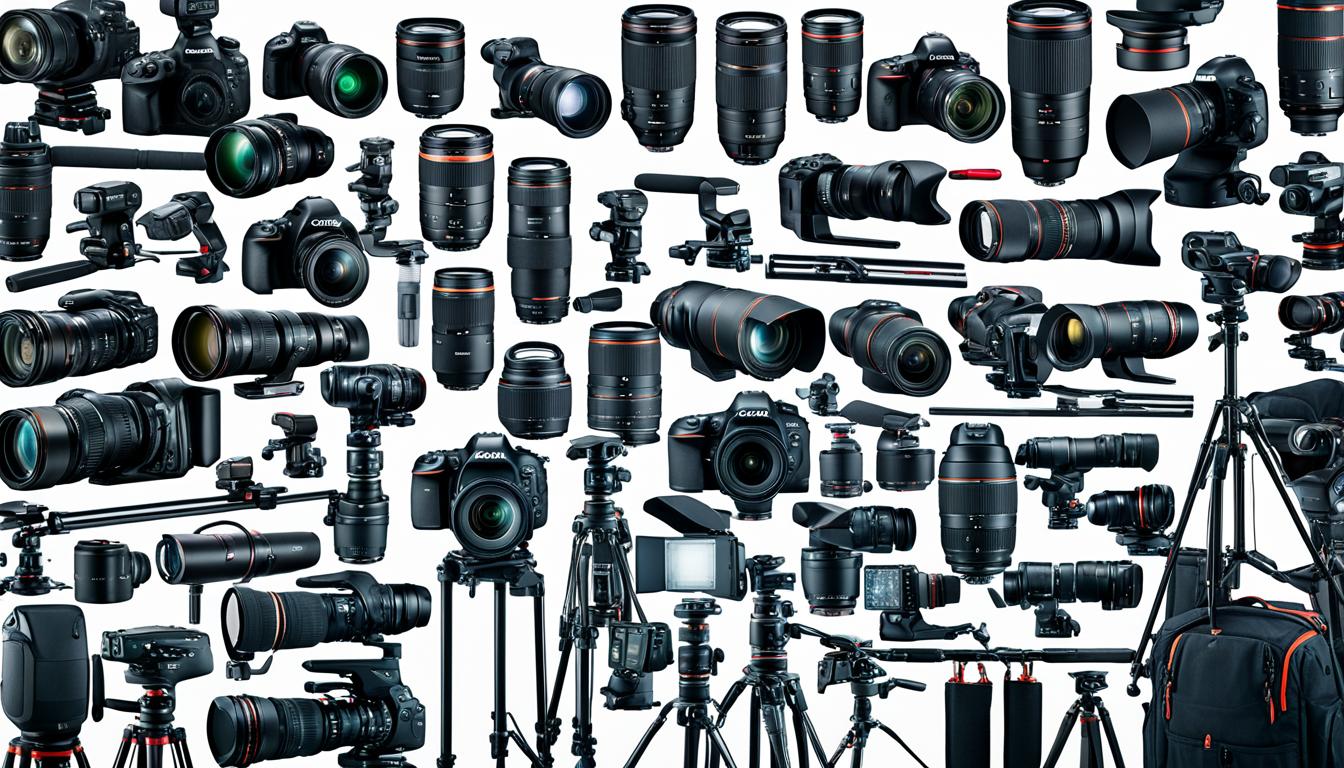
Recommended Equipment for Event Photography
For event photography, picking the right camera and lenses is key—they help you capture sharp, stunning pictures. Don’t forget your must-have extras too, like memory cards and a sturdy tripod.
Want to know more? Keep reading to learn all about the tools that make great photos happen!
Best cameras and lenses
Choosing the right camera and lens can make a huge difference in event photography. Experienced photographers use two DSLR cameras to capture every detail. Here is a list of the best options available:
- Full-frame DSLRs offer superior image quality, especially in low light. Canon’s EOS 5D Mark IV and Nikon’s D850 are top picks for their high resolution and fast autofocus.
- Crop sensor cameras, like Canon’s EOS 7D Mark II and Nikon’s D500, provide great value. They have excellent speed and quality but at a lower cost than full-frame models.
- Mirrorless cameras are gaining traction among event photographers for their compact size and lightweight. Sony’s Alpha A7 III stands out with its impressive autofocus system and high ISO performance.
- Prime lenses, such as the 50mm f/1.8, are essential for sharp portraits with beautiful background blur, making them perfect for weddings or architectural photography.
- Zoom lenses offer flexibility in framing shots without changing your position often. The 24-70mm f/2.8 and 70-200mm f/2.8 lenses are versatile choices that cover a wide range of focal lengths.
- Wide-angle lenses capture expansive scenes and large groups of people, vital for event settings. The Canon EF 16-35mm f/2.8L III USM lens is a favorite for its clarity and edge-to-edge sharpness.
- Fast shutter speeds freeze action without blur, crucial for capturing candid moments at events; thus, lenses with wider apertures (lower f-numbers) are preferred.
- For social media sharing, consider cameras with built-in Wi-Fi or Bluetooth connectivity like the Nikon Z6 or Canon EOS R, making it easy to post photos directly from the camera.
This selection covers a broad spectrum of equipment customized to meet various needs in event photography, ensuring no moment goes uncaptured.
Essential accessories
After choosing the best cameras and lenses, the next step is picking the right accessories. These items ensure your event photography goes smoothly.
- Extra batteries – You’ll never miss a shot due to dead equipment.
- Memory cards – Carry multiple cards to store all your photos.
- Flash – A must-have for low-light situations at events.
- Tripod – It stabilizes your camera for sharp images.
- Camera bag – Protects gear and keeps everything organized.
- Lens cleaning kit – Keeps lenses spotless for clear pictures.
- Reflectors – Improve lighting by bouncing light onto subjects.
- Remote shutter release – Lets you take photos without touching the camera, reducing blur.
- Water-proof covering – Shields your camera from rain or spills.
- Assistants’ contact list – Helps quickly gather names of people in the photos.
These 10 essential accessories will prepare any event photographer, whether it’s for wedding photography or architectural photography, to capture memorable moments without a hitch. Make sure each item is ready before you head to your next event.
Top Essential Gear for Event Photographers Guide
Every event photographer needs reliable equipment. Two DSLR cameras are a must. They ensure you keep shooting even if one fails. Extra batteries and memory cards are just as crucial.
You can’t capture moments if your camera dies or runs out of space.
Lenses matter too, from wide angle to telephoto, for different shots. A good flash helps in low light. Don’t forget a sturdy bag to carry it all.
Next, let’s talk about working with clients before the event starts…
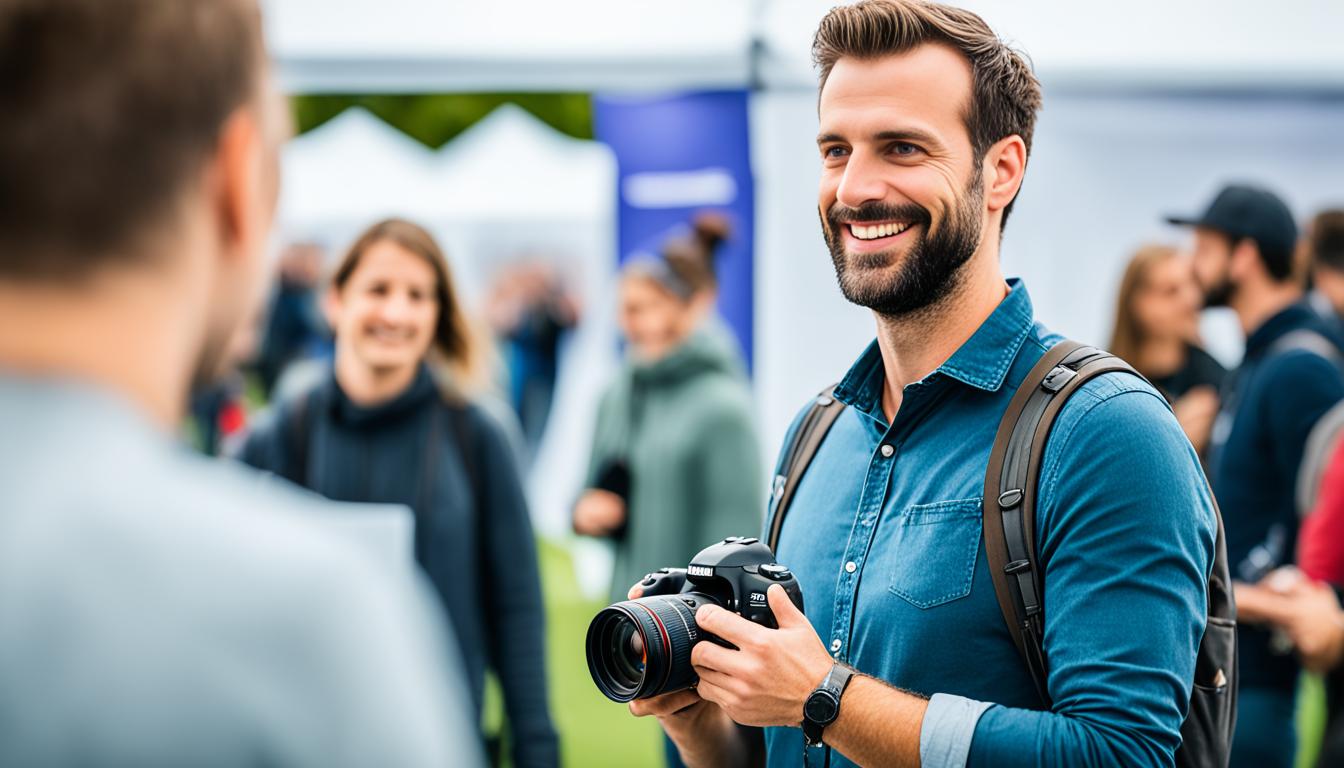
On-Site Strategies for Capturing Memorable Moments
Once on-site, be quick to adapt and watch everything closely. Chat with guests without getting in their way, and use your camera to frame shots best.
Stay adaptable and observant
Staying adaptable means changing camera settings quickly. You might need to adjust the shutter speed based on lighting or action. Always be ready for both planned and surprise moments that make an event special.
Keep your eyes open for smiles, laughter, and emotions that tell a story.
Engage with guests gently but focus mainly on taking photos. Balancing this act ensures you capture candid shots without getting in the way of the experience. Use your understanding of composition and framing to make each photo stand out.
The key to great event photography is not just capturing what happens but how it feels.
Next, let’s talk about legal issues like contracts and copyrights in event photography.
Engage with guests while remaining unobtrusive
Be a friend, but don’t get in the way. This means blending into the crowd like you’re part of it, yet always ready to catch those special moments without being noticed much. A good idea is having an assistant mingle among guests.
They can learn names and share them with you quietly. This makes for personal, meaningful shots without feeling intrusive.
Use your camera’s zoom to capture emotions close-up from a distance. Keep movements smooth and slow—no sudden dashes or standing out too much. After snapping a quiet moment or two, move on so people forget you’re there with your gear—a wedding photographer’s trick for genuine smiles and natural poses.
Next up: mastering the art of framing those perfect event photos…
Mastering Composition and Framing in Event Photos
After engaging with guests and blending into the event, focus shifts to mastering composition and framing in your photos. This skill turns good pictures into unforgettable memories. Here’s how:
- Start by understanding the rule of thirds. Imagine your image divided into nine equal parts by two equally spaced horizontal lines and two vertical lines. Place important elements along these lines or at their intersections.
- Use leading lines to guide the viewer’s eye. Roads, fences, or even a row of trees can draw attention to the main subject.
- Know when to break rules for creative shots. Sometimes, placing your subject off-center creates a more interesting photo.
- Pay attention to backgrounds. A cluttered or distracting background can ruin an otherwise perfect shot.
- Look for symmetry and patterns as they add interest and balance to photos.
- Capture different perspectives by changing your shooting angle or position. Shoot from high above, down low, or get closer to your subject for a fresh view.
- Incorporate framing elements like doorways or windows to focus on the subject and add depth.
- Experiment with depth of field to make your subject stand out from the background or foreground.
- Capture candid moments besides posed shots; these often hold the most genuine emotions.
- Use natural light whenever possible for softer, more flattering images; early morning or late afternoon light is usually best.
- Keep an eye on small details that tell a bigger story about the event; these shots are often appreciated by clients.
- Move around during events to capture different angles and moments you might not see if you stay in one spot.
- Encourage spontaneous actions among guests; interactions can lead to dynamic shots.
- Include architectural features when relevant; they can add grandeur and context to your event photographs.
- Always shoot more than you think you need. Different angles and variations give both you and the client options during selection.
Each point leverages extensive experience at countless events, ensuring every captured moment is meaningful. Finding new ways to see through your lens makes event photography exciting year after year.
Tips for Capturing Candid Moments at Events
Capturing candid moments at events creates unforgettable memories. It requires a keen eye and quick reflexes. Here are some tips:
- Sync with the event planner before the day. Know the schedule so you can be in the right spot at the right time.
- Talk to your client about what moments they see as must-haves. This ensures you focus on capturing those key interactions.
- Keep your camera ready all the time. Candid shots happen fast, and you won’t get them if you’re not prepared.
- Move around a lot but stay out of sight as much as possible. Being invisible helps guests act more naturally, making your photos genuine.
- Use a long lens for candid shots from afar. This lets you capture intimate moments without intruding on people’s personal space.
- Observe groups laughing or talking closely; these are gold mines for candid photography.
- Shoot lots of photos to increase your chances of getting that perfect shot.
- Always aim for natural light but have your flash ready for low light situations to avoid missing any action.
9 Stories connect us, so look for emotions and interactions that tell them—like tears during speeches or laughter during dances.
10 Pay attention to little details—like hands holding or children playing—which often make for powerful images.
Using these strategies has helped me catch countless memorable moments unnoticed, blending skills with observation to document events authentically and beautifully.
Legal and Ethical Aspects of Event Photography
In event photography, knowing the laws and right ways to behave is key. This includes handling contracts well and respecting people’s privacy. Always get permission before sharing photos, and make sure you’re fair in your work.
If this grabs your interest, there’s more to explore.
Event Photography Law, Contracts, and Copyrights Guide
Event photography involves capturing special moments, but photographers must understand laws and contracts. Clear expectations with clients about photo use and copyrights are a must.
This means knowing who can use the photos and how. A contract should state this clearly to avoid legal issues. Photographers need permission to distribute images, especially when they sell them or use them in their portfolio.
Getting consent from people you photograph is also critical for respecting privacy rights. Backing up images in several places ensures you meet your promises to clients. Next, we’ll explore ethical considerations that matter just as much as the technical side of event planning and architectural photography.
Ethical Considerations in Event Photography Tips
Taking photos at events means catching special moments. You must do it right and fairly. Here are tips to keep in mind:
- Always ask for permission before taking photos of guests, especially in private settings. This respects their privacy.
- Use contracts that explain how you’ll use the photos. This makes everything clear from the start.
- Don’t block guests’ views during ceremonies or speeches. You need to be sneaky and considerate.
- When posting photos online, get consent if people’s faces are clear in the shot. This avoids any upset later on.
- If someone asks not to be photographed, respect their wishes without question.
- Keep editing true to the real scene; don’t alter images too much that they mislead viewers about what happened.
- Credit anyone else’s work you share or use for inspiration, like architectural photography ideas from famous photographers.
These steps ensure you’re fair and trustworthy as a photographer.
Now, let’s move onto marketing strategies for event photographers…
Marketing and Business Strategies for Event Photographers
For event photographers, smart marketing and solid business plans open doors. Use social media, create an eye-catching portfolio, and set the right prices to stand out. Ready to shine in the photography world? Learn more now!
Event Photography Business: Marketing and Pricing Tips
Growing your event photography business requires smart marketing and clear pricing. Create a plan that sets you apart from the competition.
- Set up a professional website with a portfolio showcasing your best shots across various events such as weddings, corporate gatherings, and music festivals. Include sections for testimonials, services offered, and contact information.
- Offer package deals to meet different client needs and budgets. Start with basic coverage and allow add-ons like extra hours, special editing, or architecutural shots for an added fee.
- Use social media platforms like Instagram to share your work regularly. Tag venues and clients (with their permission) to increase visibility.
- Network with event planners, venue managers, and other photographers. Personal connections can lead to referrals.
- Provide exceptional service before, during, and after the event to encourage word-of-moth referrals. Happy clients are likely to recommend you.
- Participate in local bridal shows or trade fairs related to events you specialize in photographing. Set up a booth displaying your portfolio.
7.Sign contracts detailing deliverables, deadlines, and prices upfront to avoid misunderstandings later.
8.Invest in search engine optimization (SEO) for your website so potential clients find you online when searching for event photographers.
9.Advertise special promotions during off-peak seasons to attract more bookings.
10.Ask satisfied clients for reviews on popular platforms like Google My Business or Yelp.
11.Learn Adobe Photoshop Lightroom to enhance your photos quickly; this skill adds value to what you offer clients.
12.Price yourself competitively but don’t undervalue your work; research what others in your area charge for similar services.
13.Update your portfolio regularly with new work to show potential clients the range and quality of your photography.
Each step helps build a stronger business foundation, attracting more clients while satisfying the ones you already have.
Craft Your Event Photography Portfolio Now
After setting your event photography business strategies, it’s time to build your portfolio. A strong portfolio showcases your best work and captures a wide range of emotions and moments at events such as weddings and corporate gatherings.
Use Adobe Photoshop Lightroom for editing; it allows you to create custom presets that make your photos stand out.
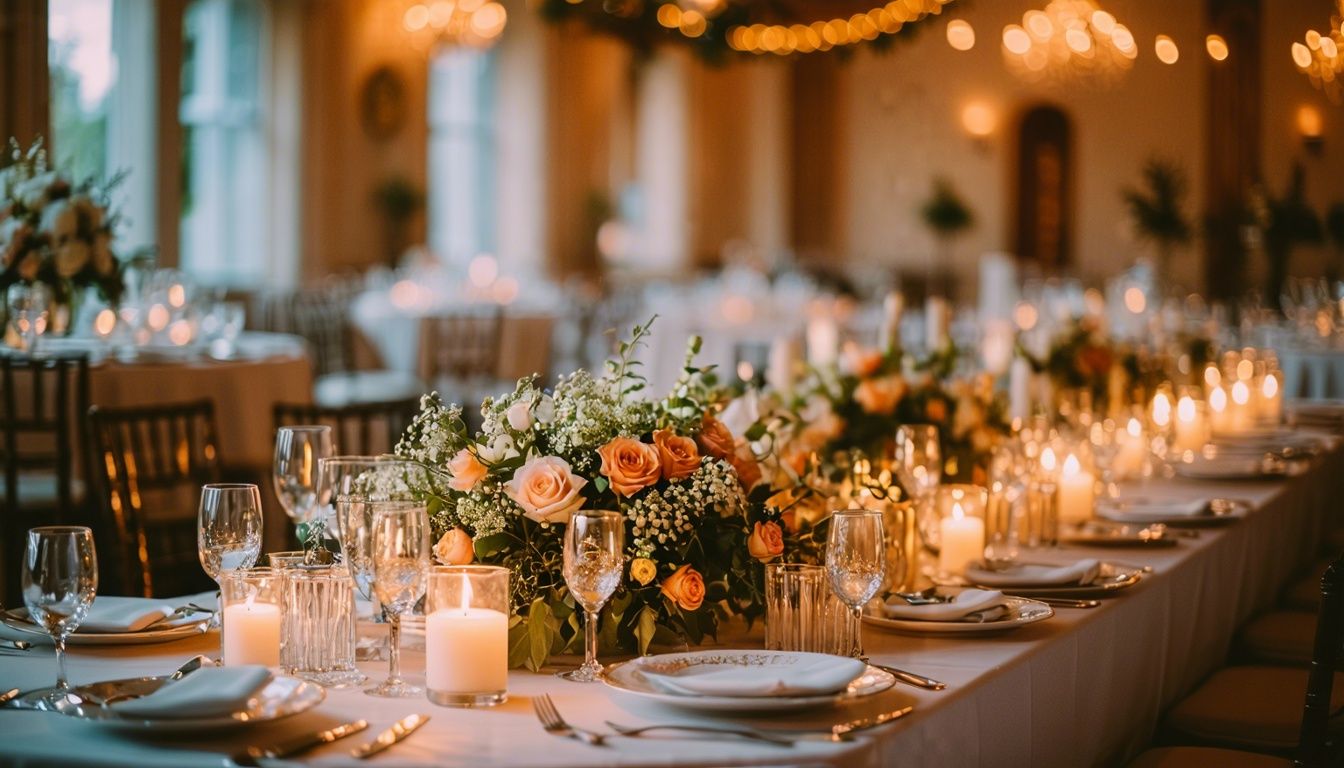
Include pictures from different stages of an event—from the setup to the climax. Make sure you have shots of key moments, like speeches at a gala or the first dance at a wedding.
Add these images in varied settings—both indoor receptions and outdoor festivals—to show versatility. Your portfolio should tell a story that potential clients can see themselves in.
A picture is worth a thousand words, but a great portfolio opens doors to countless opportunities.
Social Media Event Photo Tips: Sharing and Tagging
Social media can turn event photos into lasting memories. Sharing and tagging correctly boosts visibility and engagement. Here are tips for doing it right:
- Use hashtags wisely. Pick 3-5 relevant ones, like #eventphotography or #architecturalphotography, to reach a larger audience.
- Tag locations and people to increase photo discoverability.
- Post at optimal times for your target audience, usually evenings or weekends, to ensure maximum engagement.
- Create a story sequence of photos to share the event’s narrative and keep followers engaged.
- Engage with comments and shares promptly to build community around your photos.
- Offer sneak peeks on Instagram or Facebook stories to generate buzz before full album release.
- Share behind-the-scenes shots for an authentic look at the event experience from your perspective as the photographer.
- Credit vendors, venues, or other contributors in your posts to foster industry connections and show professionalism.
Moving onto post-event workflow details…
Post-Event Workflow
After the event ends, it’s time to sort and edit photos fast. Use software for organizing and tweaking images, making sure clients get their memories quickly.
Backup and batch editing techniques
Backup and batch editing save time and prevent photo loss. Adobe Photoshop Lightroom lets photographers create custom presets for quick edits.
- Always back up photos in two places right after shooting, like an external hard drive and cloud storage.
- Use memory cards with large storage to avoid losing images during the event.
- Implement Adobe Photoshop Lightroom for batch editing. This software speeds up the process by applying edits to multiple photos at once.
- Create presets in Lightboard for different lighting conditions encountered at events. This simplifies adjusting similar groups of photos.
- Organize photos into folders by event sections, like “Ceremony”, “Reception”, and “Portraits”. It makes finding specific images easier for editing.
- Review all images first, mark the best ones, then start batch editing those. It ensures you’re working on the most important pictures.
- After editing, back up edited versions in at least two locations, such as a different external hard drive and online backup service.
- Share samples with clients from these backups to get quick feedback without risking the entire collection.
Applying these steps guarantees safety for your work and streamlines your post-event workflow, making more time for photography itself.
Delivering final images to clients
Choose the best photos for your clients carefully. Make a web gallery to share these top picks with them. This method is quick and straightforward, ensuring they get their memories without delay.
A picture is worth a thousand words, but the right picture is priceless.
Using a web gallery speeds up delivery and lets clients easily view and choose their favorite images from architectural photography events or any gathering. This step marks the end of your professional journey with them, leaving a lasting impression.
Tips for Efficient Workflow at Big Events
Big events need smart planning to capture every moment. A good workflow saves time and keeps things moving smoothly. Here are tips to make it happen:
- Coordinate closely with event organizers early. Know the schedule, key moments, and locations before the day.
- Use Adobe Photoshop Lightroom for quick edits. Create custom presets for the event to speed up editing later.
- Pack extra batteries and memory cards. Running out can mean missing crucial shots.
- Organize gear the night before. Check cameras, lenses, and accessories to avoid last-minute issues.
- Assign roles if working in a team. Make sure everyone knows their tasks and areas to cover.
- Develop a shot list with must-have photos. This ensures important moments aren’t missed.
- Plan your positions for main events ahead of time. Knowing where you’ll shoot from saves precious time during the event.
- Keep backup equipment ready. Having a spare camera or flash can be a lifesaver if something fails.
- Backup photos as you go, if possible.Use portable hard drives or cloud storage for extra safety.
- Keep an eye on lighting changes.Tweak camera settings accordingly to maintain photo quality.
Each step helps manage big events better, leading into mastering low-light scenarios next …
Essential Post-Processing Tips for Event Photographers
Event photographers capture moments that last a lifetime. Post-processing is crucial to turn good photos into great ones. Here are essential tips for event photographers:
- Use Adobe Photoshop Lightroom for editing. This software helps manage large sets of photos.
- Create custom presets in Lightroom. This saves time by applying the same adjustments to multiple photos.
- Craft a custom vignette effect. This fades elements at the edges to focus on the main subject.
- Review every photo for sharpness and clarity. Delete any that don’t meet standards.
- Adjust exposure and contrast to make sure photos pop.
- Fine-tune colors to reflect the atmosphere of the event accurately.
- Crop photos to improve composition and direct attention.
- Remove unwanted objects or blemishes using the healing tool in Lightroom.
- Apply noise reduction for clear images, especially in low-light conditions.
- Check white balance to ensure natural-looking skin tones and environments.
11 Show before-and-after views while editing, ensuring changes enhance the photo naturally.
12 Sync edits across similar photos to maintain a consistent look throughout the album.
Specialized Event Photography Techniques
Learn how to catch feelings and vibes with your camera in low light or using flash. Explore wide scenes too. Keep reading for tricks on making every shot tell a story.
Master Event Photography: Capture Emotion and Atmosphere
To master event photography, focus on capturing emotion and atmosphere. Use a camera that suits fast-paced environments. For instance, DSLR cameras offer quick focus; perfect for snapping candid emotions at events.
Adobe Photoshop Lightroom helps in refining these shots to highlight the mood of the venue.
Capture not just the moment, but the feeling.
Atmosphere comes alive with architectural photography techniques. Play with light and shadows to bring out details in the venue’s design. This adds depth to your photos, making viewers feel like they are part of the scene.
Combining technical skills with an eye for emotion turns good photos into unforgettable stories.
Master Low-Light Event Photography Techniques
Low-light conditions challenge even the best event photographers. Mastering this requires practice and understanding your gear well.
- Use a camera with great low-light capabilities. Models like the Canon EOS-1D X Mark III or Nikon D850 perform well in dim settings.
- Choose lenses with wide apertures, f/2.8 or wider, such as the Sigma 35mm F1.4 Art, to let in more light.
- Increase ISO but keep it as low as possible to avoid noise; modern cameras can handle higher ISO levels without losing image quality.
- Slow down the shutter speed to allow more light but use a tripod to prevent camera shake.
- Practice manual focus since auto-focus may struggle in low light; some cameras have special features to help with this.
- Experiment with white balance settings to correct color shifts that often happen in artificial lighting.
- Bring an external flash but bounce the light off ceilings or walls instead of direct on subjects to avoid harsh shadows.
- Work on your post-processing skills, especially noise reduction and exposure adjustments, using software like Adobe Lightroom.
- Capture RAW images for greater flexibility during editing; this format records all data from the sensor, giving you more control.
- Always scout the location beforehand if possible, noting lighting sources and potential challenges.
By following these steps, photographers can turn challenging low-light conditions into opportunities for capturing memorable moments without compromise.
Event Flash Photography Tips: Capture the Moment
Event flash photography lights up moments that might otherwise get lost in the shadows. It turns ordinary scenes into vivid memories with clarity and depth.
- Always check your flash battery before the event to ensure it lasts.
- Use a diffuser on your flash to soften the light, reducing harsh shadows on faces.
- Balance flash intensity by adjusting settings based on ambient light; this keeps photos looking natural.
- Position yourself strategically to avoid red-eye effects or awkward shadows.
- Practice bouncing flash off ceilings or walls for even lighting, enhancing architectural photography elements.
- Engage with guests to capture candid moments with genuine emotions using quick flash adjustments.
- Experiment with off-camera flash setups for creative lighting angles, adding dimension to your photos.
- Adobe Photoshop Lightroom presets can streamline editing, making shots consistent in style and tone.
- Create custom vignettes using Lightroom to focus attention on subjects and fade distracting backgrounds smoothly.
These tips ensure memorable moments are captured clearly, making every photo stand out in an event photographer’s portfolio.
Master Panoramic & 360 Event Photo Techs
Capturing panoramic and 360-degree photos turns ordinary event coverage into an immersive experience. Carrying two DSLR cameras is crucial for photographers aiming to master these techniques.
- Use a tripod with a fluid head to ensure smooth pans and tilts, vital for stitching together seamless panoramas.
- Select wide-angle lenses to capture expansive scenes in architectural photography, providing a broad view with minimal distortion.
- Employ Adobe Photoshop Lightroom for editing; its ability to create custom presets speeds up the post-processing of panoramic and 360-degree images.
- Practice shooting in manual mode to maintain consistent exposure and white balance across shots that will be combined.
- Invest in a panoramic head attachment for your tripod; this helps rotate the camera precisely around the nodal point, reducing parallax errors in stitched photos.
- Explore 360-degree camera options if dedicated panoramic photography becomes a regular part of your services, offering ease of use for capturing full spherical images.
- Understand the basics of photo stitching software; programs like PTGui or Adobe’s built-in tools can automate much of the panorama creation process.
- Master low-light techniques for indoor events or night scenes; slow shutter speeds and wider apertures may be necessary, demanding steady camera support.
- Develop skills in both horizontal and vertical panoramas; vertical stitches can offer dramatic perspectives, especially in architectural photography at events with tall structures.
- Create a workflow that includes backing up raw files before editing begins, ensuring no data is lost during processing.
Using these methods allows photographers to deliver unique perspectives on events, capturing everything from detailed wide shots of venues to interactive 360-degree experiences that place viewers right at the heart of the action.
Conclusion
Event photography turns fleeting moments into lasting memories. Mastering it requires the right tools—like advanced cameras and lenses—and a keen eye for detail. Every event offers unique challenges, from capturing candid shots to adjusting for low light.
By following these tips, photographers can deliver stunning images that capture the essence of every occasion. Success lies in preparation, skillful execution, and post-event workflow efficiency.
Explore different techniques to elevate your craft and exceed expectations at every shoot.
FAQs
1. What gear do I need for event photography?
You need a camera with good low-light performance, multiple lenses for different shots, and a flash to capture sharp images in any light.
2. How can I take better photos at events?
Focus on lighting, composition, and moments. Use natural light when possible, frame your shots with care, and catch genuine emotions.
3. Can architectural elements improve my event photos?
Yes! Architectural features add depth and interest to your photos. Look for unique angles and use buildings as backdrops.
4. What’s the best way to edit event photos?
Select the best shots first, then adjust exposure, contrast, and color balance for each image to make them pop.