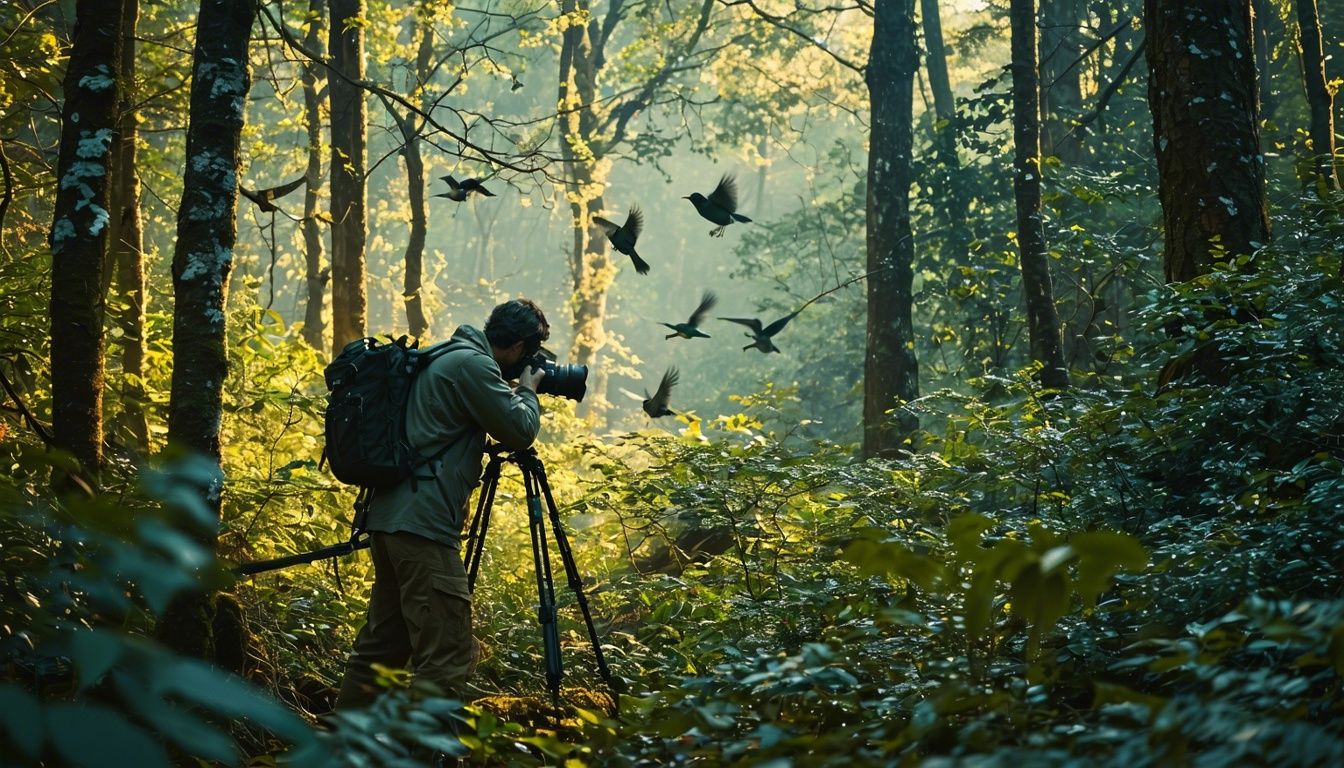
When it comes to wildlife photography, getting your camera settings right is crucial. Capturing fast-moving wildlife requires precision and skill. In this guide, we will provide you with autofocus tips specifically tailored for photographing fast-moving wildlife. Mastering these techniques will help you improve your wildlife photography skills and capture those stunning shots you’ve always dreamed of.
Key Takeaways:
- Understand the different autofocus modes: continuous focus and single focus
- Choose the right focus area for your subject
- Master back button focusing for greater control
- Utilize burst mode to capture multiple shots in rapid succession
- Learn the ins and outs of the exposure triangle: shutter speed, aperture, and ISO
Understanding Autofocus Modes
In wildlife photography, having the right autofocus mode is crucial for capturing fast-moving subjects and stationary wildlife. There are two main autofocus modes that photographers use: continuous focus and single focus. Let’s explore each mode and how they can improve your wildlife photography.
Continuous Focus Mode
Continuous focus mode, also known as AF-C in Nikon, AF-C in Sony, and AI Servo in Canon cameras, is an ideal choice for capturing moving subjects. This autofocus mode continuously analyzes and adjusts the focus as your subject moves, ensuring that it remains sharp and in focus. It’s perfect for wildlife photography when you need to track fast-moving animals or birds in flight.
Single Focus Mode
Single focus mode, also known as AF-S in Nikon, AF-S in Sony, and One Shot in Canon cameras, is designed for stationary subjects. When using single focus mode, the camera locks the focus on a specific point and does not readjust unless the focus button is pressed again. This mode is suitable for wildlife that remains still for longer periods, such as perched birds or animals resting.
Understanding the autofocus modes and when to use them is essential for wildlife photographers. By selecting the appropriate autofocus mode, you can ensure that your subject remains in focus, resulting in sharp and detailed wildlife photographs.
| Autofocus Mode | Manufacturer | Camera Models |
|---|---|---|
| Continuous Focus | Nikon | AF-C |
| Continuous Focus | Sony | AF-C |
| Continuous Focus | Canon | AI Servo |
| Single Focus | Nikon | AF-S |
| Single Focus | Sony | AF-S |
| Single Focus | Canon | One Shot |
Choosing the Right Focus Area
The focus area plays a critical role in wildlife photography as it determines where your camera will focus within the frame. To ensure sharp and precise focus on your subject, it’s important to select the right focus area based on the speed and movement of the wildlife you are capturing.
For slow-moving subjects that can be easily focused on, using a single point focus area is recommended. This allows for precise focus on the subject, bringing out the intricate details that make your wildlife images truly captivating. As a bonus tip, try focusing on the animal’s eye for a more compelling and emotive image, as the eyes often serve as the focal point of a photograph.
However, when dealing with faster or more unpredictable subjects, using a slightly larger focus area may be necessary. This provides a wider coverage area, ensuring that your camera can keep up with the subject’s movements and maintain focus. By adjusting the focus area to match the behavior of the wildlife, you increase your chances of capturing sharp and well-focused shots.
Furthermore, for subjects that move rapidly in and out of the frame, utilizing the camera’s auto AF area mode can be highly advantageous. This mode allows the camera to automatically adjust the focus area, tracking the subject as it moves across the frame. This ensures that even if the subject momentarily disappears, the camera will quickly regain focus when it reenters the frame, enabling you to capture those decisive moments with ease.
Remember, selecting the right focus area is essential for achieving sharp and well-focused wildlife photographs. By understanding the movement and behavior of your subjects, you can confidently make the right choice and elevate the quality of your wildlife images.
Mastering Back Button Focusing
In wildlife photography, capturing fast-moving subjects requires precise focus and quick reflexes. One technique that can greatly enhance your ability to focus accurately is back button focusing. By separating the focus and shoot functions, back button focusing offers greater control and flexibility over the autofocus system.
The key to back button focusing lies in assigning the autofocus function to a dedicated AF-ON button. Unlike traditional autofocus systems, which rely on half-pressing the shutter button to activate autofocus, back button focusing allows you to prevent the camera from refocusing when the shutter button is pressed.
Here’s how it works: when using back button focusing, pressing the AF-ON button once locks the focus on your target until the button is pressed again. This is similar to single focus mode, ensuring that the focus remains constant even if you release the shutter button. If you need continuous tracking, you can achieve it by holding down the AF-ON button while panning or following the subject.
This technique offers several advantages. Firstly, it combines the benefits of both single focus and continuous focus modes, giving you the flexibility to choose the most suitable focus mode for your subject. Secondly, it allows you to separate focusing from shooting, enabling you to recompose the frame without the camera refocusing inadvertently. This can be especially useful when photographing fast-moving wildlife in dynamic environments.
Most modern cameras now feature a dedicated AF-ON button designed specifically for back button focusing. However, if your camera doesn’t have this button, you can often reconfigure an existing button’s function to act as the AF-ON button. Refer to your camera’s manual or consult online resources for specific instructions on setting up back button focusing for your camera model.
Advantages of Back Button Focusing
“Back button focusing provides greater control and flexibility, allowing photographers to achieve precise focus and recompose shots without the risk of the camera refocusing.”
By mastering back button focusing, you can elevate your wildlife photography to new heights. It provides you with the control to focus quickly and accurately on fast-moving wildlife, ensuring you capture those fleeting moments with sharpness and clarity.
| Advantages | Disadvantages |
|---|---|
| Separates focus and shoot functions for greater control | Requires practice to become comfortable with the new technique |
| Enables continuous tracking by holding down the AF-ON button | May require reconfiguring an existing button’s function on certain camera models |
| Prevents the camera from refocusing inadvertently |
Utilizing Burst Mode
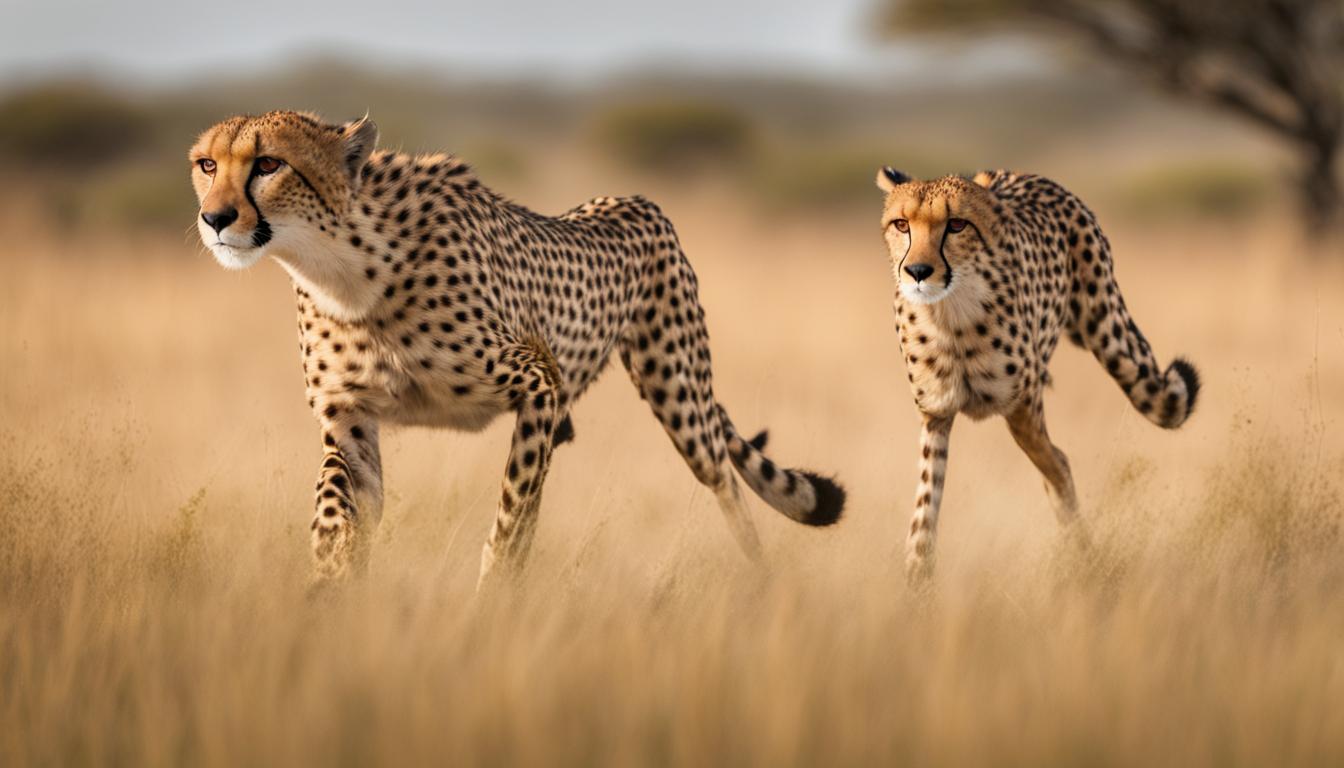
In the world of fast-moving wildlife photography, burst mode is an invaluable tool that can greatly enhance your chances of capturing the perfect shot. Burst mode, also known as continuous high, allows your camera to take a rapid sequence of shots in quick succession. This feature is especially useful when photographing wildlife that is constantly on the move, allowing you to freeze action and capture those fleeting moments with precision.
When you set your camera to burst mode, it captures a series of frames per second (FPS) depending on the capabilities of your camera. The higher the FPS, the more frames you can capture in a single second, increasing your chances of getting a sharp image of fast-moving subjects. A camera with a higher FPS capability provides you with a greater number of images to choose from, increasing the likelihood of capturing the perfect moment.
In burst mode, your camera fires off multiple shots in quick succession, effectively creating a continuous stream of images. This allows you to choose the best frame from the burst of shots, ensuring that you don’t miss a critical moment. Whether it’s a thrilling leap of a cheetah or the graceful flight of a bird, burst mode allows you to capture these decisive moments in stunning detail.
Using burst mode requires proper timing and anticipation. You must be ready to press and hold the shutter release button while tracking the subject’s movement. By doing so, you increase the chances of capturing the perfect shot within the burst sequence.

Maximizing the potential of burst mode requires some practice and experimentation. Each camera has its own unique capabilities, and it’s important to understand how your camera performs in burst mode. Take the time to familiarize yourself with the burst mode settings of your camera and experiment with different FPS rates to find the ideal balance between capturing enough frames and managing your camera’s buffer.
Remember, burst mode is not always necessary for every wildlife photography situation. Certain subjects may not require rapid-fire shooting, and capturing a single, well-timed shot may be more desirable. However, for fast-moving wildlife and action-packed moments, burst mode is an essential tool that can elevate your photography to new heights.
Benefits of Burst Mode:
- Increases the likelihood of capturing the perfect moment
- Allows for a continuous stream of images
- Provides multiple frames to choose from
- Enables freezing action and capturing fast-moving subjects
Burst mode is just one of the many techniques that can help you master the art of wildlife photography. Combined with other autofocus tips and camera settings, burst mode empowers you to capture the beauty, grace, and intensity of fast-moving wildlife in breathtaking detail.
Understanding the Exposure Triangle
In wildlife photography, achieving the correct exposure is essential to capturing stunning images. Understanding the exposure triangle, which consists of three key elements – shutter speed, aperture, and ISO – is crucial for achieving optimal exposure in your wildlife photographs.
Shutter Speed
The shutter speed refers to the length of time the camera’s shutter is open, determining how quickly the camera captures the image. A fast shutter speed freezes motion, ideal for capturing fast-moving wildlife with minimal blur. On the other hand, a slow shutter speed can create motion blur, which can be used creatively to convey a sense of movement. Experimenting with different shutter speeds allows you to capture the desired effect in your wildlife photographs.
Aperture
The aperture setting controls the size of the lens opening, influencing the amount of light that reaches the camera’s image sensor. A wide aperture (represented by a lower f-number) allows more light to enter the camera, resulting in a shallow depth of field. This can be used to isolate your subject from the background, drawing attention to the wildlife. A narrow aperture (represented by a higher f-number) decreases the amount of light, resulting in a larger depth of field, which can be beneficial when you want to capture more details in your wildlife scene.
ISO
The ISO setting determines the sensitivity of the camera’s sensor to light. A lower ISO value (such as ISO 100) is preferable in well-lit conditions as it produces images with less noise. However, in low-light situations, you may need to increase the ISO to obtain a properly exposed image. Keep in mind that higher ISO values can introduce noise or grain into your photos, so finding the right balance is crucial.
By understanding how these three elements interact and finding the optimal settings for your wildlife photography, you can create properly exposed images that truly showcase the beauty of fast-moving wildlife.
Exposure Triangle Overview
| Element | Description |
|---|---|
| Shutter Speed | The length of time the camera’s shutter is open, controlling the amount of light that enters the camera. |
| Aperture | The size of the lens opening, regulating the amount of light that reaches the camera’s sensor. |
| ISO | The sensitivity of the camera’s sensor to light, determining the camera’s ability to capture images in low-light conditions. |
By manipulating these three elements, wildlife photographers can achieve the desired exposure and create visually captivating images of fast-moving wildlife.
Mastering Shutter Speed, Aperture, and ISO
In wildlife photography, achieving the perfect shot requires a balance of three crucial settings: shutter speed, aperture, and ISO. These settings, also known as the exposure triangle, play a vital role in capturing fast-moving wildlife, minimizing motion blur, and creating a desired depth of field.
Shutter speed determines how motion is captured in your image. When photographing wildlife in action, faster shutter speeds are essential to freeze the subject and minimize motion blur. This is particularly important for capturing the speed and agility of fast-moving wildlife. Experiment with different shutter speeds to find the perfect balance between freezing the action and capturing natural movement.
Aperture impacts the depth of field in your photographs. It determines how much of the image is in focus, allowing you to create a sense of depth and emphasize your subject. A wider aperture, indicated by a lower f-number, creates a shallower depth of field, blurring the background and isolating your subject. On the other hand, a narrower aperture, indicated by a higher f-number, expands the area in focus, ensuring more of the scene is sharp. Consider the effect you want to achieve and adjust the aperture accordingly.
ISO refers to the sensitivity of your camera’s sensor to light. In wildlife photography, shooting in low-light conditions is often unavoidable. By increasing the ISO, you can capture images in dim lighting without sacrificing the exposure. However, higher ISO settings can introduce digital noise to your photos. Aim to use the lowest ISO value possible while maintaining proper exposure to minimize noise and retain image quality.
Shutter Speed, Aperture, and ISO Comparison
| Setting | Effect | Examples |
|---|---|---|
| Shutter Speed | Fast shutter speed freezes motion, minimizing motion blur. | 1/1000s – Freezes the flapping wings of a bird in flight. |
| Aperture | Wider aperture (lower f-number) creates a shallow depth of field, blurring the background and isolating the subject. | f/2.8 – Blurs the background, emphasizing the sharpness of an animal’s eyes and features. |
| ISO | Higher ISO allows capturing images in low-light conditions, but can introduce digital noise. | ISO 3200 – Enables capturing sharp images in low-light habitats without underexposure. |
By mastering the balance of shutter speed, aperture, and ISO, you can unleash your creativity and capture breathtaking wildlife photographs with clarity, detail, and impact. Experiment with different settings, and remember to adjust them based on the conditions and the effect you want to achieve.
Choosing the Right Shooting Mode
When it comes to wildlife photography, selecting the appropriate shooting mode is crucial. It determines the level of control you have over your camera settings and greatly impacts the outcome of your images. While there are various shooting modes available, the best one for wildlife photography is aperture priority.
In aperture priority mode, you have the flexibility to adjust the aperture setting according to your desired depth of field. The camera will automatically adjust the shutter speed to ensure proper exposure. This mode simplifies the process, allowing you to focus more on capturing the perfect shot while maintaining control over the depth of field.
On the other hand, automatic mode should generally be avoided for wildlife photography. It limits your control over the camera settings, resulting in less creative freedom and potentially compromising the quality of your images.
For photographers who prefer more manual control, both shutter speed priority and manual mode are viable options. Shutter speed priority mode allows you to set the desired shutter speed while the camera adjusts the aperture to maintain proper exposure. Manual mode gives you complete control over both the aperture and shutter speed, requiring more technical knowledge and experience.
In conclusion, aperture priority mode strikes a balance between control and simplicity, making it the ideal shooting mode for wildlife photography. By selecting this mode, you can focus on composition and capturing the moment while still maintaining control over important elements such as depth of field. Experiment with different shooting modes to find the one that suits your style and preferences, ultimately enhancing your overall wildlife photography experience.
Overcoming the Challenges of Wildlife Photography
Wildlife photography presents various challenges that require skill and adaptability to overcome. Whether it’s capturing moving subjects, dealing with their unpredictability, or working in low-light conditions, photographers face unique hurdles that require careful planning and execution to achieve stunning wildlife photographs.
One of the main challenges in wildlife photography is capturing moving subjects. Animals rarely stay still, especially in their natural habitats. To overcome this challenge, mastering autofocus techniques is crucial. By understanding and utilizing the different autofocus modes and focus areas, you can ensure your camera locks onto your subject swiftly and accurately.
The unpredictability of wildlife adds another layer of difficulty. Animals behave in their own natural ways, and their actions can be unexpected. To overcome this challenge, it’s essential to anticipate their movements and be ready to adjust your camera settings accordingly. Being patient, observant, and adaptable will greatly increase your chances of capturing unique moments.
Working in low-light conditions is yet another challenge wildlife photographers often face. Many wild animals are most active during dawn and dusk, when light levels are low. To overcome this challenge, it’s important to understand the exposure triangle, which consists of shutter speed, aperture, and ISO. Adjusting these settings and utilizing appropriate tools such as tripods and camera supports can help you capture sharp and well-exposed images even in challenging lighting situations.
By addressing these challenges head-on and continuously honing your skills, you can improve your wildlife photography abilities and capture truly captivating images of fast-moving subjects in unpredictable environments.

Tips for Overcoming Wildlife Photography Challenges:
- Master different autofocus modes and focus areas to capture moving subjects effectively.
- Practice patience and be observant to anticipate and adapt to unpredictable animal behavior.
- Learn and utilize the exposure triangle to work efficiently in low-light conditions.
- Carry essential gear such as tripods and camera supports to stabilize your shots in challenging situations.
- Study the behavior of the wildlife you intend to capture to better anticipate their actions.
“Wildlife photography is a constant adventure filled with challenges. It requires us to be patient, adaptable, and technically adept. By understanding the unique difficulties we face and employing effective strategies, we can capture breathtaking images of animals in their natural habitats.”
Tips for Improving Wildlife Photography
In addition to the autofocus tips and understanding camera settings we’ve discussed so far, there are several general tips that can help you elevate your wildlife photography skills. By incorporating these tips into your workflow, you’ll be able to capture the true essence of fast-moving wildlife and create stunning images that truly stand out.
1. Practice Patience
Wildlife photography often requires waiting for the perfect moment to capture the behavior or action you want. Patience is key, as animals may not always cooperate with your desired shot immediately. Take the time to observe their behavior, anticipate their movements, and be ready to capture that split-second action when it happens.
2. Research Animal Behavior
Understanding the behavior of the wildlife you’re photographing can greatly improve your chances of capturing unique and compelling shots. Research their habits, movement patterns, and preferred habitats. This knowledge will enable you to anticipate their actions and position yourself for optimal shooting opportunities.
3. Utilize Natural Light
Natural light can make or break a wildlife photograph. In most cases, shooting during the golden hour – the hour after sunrise or before sunset – can result in beautiful warm tones and softer lighting. Avoid harsh midday sunlight, as it can create unflattering shadows and high contrast. Experiment with different lighting conditions to capture the mood and atmosphere you desire.
4. Compose Interesting and Compelling Shots
Composition is key in wildlife photography. Take the time to carefully frame your shot, considering the rule of thirds, leading lines, and the overall balance of the image. Look for unique angles and perspectives to create visually engaging photographs. Remember to focus on the eyes of your subject, as they are often the most captivating and expressive part of the image.
5. Continuously Hone Your Skills
Improving your wildlife photography requires constant practice and experimentation. Take every opportunity to get out in the field and practice your techniques. Learn from your successes and failures, and don’t be afraid to try new approaches. Explore different settings, angles, and compositions to discover your unique style and vision as a wildlife photographer.
By following these tips and incorporating them into your wildlife photography, you’ll develop a strong foundation and enhance your ability to capture stunning images of fast-moving wildlife. Remember, each photograph is an opportunity to tell a story and share the beauty of the natural world with others.
Essential Tips for Wildlife Photography
| Tips | Description |
|---|---|
| Practice Patience | Take the time to wait for the perfect moment and capture unique behavior. |
| Research Animal Behavior | Understand the habits and movement patterns of the wildlife you’re photographing. |
| Utilize Natural Light | Shoot during the golden hour for warm tones and softer lighting. |
| Compose Interesting and Compelling Shots | Consider composition techniques and focus on capturing captivating angles and perspectives. |
| Continuously Hone Your Skills | Practice regularly, learn from your experiences, and experiment with different approaches. |
Gear Recommendations for Wildlife Photography
When it comes to wildlife photography, having the right gear can make a significant difference in capturing stunning images of fast-moving wildlife. Here are some essential pieces of equipment that every wildlife photographer should consider:
Telephoto Lenses
A telephoto lens is a must-have for wildlife photography. These lenses have a long focal length, allowing you to capture wildlife from a distance while maintaining sharpness and detail. With the ability to bring distant subjects close, telephoto lenses enable you to capture intimate shots without disturbing the animals. Whether you’re photographing birds in flight or a lion on the savannah, a telephoto lens is an invaluable tool.
Tripods
When shooting wildlife, stability is key. A tripod provides a sturdy base for your camera, ensuring sharp images and reducing the risk of camera shake. Look for a lightweight yet durable tripod that is easy to carry in the field. Consider features such as quick-release plates, adjustable height, and robust construction. A tripod allows you to compose your shots precisely, especially when using longer focal lengths or shooting in low-light conditions.
Camera Supports
In addition to tripods, camera supports such as monopods and bean bags can be useful for wildlife photography. Monopods provide stability while offering more mobility compared to tripods, making them ideal for tracking moving subjects. Bean bags can be easily molded to support your camera on various surfaces, such as the roof of a vehicle or the ground. Camera supports help you maintain steady shots and reduce fatigue during long hours of shooting.
Accessories
There are several accessories that can further enhance your wildlife photography capabilities. Teleconverters are valuable tools that increase the effective focal length of your lens, allowing you to get even closer to your subjects. Lens hoods help reduce lens flare and protect your lens from stray light. These accessories can make a noticeable difference in the quality and versatility of your wildlife images.
Investing in high-quality wildlife photography gear, including telephoto lenses, tripods, camera supports, and accessories, can greatly enhance your ability to capture stunning images of fast-moving wildlife. They provide the necessary stability, reach, and versatility to tackle the challenges of wildlife photography and bring your vision to life.
Conclusion
Capturing fast-moving wildlife requires a solid understanding of autofocus techniques and proper camera settings. By utilizing the autofocus modes, focus areas, back button focusing, burst mode, and mastering the exposure triangle, you can improve your ability to focus quickly and capture stunning wildlife photographs.
Remember to practice, experiment, and continuously refine your skills to truly capture the beauty and essence of fast-moving wildlife. Wildlife photography is a challenging yet rewarding endeavor that requires patience, persistence, and a deep connection with nature.
So grab your camera, venture into the wild, and let your autofocus skills lead the way. With the right techniques and a keen eye, you can capture breathtaking images that showcase the splendor of fast-moving wildlife. Happy shooting!
FAQ
What are the different autofocus modes for fast-moving wildlife photography?
The two main autofocus modes for wildlife photography are continuous focus mode (AF-C or AI Servo) for moving subjects and single focus mode (AF-S or One Shot) for stationary subjects.
How do I choose the right focus area for wildlife photography?
For slow-moving subjects, use a single point focus area, focusing on the subject’s eye for a more captivating image. For faster or more unpredictable subjects, consider using a slightly larger focus area. Auto AF area mode can help maintain focus for subjects moving rapidly in and out of the frame.
What is back button focusing and how can it improve my wildlife photography?
Back button focusing is a technique that separates the focus and shoot functions, providing greater control and flexibility. By assigning the autofocus function to a dedicated AF-ON button, you can prevent the camera from refocusing when the shutter button is pressed, allowing for precise focusing and continuous tracking.
How can burst mode enhance my fast-moving wildlife photography?
Burst mode, also known as continuous high, is essential for capturing fast-moving wildlife. It allows your camera to capture multiple shots in rapid succession, increasing the chances of capturing the perfect moment. The frames per second (FPS) capability of your camera is important for capturing more frames per second and sharper images of fast-moving subjects.
What is the exposure triangle and why is it important in wildlife photography?
The exposure triangle consists of shutter speed, aperture, and ISO, which together determine the exposure of your image. Understanding how these three elements work together is essential for achieving the correct exposure in wildlife photography.
How should I set my shutter speed, aperture, and ISO for wildlife photography?
Shutter speed freezes motion, so faster shutter speeds are ideal for capturing fast-moving subjects. Aperture affects the depth of field, allowing you to control how much of the image is in focus. ISO should be adjusted based on available light, aiming for the lowest value while maintaining a properly exposed image.
What shooting mode should I use for wildlife photography?
Aperture priority mode is recommended for wildlife photography. It allows you to control the aperture setting while letting the camera adjust the shutter speed for proper exposure. Automatic mode should generally be avoided, and shutter speed priority or manual mode are alternative options.
What are the challenges of wildlife photography, and how can I overcome them?
Wildlife photography presents challenges such as capturing moving subjects, dealing with their unpredictability, and working in low-light conditions. Mastering autofocus techniques, understanding camera settings, and being prepared for different scenarios can help overcome these challenges.
What are some general tips for improving wildlife photography?
Practicing patience, researching animal behavior, utilizing natural light, composing interesting shots, and constantly honing your skills through practice and experimentation are key to improving your wildlife photography.
What gear is essential for wildlife photography?
The most essential gear for wildlife photography is a telephoto lens, which allows you to capture wildlife from a distance. Tripods, camera supports, teleconverters, and lens hoods can also enhance your wildlife photography capabilities.
How can I improve my ability to focus quickly in wildlife photography?
By utilizing autofocus modes, focus areas, back button focusing, burst mode, and mastering the exposure triangle, you can improve your ability to focus quickly and capture stunning wildlife photographs.
What are some additional tips for wildlife photography?
In addition to autofocus tips and camera settings, practicing patience, researching animal behavior, utilizing natural light, composing compelling shots, and constantly refining your skills are key to capturing the essence of fast-moving wildlife.
What are some recommended gear options for wildlife photography?
Telephoto lenses, tripods, camera supports, teleconverters, and lens hoods are recommended gear options for wildlife photography, enhancing your ability to capture stunning wildlife images.
How can I capture the true essence of fast-moving wildlife?
By understanding and implementing autofocus techniques and proper camera settings, practicing patience, and refining your skills, you can capture the true essence of fast-moving wildlife in your photographs.
How Can Autofocus Tips Help Capture Fast-Moving Wildlife in Wildlife Photography?
Autofocus tips are essential composition techniques for wildlife photography, especially when capturing fast-moving subjects. By understanding how to properly utilize autofocus features, photographers can ensure that their shots are focused and crisp, even when dealing with unpredictable wildlife movements. These tips can make a significant difference in the quality of wildlife photography.