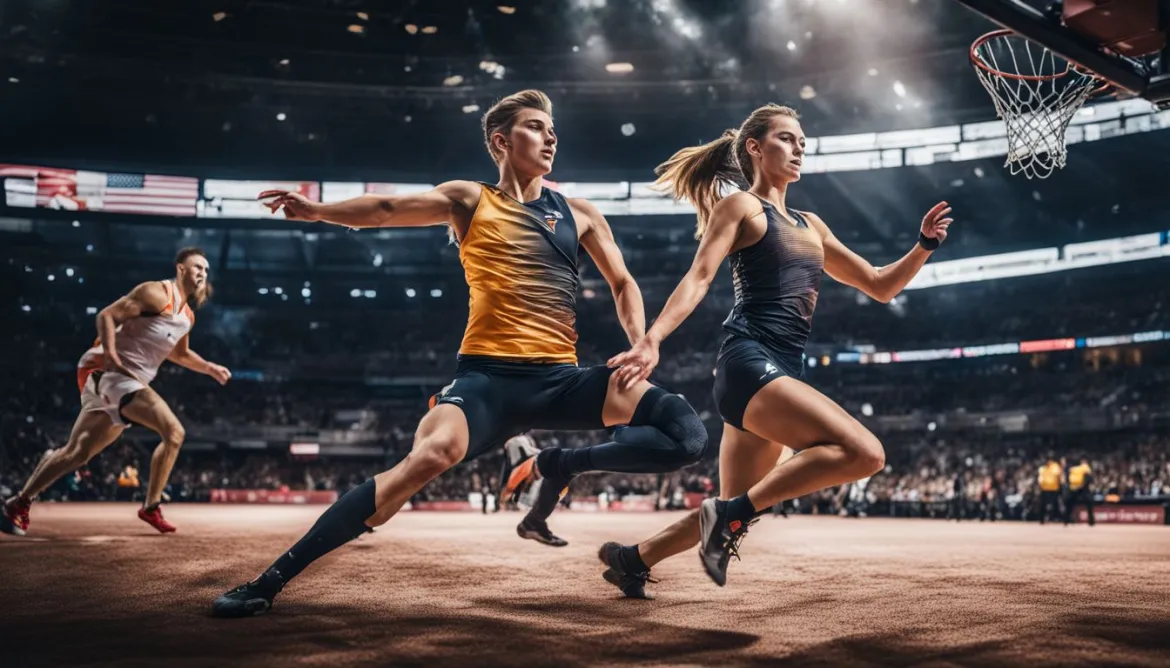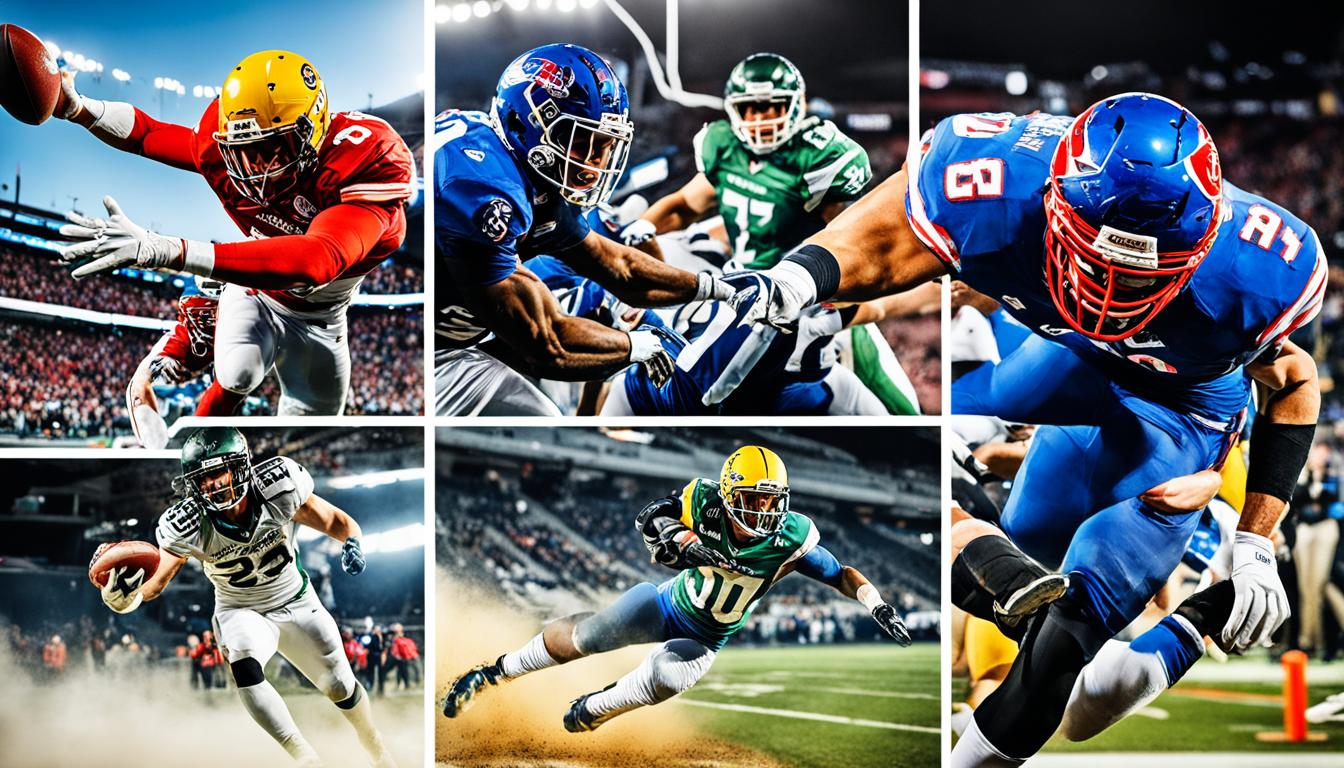
When it comes to capturing fast action in sports photography, choosing the right shooting mode is crucial. Continuous shooting mode and single shot mode are two important options that every sports photographer should be familiar with. Let’s explore the differences between these modes and understand when to use each one to capture those decisive moments on the field.
Key Takeaways:
- Continuous shooting mode allows you to capture a stream of shots by holding the shutter button down.
- Single shot mode takes only one photo with each press of the shutter button.
- Continuous shooting mode is ideal for capturing fast action in sports photography.
- Single shot mode is useful for portrait photography, street photography, and general photography.
- Understanding the strengths and limitations of each mode will enhance your sports photography skills.
Understanding Single Shot Mode
Single shot mode is a fundamental setting found in all cameras. It is perfect for various photography genres, including portrait photography, street photography, and general photography. In this mode, the camera captures a single photo with each press of the shutter button, preventing it from taking a series of shots that may look very similar.
When it comes to portrait photography, single shot mode allows you to focus on capturing the perfect moment and expression of your subject. It ensures that you can preserve the individuality and uniqueness of each portrait, enabling you to create compelling and intimate photographs.
In street photography, single shot mode is incredibly useful as it enables you to capture candid moments on the streets. With a single press of the shutter button, you can freeze a fleeting expression, interesting composition, or a decisive moment. The simplicity of single shot mode helps you remain discreet and unobtrusive, allowing you to blend into the bustling urban environment.
For general photography, such as landscapes or still life, single shot mode allows you to carefully compose your shots and capture them with precision. It gives you complete control over each image, ensuring that you capture the desired details and elements without unnecessary duplicates.
“Single shot mode allows photographers to focus on capturing the essence of a subject in a single frame. It’s about patience, intention, and avoiding redundancy in our shots.”
To further illustrate the benefits of single shot mode, here’s a comparison table:
| Single Shot Mode | Continuous Shooting Mode | |
|---|---|---|
| Number of shots per press | 1 | Multiple |
| Useful in |
|
|
| Advantages |
|
|
The right shooting mode depends on the context and the desired outcome. Understanding single shot mode allows us to make intentional decisions and capture photographs that speak to our artistic vision and storytelling ability.
Mastering Continuous Shooting Mode
Continuous shooting mode is a powerful tool for capturing fast action in sports photography and wildlife photography. With this mode, you can hold down the shutter button and your camera will continuously take shots until you release the button. This allows you to capture a series of images in quick succession, ensuring you don’t miss any decisive moments.
In sports photography, where athletes are constantly in motion, continuous shooting mode is invaluable. Whether it’s a soccer player scoring a goal or a sprinter crossing the finish line, the ability to capture multiple frames per second gives you the best chance of getting that perfect shot.
Similarly, wildlife photography often requires capturing animals in their natural habitat, where split-second movement can make all the difference. Continuous shooting mode enables you to track these quick movements and increase your chances of getting a sharp, well-timed image.
But continuous shooting mode isn’t just limited to action shots. It’s also useful for bracketing shots, especially in HDR (High Dynamic Range) and landscape photography. By quickly capturing multiple exposures with slight variations, you can later blend them together to create stunning, well-balanced images with a wider range of tones.
Continuous shooting mode is our go-to option for sports photography, wildlife photography, and bracketing shots. It allows us to capture fast action moments and multiple exposures in quick succession, maximizing our chances of getting the perfect shot.
By mastering continuous shooting mode, you unlock a world of opportunities in capturing dynamic moments and creating visually impactful images.
| Advantages of Continuous Shooting Mode | Applications |
|---|---|
| Allows for capturing fast action moments | Sports photography |
| Increases chances of getting a sharp, well-timed image | Wildlife photography |
| Enables bracketing shots for HDR and landscape photography | Bracketing shots |
Different Speeds in Continuous Shooting Mode
In continuous shooting mode, cameras offer two different shooting speeds: continuous low and continuous high. Each speed setting has its own advantages and is suited for different photography scenarios.
Continuous Low
Continuous low mode is designed to capture a moderate number of shots per second. On average, it can take approximately 3 shots per second. This speed is ideal for situations where the action is not extremely fast-paced, such as photographing a casual sports game or capturing a moving subject with a relatively steady motion.
Continuous High
The continuous high mode, on the other hand, delivers the camera’s maximum speed for continuous shooting. The maximum speed varies between camera models, with some capable of shooting at 5-7 frames per second or even higher. This mode is specifically designed for capturing fast action shots, such as those found in professional sports events or wildlife photography.
Comparison between Continuous Low and Continuous High Modes
| Mode | Shooting Speed | Best Suited for |
|---|---|---|
| Continuous Low | Around 3 shots per second | Casual sports games, steady motion subjects |
| Continuous High | Camera’s maximum speed (varies between models) | Professional sports events, wildlife photography |
Understanding the different speeds available in continuous shooting mode allows photographers to choose the appropriate setting based on the level of action and motion they aim to capture. Whether it’s freezing a single moment or capturing a rapid sequence, selecting the right speed will ensure the best results in sports photography and other fast-paced scenarios.
Limitations of Continuous Shooting
While continuous shooting allows for capturing a rapid sequence of images, it does have its limitations. These limitations mainly revolve around factors such as the maximum speed of continuous shooting, the file format used (RAW or JPEG), and the write speed of the memory card.
When shooting in continuous mode, the maximum speed at which the camera can capture images can only be sustained for a short period. This is especially noticeable when shooting in RAW format.
RAW files are larger and contain more data, which requires more time to write to the memory card. As a result, the camera may face some pauses while writing the images, causing a delay in capturing subsequent shots.
By contrast, shooting in JPEG format reduces the likelihood of pauses during continuous shooting since JPEG files are smaller and require less time to be written to the memory card. However, it’s important to note that the overall speed of continuous shooting also depends on the capabilities of the memory card used.
Max Speed of Continuous Shooting
The maximum speed of continuous shooting refers to the number of frames the camera can capture per second (fps). Different camera models offer varying maximum speeds, typically ranging from 3 to 7 fps or even higher for some advanced models.
As the camera shoots at faster speeds, it requires the memory card to keep up with the continuous flow of data. The write speed of the memory card plays a crucial role in maintaining the uninterrupted capture of images during continuous shooting. A higher write speed ensures that the camera can write the images to the memory card at a faster rate, reducing the chances of pausing and enabling a more seamless shooting experience.
When it comes to shooting in continuous mode, it’s important to consider the limitations imposed by the maximum speed, file format, and memory card write speed. Understanding these factors will help you optimize your shooting experience and avoid any interruptions in capturing those crucial moments.
Autofocus and Auto Exposure in Continuous Shooting Mode
When using continuous shooting mode, it’s important to consider the autofocus mode and auto exposure settings. These features play a crucial role in capturing sharp and well-exposed images.
Autofocus Mode:
Continuous autofocus, also known as AI Servo AF, is designed to track moving subjects and continuously adjust the focus as they move closer or farther away. This mode is especially useful in sports photography, where the subject’s position may change rapidly. By selecting continuous autofocus, the camera will constantly analyze the scene to keep the subject in focus throughout the burst of images.
On the other hand, single autofocus, or one-shot AF, locks the focus at a specific point when the shutter button is halfway pressed. This mode is commonly used in situations where the subject is stationary or when you want to focus on a specific element in the frame.
Auto Exposure:
Auto exposure is another key feature to consider when shooting in continuous mode. When the shutter button is pressed halfway, auto exposure locks the exposure settings so that they remain constant throughout the burst of images. This ensures consistent exposure for each frame captured, regardless of any changes in lighting conditions.
Expert Tip:
When photographing fast-paced action in continuous shooting mode, it’s recommended to use a combination of continuous autofocus and auto exposure. This allows both focus and exposure to adapt to the changing conditions, resulting in sharp and well-exposed images.
Here’s a comparison of continuous autofocus and single autofocus:
| Autofocus Mode | Function | Suitable for |
|---|---|---|
| Continuous autofocus (AI Servo AF) | Continuously adjusts focus on a moving subject | Sports photography, wildlife photography, fast-paced action |
| Single autofocus (one-shot AF) | Locks focus at a specific point | Portrait photography, still subjects |
By understanding and utilizing the autofocus mode and auto exposure settings in continuous shooting mode, you can enhance your ability to capture dynamic and well-focused images.
Utilizing the Self Timer Mode
When it comes to photography, timing is everything. That’s why the self timer mode is a valuable tool that every photographer should take advantage of. This feature, found on most cameras, offers a delay between pressing the shutter button and capturing the photo. While it may seem like a simple function, the self timer mode can be incredibly useful in a variety of scenarios.
One of the main benefits of using the self timer mode is to reduce camera shake. When taking photos, even the slightest movement can result in blurry images. By setting a short delay on the self timer, you can press the shutter button, step away from the camera, and allow it to stabilize before the photo is taken. This is particularly important when shooting in low light conditions or when working with longer shutter speeds, as any movement during the exposure can significantly impact the sharpness of the image.
Additionally, the self timer mode is often utilized in landscape photography, architectural photography, and night photography. These genres often require a steady camera setup to capture detailed and sharp images. By using the self timer mode, photographers can mount their camera on a tripod or other stable surface, set the desired delay, and then step away to minimize any potential camera movement. This ensures that the photos turn out clear and focused, showcasing the beauty of the landscapes or architectural structures.
To illustrate the benefits of the self timer mode, consider the example below:
| Scenario | Without Self Timer Mode | With Self Timer Mode |
|---|---|---|
| Landscape Photography |  |
|
| Architectural Photography | ||
| Night Photography |  |
As you can see from the examples above, the images taken with the self timer mode exhibit greater clarity and sharpness. By utilizing this mode, photographers can eliminate camera shake and capture stunning photos in a variety of shooting situations.
In conclusion, the self timer mode is a powerful feature that shouldn’t be overlooked. It not only reduces camera shake and increases image sharpness but also allows photographers to include themselves in group shots or create self-portraits. Whether you’re capturing stunning landscapes, architectural wonders, or captivating night scenes, remember to take advantage of the self timer mode for optimal results.
Unleashing the Power of Mirror-Up Mode
Mirror-Up mode is a powerful feature found on DSLR cameras that can significantly enhance image quality by reducing vibrations caused by the flipping of the mirror when the photo is taken. By flipping up the mirror before capturing the image, any vibrations can dissipate, resulting in sharper and clearer images.
This mode is particularly valuable for photographers who prioritize the highest image quality, such as fine art architectural and landscape photographers. By utilizing Mirror-Up mode, they can ensure that their photos are free from any blurring or distortion caused by camera shake.
It’s important to note that not all DSLR cameras have a dedicated Mirror-Up mode. However, some modern DSLRs offer alternatives, such as Liveview with silent shooting, which achieves a similar effect by eliminating the need for the mirror to flip up. This feature allows photographers to capture images without any vibration caused by the mirror movement, resulting in exceptionally sharp and detailed photos.
To make the most of Mirror-Up mode or its alternatives, it’s recommended to use a sturdy tripod to further minimize any potential camera movement. This will ensure maximum stability and clarity in your images.
Vibration Reduction in Mirror-Up Mode
One important benefit of Mirror-Up mode is its effectiveness in reducing vibrations, which can have a noticeable impact on image quality. The reduction of vibrations in this mode is especially beneficial when using long focal lengths or when shooting at slow shutter speeds.
When shooting with longer focal lengths, even the smallest camera movements can result in soft or blurry images. By activating Mirror-Up mode and allowing the vibrations to settle before capturing the image, photographers can achieve sharper and more detailed results.
Similarly, when shooting at slow shutter speeds, any vibrations from the camera can be magnified and result in noticeable blurring. By using Mirror-Up mode in these situations, photographers can mitigate vibrations and achieve the highest level of image sharpness and clarity.
Overall, Mirror-Up mode is an invaluable tool for photographers looking to capture the highest quality images with their DSLR cameras. It provides a reliable method for reducing vibrations and producing sharper, crisper, and more professional-looking photos.
| Advantages of Mirror-Up Mode | Disadvantages of Mirror-Up Mode |
|---|---|
|
|
Exploring the Potential of Bulb Mode
Bulb mode is a powerful feature that grants photographers greater control over exposure and timing, opening up creative possibilities for capturing stunning images. By keeping the shutter open for as long as the shutter button is held down, bulb mode enables long exposure photography, making it an essential tool for night photography and capturing bright light sources.
When it comes to long exposure photography, bulb mode allows you to extend the exposure time, resulting in striking images that showcase the beauty of night scenes or create a captivating blur effect for moving subjects. This mode is particularly useful when you want to capture the mesmerizing trails of light from fireworks or the dramatic streaks of lightning during a storm.
By using bulb mode, you have the flexibility to choose the perfect exposure time that suits your creative vision. Whether you want to capture a city skyline bathed in a sea of colorful lights or create dreamy, smooth water effects in your landscape shots, bulb mode allows you to experiment and achieve your desired results.
It’s important to note that using bulb mode requires a stable camera setup to prevent unwanted camera shake. To achieve sharp and crisp images, it’s recommended to use a tripod or a sturdy surface to keep your camera steady during the long exposure. Additionally, using a remote shutter release or a timer can help avoid any accidental camera movement when you press and hold the shutter button.
Here are some key benefits of using bulb mode for long exposure photography:
- Control over exposure: Bulb mode gives you the power to determine the perfect exposure time for your desired effect.
- Capturing light trails: With bulb mode, you can capture dynamic light trails created by moving subjects, adding a sense of motion and drama to your images.
- Showcasing night scenes: Night photography often requires longer exposures to properly capture the ambient light and create stunning nightscapes.
- Creative experimentation: By utilizing bulb mode, you have the freedom to explore and experiment with different exposure times, resulting in unique and artistic photographs.
Unlock the full potential of your camera and venture into the captivating world of long exposure photography with bulb mode. Explore the beauty of night scenes, capture mesmerizing light sources, and unveil a whole new level of creativity in your photography.
Conclusion
When it comes to sports photography, choosing the right shooting mode is crucial to capture dynamic and impactful images. Understanding the differences between continuous shooting and single shot mode is essential for mastering the art of sports photography.
Continuous shooting mode is perfect for capturing fast action shots, allowing you to capture a stream of shots by holding the shutter button down. This mode is ideal for sports photography where the action is fast-paced and unpredictable. It gives you more chances to capture the perfect moment, ensuring you don’t miss any important details.
On the other hand, single shot mode is best suited for capturing individual moments, whether it’s a player’s celebratory pose or a close-up shot of a particular moment during the game. It allows you to focus on capturing a single photo, ensuring you have full control over each frame and can emphasize specific details.
To enhance your sports photography skills, it’s important to experiment with different shooting modes and settings. Explore the capabilities of your camera and understand how each mode can contribute to your desired outcome. By practicing and learning from your shots, you can develop your own unique sports photography techniques and capture stunning action-filled images.
FAQ
What is the difference between continuous shooting mode and single shot mode?
Continuous shooting mode allows you to capture a stream of shots by holding the shutter button down, while single shot mode takes only one photo with each press of the shutter button.
When should I use single shot mode?
Single shot mode is ideal for portrait photography, street photography, and general photography where you only want to capture a single photo with each press of the shutter button.
When should I use continuous shooting mode?
Continuous shooting mode is most useful for capturing fast action, such as sports and wildlife photography, as it allows you to hold down the shutter button and the camera will continue taking shots until you release the button.
What are the different speeds in continuous shooting mode?
Many cameras offer two different continuous shooting modes – continuous low and continuous high. Continuous low mode typically takes about 3 shots per second, while continuous high mode shoots at the camera’s maximum speed.
Are there any limitations to continuous shooting mode?
The maximum speed of continuous shooting can only be sustained for a short period, especially when shooting in RAW format. Shooting in JPEG format and using a faster memory card can help reduce any potential issues.
What should I consider regarding autofocus and auto exposure in continuous shooting mode?
Continuous autofocus allows the camera to continuously adjust focus on a moving subject, while single autofocus locks focus at a specific point. Auto exposure settings are typically locked when the shutter button is pressed, maintaining the same exposure settings throughout the burst of images.
How can I reduce camera shake while taking photos?
The self-timer mode, available on most cameras, offers a delay between pressing the shutter button and capturing the photo, which can help reduce camera shake. This mode is particularly useful in landscape photography, architectural photography, and night photography.
What is mirror-up mode and when should I use it?
Mirror-up mode, found on DSLR cameras, reduces vibration caused by the flipping of the mirror when the photo is taken. It is mainly used by fine art architectural and landscape photographers who prioritize the highest image quality. Some modern DSLRs offer alternatives, such as Liveview with silent shooting.
How can I capture long exposures and capture bright light sources?
Bulb mode allows the camera to keep the shutter open for as long as the shutter button is held down, making it ideal for long exposures, night photography, and capturing bright light sources like lightning or fireworks.
What is the importance of choosing the right shooting mode in sports photography?
Choosing the right shooting mode, whether it’s continuous shooting or single shot mode, is essential for capturing dynamic sports photography. Continuous shooting mode is perfect for fast action shots, while single shot mode is ideal for capturing individual moments.
How Can Remote Shooting and Camera Traps Improve Sports Photography, Especially in Regards to Continuous Shooting vs. Single Shot?
Remote shooting sports tips can greatly enhance sports photography by providing unique angles and capturing candid moments. Continuous shooting allows for a sequence of images to be taken in quick succession, while single shot requires precise timing. Camera traps can capture elusive animal behavior during sports events, adding an unexpected element to the photos.