Many struggle to capture the beauty of aquatic life with their cameras. The Underwater Photography Guide by Scott Gietler offers complete insights. This blog will cover essential tips and techniques for taking stunning underwater photographs, ensuring you can preserve those magical underwater moments accurately.
Dive deeper with us.
Key Takeaways
- To take good underwater photos, learn how water affects light and color. Use strobes or lights to make your photos bright and colorful.
- Choose the right camera for you. Compact cameras are easier for beginners, but interchangeable lens cameras give better quality and more control.
- Practice is key to getting better at underwater photography. Join groups to share tips and keep learning new ways to improve your shots.
Understanding the Basics of Underwater Photography

Underwater photos aren’t easy—water changes how light and colors look. To get good pictures, you need to know about shutter speed and exposure.
How Water Affects Light and Color
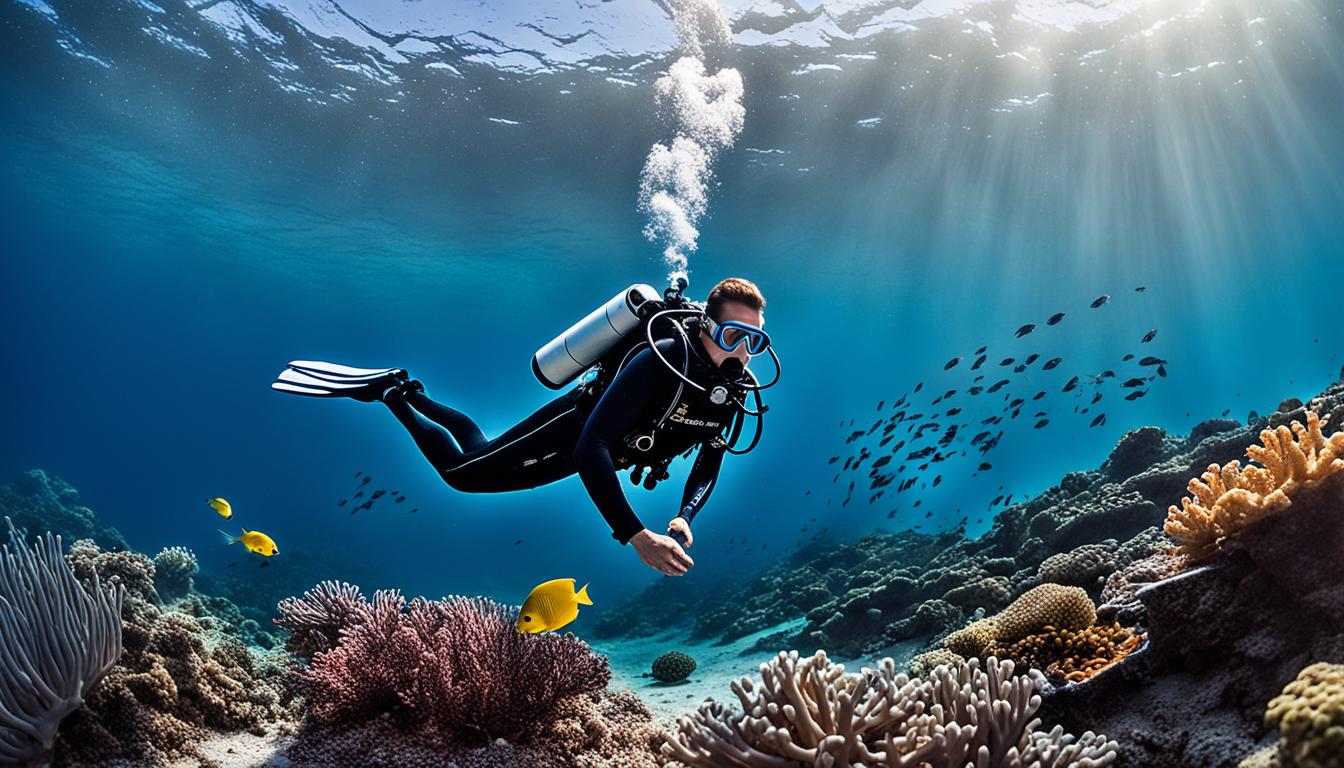
Water makes light and color change underwater. It soaks up light, making things less bright. Different colors disappear at different depths. Red goes first, vanishing by about 15 feet deep.
Orange and yellow follow as you go deeper. This means your photos can look very blue or green if you don’t use extra light.
To get good blues in your shots, photographers use strobes or bring their own lights down there with them. These lights help bring back the true colors of fish, coral, and everything else under the sea.
They show off details that would otherwise be hidden in shadow.
Always add a bit of extra light to reveal the vibrant world beneath the waves.
Importance of Exposure Settings
Getting the right exposure settings is key for sharp, colorful underwater photos. Water filters out colors and light differently than air does. This makes it tricky to capture what you see.
You must adjust shutter speeds, apertures, and ISO settings carefully. For example, fast shutter speeds freeze motion but require good lighting or higher ISOs. Aperture affects depth of field and how much light hits your camera sensor.
Let’s say you’re using a Sony a6500 for underwater shots. Manual white balance becomes your best tool here to bring back real colors lost under water. Start with setting the correct ISO—low in bright conditions and higher when it’s darker but watch out for noise at high values.
A compact camera might limit control over these settings compared to DSLRs or mirrorless cameras with full-frame sensors like Nikon or Canon EOS R models that offer greater flexibility.
Now ready to pick the right gear?
Choosing the Right Equipment
Picking the right gear is key in underwater photography. You’ll need cameras that can handle water and lights to show off the sea life.
Compact Cameras vs. Interchangeable Lens Cameras
Choosing the right underwater camera can make or break your photography experience. Let’s compare compact cameras and interchangeable lens cameras to help you decide which fits your underwater photography needs.
| Feature | Compact Cameras | Interchangeable Lens Cameras (ILCs) |
|---|---|---|
| Size and Portability | Small, easy to carry and handle underwater. | Larger, require more space and can be cumbersome. |
| Lens Flexibility | Fixed lens, limited zoom and angle options. | Wide range of lenses available for various photography needs. |
| Image Quality | Good for casual shots, but might lack in low light. | Higher quality images, performs well in various lighting. |
| Manual Controls | Limited manual settings. Mostly automatic. | Extensive manual controls, allows for more creative shots. |
| Price | Generally more affordable. | More expensive, with additional cost for lenses and housings. |
| Learning Curve | Easier to use for beginners. | Requires more time to learn all the features and settings. |
| Underwater Housing Availability | Many models have custom housings made by manufacturers. | Wide availability, but can be more expensive and model-specific. |
Compact cameras, like the Canon G1X and Olympus PEN-F, offer simplicity and convenience for those new to underwater photography or looking for a lightweight option. Interchangeable lens cameras, such as the Panasonic S1H, provide superior image quality and flexibility for more serious photographers willing to invest in their gear. Your choice depends on your priorities: ease of use and cost or image quality and versatility.
Strobes and Lighting Options
After picking your camera, lighting is next. Good lights make underwater pictures bright and colorful. Underwater strobes and video lights help a lot. Brands like Sea & Sea, Inon, Ikelite, and Kraken Sports are top choices.
They offer different strengths for all needs.
Strobes give light fast to freeze motion in photos. Video lights, or focus lights, keep subjects bright for videos or aiming the camera right. Use a strobe with TTL (through the lens) for easy settings that work well in most situations.
You can add more than one light for bigger areas or creative effects.
The right light transforms underwater scenes from dull to dazzling.
Essential Accessories for Underwater Photography
Underwater photography transforms the way we see the world beneath the waves. To capture stunning images, you need more than just a camera and diving gear.
- Waterproof Camera Housing: This acts as a protective shell for your DSLR or mirrorless camera. Brands like Nauticam and Ikelite lead in quality.
- Lighting Accessories: Strobes illuminate dark waters, while video lights help with constant lighting for moving shots.
- Macro Lens: For close-up photos of tiny sea life, a macro lens captures sharp details you can’t see with the naked eye.
- Wide Angle Lens: It grabs vast scenes, such as coral reefs and shipwrecks, making them essential for scenic shots.
- Dive Tripod: A sturdy tripod stabilizes your camera for clear, blur-free images underwater.
- Floating Straps: They keep your camera from sinking if you lose grip, adding an extra layer of security.
- Anti-Fog Inserts: These prevent your housing lens from fogging up, ensuring clear shots during temperature changes.
- Extra Memory Cards and Batteries: Underwater shoots last hours; spare batteries and cards ensure you don’t miss a shot.
- Color Correction Filters: Filters adjust colors at different depths to bring back natural hues lost underwater.
- Cleaning Kit for Gear Maintenance: Post-dive care keeps your equipment in top condition, avoiding costly repairs.
Next up is mastering lighting techniques to bring out the vibrant colors of underwater worlds.
Techniques for Shooting Underwater
Getting great photos underwater means knowing a few tricks. Light acts funny and colors fade, so using flashlights and understanding how to frame your shots can make a big difference.
Using Strobes and Natural Light
Mix strobe and daylight for underwater shots. Strobes bring out colors and details in close subjects, while sunlight adds a natural feel to your scene. Use advanced backlighting with strobes to create dynamic effects.
Master the balance between artificial and natural lighting.
Consider the angle of light. Position your strobe correctly—aim it slightly away from your subject to reduce backscatter from particles in the water. This technique helps keep your photos clear.
For wide scenes, blend sunlight and strobe light by adjusting their power settings until you get a smooth transition between the two types of illumination.
Composition Techniques in Underwater Photography
After mastering the balance between strobes and natural light, it’s time to focus on how you frame your underwater shots. Composition is key in creating impactful underwater photographs.
A simple yet strong composition can make a photo stand out. Aim to include five essential photos in your portfolio that showcase varied compositions.
Rule of thirds, leading lines, and negative space are basic techniques that can transform an ordinary shot into a visual story. For instance, positioning your subject off-center according to the rule of thirds creates more dynamic images.
Using coral reefs as leading lines draws the viewer’s eye towards your main subject—like a turtle or fish. Don’t forget about background elements; sometimes empty space makes your subject stand out more.
In short, experiment with different angles and perspectives underwater. Capture wide-angle views of coral reefs or close-up shots with macro photography gear like DSLRs equipped with full-frame sensors for deeper depth of field effects.
Always be ready to switch settings based on lighting and movement around you for perfect exposure and autofocus performance. Keeping these composition tips in mind will surely enhance the quality and impact of your underwater photography portfolio.
Managing Backscatter Effectively
To cut down on backscatter, position your lights to the sides. This stops tiny particles from lighting up in front of your lens. Use Photoshop for getting rid of any spots that show up in your pictures.
Start by picking tools like the Healing Brush or Clone Stamp. These work great for cleaning up small areas with backscatter.
Keep a close eye on your camera settings too. Adjusting aperture and shutter speed can reduce how much light hits these particles, making them less visible. For those who shoot with DSLR cameras or advanced compact cameras, this means setting a narrower aperture (higher f-number) and using faster shutter speeds when possible.
Always review your images after a shot to catch any backscatter early, saving you time in post-processing with software like Lightroom or Photoshop.
Specialized Underwater Photography Tips
Explore the art of close-up and wide shots under the sea, along with using lights in new ways to make your photos stand out. Learn more to catch every detail and color underwater.
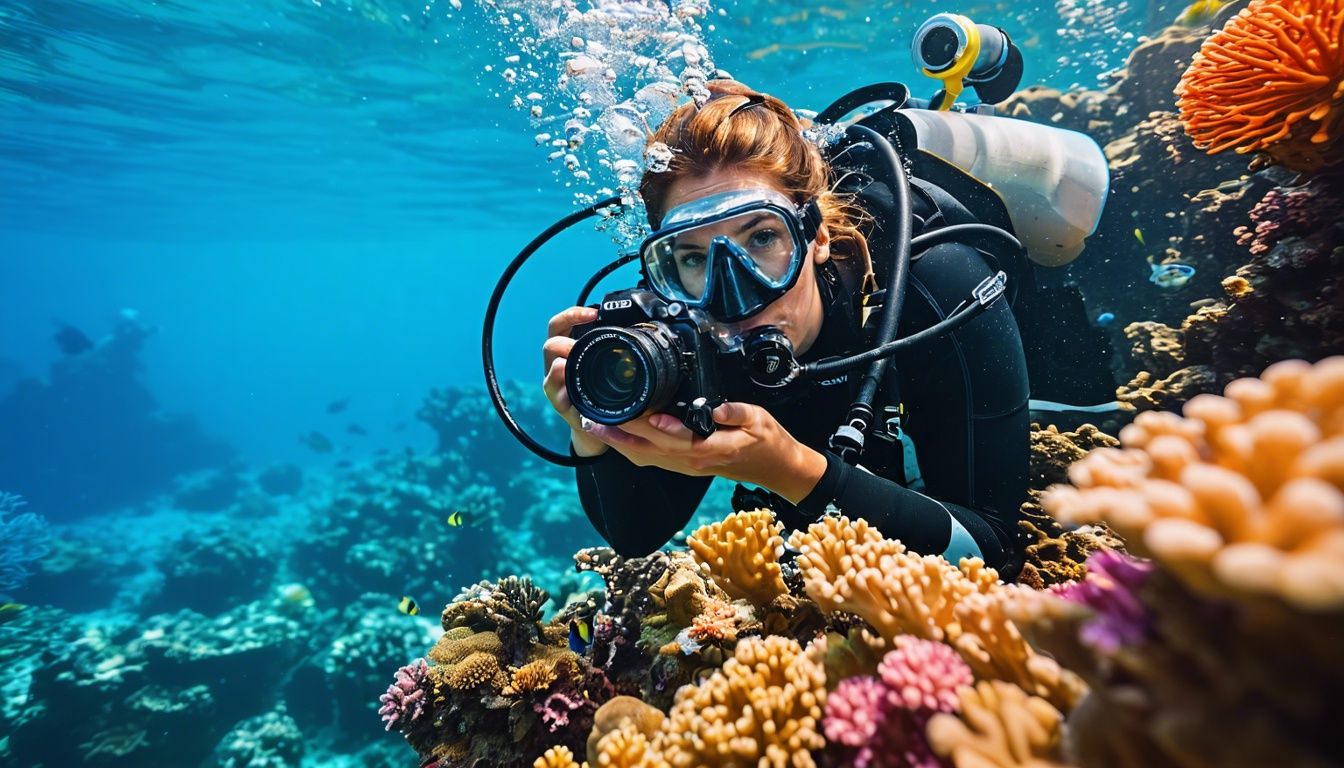
Macro Photography Underwater
Macro photography underwater focuses on small subjects. To capture quick critters, use a snoot for precise lighting. This technique highlights intricate details by directing a beam of light.
It brings out vibrant colors and textures not visible to the naked eye.
For best results, get close to your subject. This reduces water between your camera lens and the critter, making photos clearer. A compact camera or one with interchangeable lenses works well for macro shots.
Lighting is key—experiment with strobes and natural light to find what reveals the most detail in your subjects.
Mastering macro underwater photography takes patience but capturing those hidden details makes it all worth it.
Wide Angle Shots
Wide angle shots capture the vastness underwater, bringing scenes to life. Close focus wide-angle techniques allow photographers to bring out vibrant colors and clear details near the lens, while the background remains large and impressive.
This method works best in clear waters with plenty of sunlight or when using a strobe to light up the foreground.
Using one strobe with wide-angle shots creates dynamic lighting effects. It highlights subjects against softly lit backgrounds, giving photos depth and contrast. Photographers often choose full frame sensors for their wider field of view, making it easier to catch expansive ocean scenes or large wrecks.
Settings like f/2.8 help manage light effectively underwater where it can be scarce, enhancing both color and clarity in each shot.
Creative Lighting Techniques
After capturing the vast beauty with wide angle shots, focus shifts to enhancing underwater scenes using creative lighting techniques. Single strobe shooting lights up your subject while keeping the water background dark.
This method creates stunning contrasts and brings out vibrant colors in sea creatures and plants. Positioning is key—place the strobe off to one side for dramatic shadows or directly above for even light.
For black backgrounds, aim your strobe carefully so it doesn’t light up particles between the camera and your subject. This technique makes subjects pop against a pure black void, highlighting delicate details often missed in natural light.
Both methods require practice but they guarantee eye-catching results that stand out in any underwater photographic collection.
Pre-Dive Preparation
Before you jump into the water, setting up your camera is key. Make sure all gear–like cameras, housings, and lights–is good to go and works well together.
Configuring Camera Settings
Configuring your camera settings is key to getting stunning underwater photos. Different settings can change how your pictures look.
- Set your camera to manual mode. This gives you full control.
- Adjust the aperture to control light. Use f/8 for sharp images.
- Increase ISO for low light but not too much, or your photo will have noise.
- Choose a fast shutter speed to freeze motion. Try 1/125 sec as a start.
- Set white balance manually to correct colors, especially the blues and greens underwater.
- Use autofocus with point and shoot cameras like the Sony RX100 VII for quick shots.
7.. For DSLRs and mirrorless cameras, like Nikon Z6 or Sony A7R, select continuous autofocus (AF) mode.8.. Pick a metering mode based on your scene; spot metering is good for focusing on small subjects.
9.. Enable image stabilization to reduce blurry shots caused by water movement.
10.. Test exposure settings above water before diving in.
I found setting my Sony A6000 to continuous shooting mode lets me capture quick fish movements without blur. Also, attaching a strobe helps light up subjects far from my lens, making them clearer and more colorful in deep waters where light fades. Cleaning my lenses and keeping them free of scratches ensures my images are sharp every dive, while checking my battery level saves me from missing shots underwater.
Following these steps enhances your photos dramatically, capturing the beauty of marine life vividly and making each dive memorable through beautiful images.
Equipment Checks and Maintenance
Good gear is key for great underwater photos. Always check and maintain your equipment to keep it in top shape.
- Read housing maintenance guides from brands like Nauticam, Ikelite, Sea & Sea, Aquatica. They offer specific advice.
- Check all O-rings carefully for any cuts or dirt before a dive. Clean them gently if needed.
- Ensure your camera and housing are perfectly dry before opening to prevent water damage.
- Test the housing’s seals in shallow water without the camera first to spot any leaks.
- Look over strobes and lighting units for any signs of corrosion or battery issues; replace batteries as needed.
- Verify that all buttons and dials move freely without sticking; lubricate lightly if necessary.
- Inspect connections between camera housings and external lights or strobes for secure fitting.
- Set up your camera settings on land to avoid fiddling with controls underwater unnecessarily.
- Rinse gear with fresh water after each dive, focusing on moving parts and buttons to remove salt and debris.
- Dry everything thoroughly before storing; damp gear can mold or corrode quickly.
- Store your equipment in a cool, dry place away from direct sunlight to prevent rubber parts from degrading.
- Regularly update firmware on cameras like GoPros and Canon’s DSLRs to fix bugs and improve performance.
Following these steps will help ensure your underwater photography equipment remains reliable dive after dive, allowing you to focus on capturing stunning images below the surface.
Practical Tips During the Dive
Stay close and move slowly to not scare the fish away. Keep your camera steady for clear shots.
Positioning and Approaching Subjects
In underwater photography, getting close to your subjects is key. Water reduces clarity, so you must minimize the distance between your camera and the sea life. Move slowly to avoid scaring them away.
Pay attention to how light plays off fish scales or coral textures. This technique sharpens details in your shots.
For capturing fast ocean action, positioning matters a lot. Anticipate where sea creatures will move next and position yourself accordingly—this way, you’re ready to snap the photo at just the right moment.
Use viewfinders or autofocus (AF assist beam) for quick focusing on moving targets like schools of fish darting through water or a diver exploring wrecks. Good underwater photographers always respect their aquatic subjects, keeping a safe distance while achieving that perfect shot.
Handling and Adjusting Equipment Underwater
Adjusting your camera settings underwater takes practice. You must change the aperture stops and autofocus settings to capture sharp images. Underwater, light behaves differently, affecting how colors appear in your photos.
For best results, play with manual power on strobes to light up subjects just right. This technique also helps avoid backscatter from small particles in water.
Experience shows it’s crucial to keep checking your camera gear while underwater. Constantly monitor if the GoPro Hero or Canon’s lens housing is secure against leaks. Quickly adapting to unexpected lighting changes means adjusting exposure settings on the fly.
Next up, let’s look at cleaning and storing equipment after a dive.
Post-Dive Practices
After your underwater photo adventure, clean and store your gear right away. You’ll also tweak photos to look their best, removing bits that don’t belong.
Cleaning and Storing Your Equipment
Cleaning and storing your equipment right keeps it ready for the next adventure. Freshwater rinse your camera housing, strobes, and lenses after each use to remove salt and grit. Pay special attention to buttons and seals—they’re critical for keeping water out.
Dry them with a soft towel before opening any compartments.
Store everything in a cool, dry place away from direct sunlight. Batteries should come out of devices if you won’t use them soon. This helps avoid leaks that could damage your gear.
Next up, let’s explore basic editing techniques for bringing those underwater photos to life.
Proper care extends the life of your photography gear.
Basic Editing Techniques for Underwater Photos
Editing underwater photos is a must to bring out their best colors and details. Adobe Lightroom CC offers great tools like Dehaze which clears up water’s murkiness, making your shots clearer.
Start by adjusting exposure settings to fix any darkness or light issues. Next, play with the color balance—water shifts colors, especially reds and oranges.
To remove unwanted particles or backscatter, use the spot removal tool in Lightroom. This keeps your subjects clear and free from distractions. Don’t forget about sharpening to detail those hidden textures in sea life or wrecks you’ve captured.
Now let’s tackle removing backscatter for cleaner images…
Removing Backscatter in Post-Processing
To get rid of backscatter in your underwater photos, use Photoshop. With this tool, apply Gaussian Blur to soften the look of floating particles. This process makes your images clearer and more professional.
It’s a simple fix but makes a big difference.
First, select areas with backscatter in Photoshop. Then, add Gaussian Blur just enough to blend these spots without making the whole image too soft. Keep adjusting until you find the right balance; it ensures your sea life shots stand out beautifully.
Next up: Building Your Skills.
Building Your Skills
To get better at underwater photography, keep practicing and learn from every mistake. Join a club or online group to share tips and stories with other people who take pictures under water.
Practice Sessions
Practice makes perfect in underwater photography. Regular sessions can boost your skills and confidence.
- Set goals for each practice session. Decide if you want to focus on mastering lighting, composition, or working with moving subjects.
- Choose local spots for practice. Lakes and swimming pools are great for beginners before heading to the ocean.
- Join an underwater photography course. A lifetime subscription at $69 offers endless learning opportunities.
- Attend workshops to advance skills. Learning from experienced underwater photographers can provide invaluable insights.
- Create a checklist for pre-dive setup. Include camera settings, safety stop durations, and equipment checks.
- Experiment with different camera lenses during sessions, switching between macro lenses for close-ups and wide-angle lenses for scenic shots.
7.undefined Use natural light when possible, but bring strobes to practice using artificial light underwater. - Work on your buoyancy control as it’s crucial for getting steady shots and protecting marine life.
9 Practice shooting at various depths to understand how color and light change under water.10.Refine your autofocus skills by photographing moving subjects like fish or divers.
Next up is exploring the right gear for underwater shoots…
Learning from Mistakes
Making errors is a big part of getting better at underwater photography. You might set your camera wrong or miss the perfect light. These mistakes teach you how to improve next time.
For instance, if backscatter ruins your shot, you learn to adjust your strobe position or check water clarity before shooting.
Rene Umberger, Howard Hall, and Shark Angels have all shared stories about their early mistakes in underwater workshops. They didn’t get it right on their first try either. From forgetting to remove lens caps to misjudging the bokeh effect due to refraction under water, every mistake was a lesson that sharpened their skills.
By practicing in different conditions—scuba dive in both salty seas and freshwater lakes—they mastered focusing and managing shallower depth of field challenges unique to underwater scenes.
Considering these examples can encourage you when things don’t go as planned, showing that even experts had to learn from dozens of missed shots and botched settings adjustments before achieving mastery in capturing the beauty below waves with precision autofocus techniques.
Continuing Education and Community Engagement
Keep learning to grow your skills. Join workshops and sign up for our newsletter. We partner with ScubaShooters, DiveMag, Scuba Travel, and California Diver for the latest in underwater photography.
These sessions cover everything from post-processing to autofocusing techniques. You also get news, reviews, and tips.
Connect with a community that shares your passion. Engage in social media discussions or local clubs. Share your photos and learn from feedback. This way, you’re not just taking pictures; you’re telling stories through your lens.
Now, let’s explore Underwater Photography Equipment Basics…
Underwater Photography Equipment Basics
To start with underwater photography, you need the right gear. Compact cameras work well for beginners while interchangeable lens cameras suit advanced shooters. Brands like Nauticam, Ikelite, Sea & Sea, and Aquatica offer durable camera housings to protect your equipment under water.
Strobes and proper lighting are essential too; they bring out vivid colors in your photos.
You also need accessories like lens filters and waterproof cases. Lens filters correct color balance, making underwater scenes look more natural. Waterproof cases keep your camera safe and dry.
Always check everything before a dive to avoid leaks or malfunctions. Good post processing software helps fix any color issues later on. With practice and the right tools from these brands, you’ll capture stunning underwater images.
Mastering Lighting Techniques for Underwater Scenes
In underwater photography, light and color play by different rules. Water absorbs colors, starting with reds and followed by oranges and yellows, making scenes appear blue or green.
Mastering lighting techniques means bringing those true colors back into your shots. Strobes—or flashlights for underwater cameras—are key. They add the necessary light to reveal vibrant colors of fish, corals, and other sea life.
But it’s not just about adding light; it’s about understanding where to place strobes for the best effect. Advanced strobe backlighting techniques create depth and drama in your photos.
I discovered firsthand that side lighting can accentuate textures on rocky seabeds or wrecks while front lighting illuminates a subject directly for clear details. Each technique has its moment depending on what you aim to capture beneath the waves.
The journey here also includes experimenting with natural light for wide-angle scenic shots where sunlight filters through water in beams or glows around subjects near the surface—these moments are magical.
Now let’s move into aquatic composition…
Aquatic Composition: Mastering Framing Underwater
Mastering framing underwater focuses on creating simple yet striking images. Close focus wide-angle techniques are key. This approach lets underwater photographers capture both their subject and the vastness of the marine environment, enhancing depth and interest in each shot.
Photographers must also consider water’s effect on light and color, adjusting exposure settings accordingly to ensure vibrant, clear images.
Effective aquatic composition involves choosing the right moment and angle to frame subjects amidst dynamic underwater landscapes. Techniques like leading lines or patterns can draw viewers’ eyes through the photo, adding a sense of movement or drama.
Practice plays a crucial role in developing these skills, as does being aware of how different elements interact within your frame—ensuring that each image tells a compelling story of its underwater scene.
Selecting the Right Camera Housing for Underwater Photos
Picking the perfect camera housing is key for underwater photographers. Brands like Nauticam, Ikelite, Sea & Sea, and Aquatica offer options. They protect your camera from water and pressure.
Reviews help choose the right one. For example, housings for Canon 5D MK IV, Sony RX100 VII, Nikon D850 get high marks.
Each model has pros and cons. Think about size, weight, compatibility with your camera, ease of use under water, and access to controls. Your choice can make or break your underwater photography adventure.
Next up: Understanding Freshwater vs Saltwater Underwater Photography Tips.
Understanding Freshwater vs. Saltwater Underwater Photography Tips
Freshwater and saltwater environments create different challenges for underwater photographers. Freshwater often has less visibility than saltwater due to particles in the water, such as algae.
This means you need a good camera that performs well in low light. Saltwater is clearer but can have more light reflection issues. Use polarizing filters to cut glare and improve your photos.
In freshwater, colors fade quickly as you go deeper, just like in saltwater. But the types of lighting equipment you’ll use can vary. In fresh lakes, LED lights might work better to highlight the murky depths and bring out hidden details in sunken objects or aquatic plants.
In the vibrant seas, strobes are great for bringing vivid colors back into coral reefs or fish schools. Both environments require understanding how light behaves under water and adjusting your techniques accordingly.
Always rinse your gear after diving in salt water to protect it from corrosion.
Exploring Underwater Wrecks and Archaeology
Moving from the differences in shooting in freshwater and saltwater, underwater photographers find capturing wrecks and archaeology gives a unique twist to their portfolios. Ancient ships and submerged cities offer more than eye candy; they tell stories of history lying beneath the waves.
To get striking photos, mastering techniques for black backgrounds is crucial. This skill ensures that the main subject stands out sharply against a deep, void-like backdrop.
The ultimate guide to shooting wrecks involves understanding light manipulation and composition within these silent giants of the sea. Underwater photographers must learn how to weave through tight spaces within shipwrecks, avoiding disturbing delicate ecosystems or historical artifacts.
Shooting wide angle shots brings out the majestic scale of wreck sites, while macro photography captures intricate details hidden on corroded surfaces or among relics resting on the ocean floor.
Each venture into these underwater museums not only challenges a photographer’s skills but also sparks awe at civilizations’ remnants swallowed by time.
Advanced Diving Techniques for Photographers
From exploring underwater wrecks and archaeology, photographers now delve deeper into advanced techniques. Mastering these methods ensures stunning shots under the sea.
- Achieve fast focus by practicing with moving subjects in various light conditions.
- Use back button focus to separate focusing from shooting, giving better control.
- For low light scenarios, adjust your ISO settings without compromising image quality.
- Choose settings that allow for quick adjustments to capture fleeting underwater moments.
- Conduct equipment checks before each dive to ensure all gear functions properly.
- Engage in practice sessions in controlled environments to hone skills.
- Learn from every mistake by reviewing photos post-dive to identify areas for improvement.
- Join photography communities online and in real life for shared tips and continuous learning.
- Compare cameras and housings to find the best match for your diving style and photography needs.
- Experiment with different strobe positions to master creative lighting techniques.
- Study compositions by analyzing successful underwater photos and replicate their framing underwater.
- Select camera housings that withstand deep dives and protect against water pressure effects.
- Understand how freshwater vs saltwater impacts buoyancy, visibility, and lighting for appropriate adjustments.
- Embrace specialized lenses like macro or wide-angle for diverse shot compositions underwater.
- Prepare for each dive by configuring camera settings ahead of time based on expected conditions.
- Clean and maintain gear after every use to prevent malfunction on future dives.
By following these steps, photographers can excel in capturing the beauty of underwater scenes with precision and creativity
Underwater Photography Gear Care and Maintenance Tips
After mastering advanced diving techniques, underwater photographers must focus on gear care and maintenance. Proper upkeep ensures your equipment lasts longer and performs better.
- Rinse all gear with fresh water after each use to remove salt, sand, and other debris.
- Dry everything thoroughly before storing to prevent mold and corrosion.
- Check O-rings regularly for damage or wear since they ensure your camera housing stays waterproof.
- Apply silicone grease to O-rings as needed to keep them flexible and maintain a good seal.
- Store camera and accessories in a cool, dry place away from direct sunlight to avoid heat damage.
- Charge batteries fully before dives; never leave them in the charger after reaching full capacity.
- Update your camera’s software to fix bugs and improve performance.
- Inspect strobes and lights for proper functioning; replace bulbs as necessary.
- Clean lenses and dome ports with a soft cloth to avoid scratches that can ruin photos.
- Test all equipment in a controlled environment before taking it on a dive to check for leaks or malfunctions.
- Adventures demand keeping spare parts like O-rings, screws, and mounts handy during trips.
- Regularly back up photos from memory cards to avoid data loss.
Taking care of your underwater photography gear extends its lifespan and ensures you capture the best images possible beneath the waves.
Ethics of Underwater Photography and Its Eco-Impact
Caring for your gear in underwater photography ties directly to respecting the ocean and its inhabitants. Ensuring your actions don’t harm marine life is crucial. This responsibility covers not touching or disturbing coral reefs, which are already facing threats from climate change and pollution.
For underwater photographers, this means practicing ethical behavior at all times. The ocean’s health impacts everything – from coral reefs that provide homes for fish to turtles swimming through plastic-filled waters.
For those passionate about capturing the underwater environment, consider the impact of each shot. Flash photography, for instance, can stress some aquatic creatures. So, use natural light whenever possible to minimize disturbance.
Also, be aware of your surroundings to avoid damaging sensitive habitats with fins or equipment. Through responsible practices like these—which must include avoiding areas where human interaction stresses wildlife—we can contribute positively while enjoying the beauty beneath the waves.
Upholding these standards ensures future generations will also experience these wonders directly. Our choices help protect green sea turtles’ conservation efforts and battle against plastic pollution engulfing our oceans.
Taking photos under water isn’t just about getting good shots; it’s also about preserving those moments responsibly for tomorrow.
Planning Your Underwater Photography Expedition
Planning your underwater photography trip takes careful thought. The right research and gear ensure memorable shots.
- Choose top dive destinations known for clear waters and rich marine life.
- Research dive sites to find the perfect underwater scenes, considering light and visibility.
- Decide between staying at a resort or on a liveaboard based on the type of images you want to capture.
- Check water conditions – fresh vs. saltwater affects buoyancy and equipment choice.
- Pick the right time of year for ideal weather and underwater clarity.
- List essential gear: underwater cameras, housings, strobes, and diving equipment.
- Ensure your camera housing matches your camera model for a leak-free experience.
- Plan for both wide-angle lenses for vast seascapes and macro lenses for detailed shots.
- Consider taking lights that enhance colors submerged in depths where sunlight fades.
- Master using strobes to reduce backscatter from suspended particles in water.
- Dive with local guides; they know the best spots and times to see unique marine life.
- Practice buoyancy control to protect sea life and improve shot stability.
Next, we’ll explore mastering lighting techniques for those breathtaking underwater scenes.
Conclusion
Master underwater photography to capture the ocean’s beauty. Learn from Scott Gietler’s guide. Get the right gear, like compact cameras and strobes. Understand light, color, and exposure for stunning shots.
Explore techniques for macros, wide angles, and managing backscatter. Clean gear after each dive and keep learning for great photos every time.
FAQs
1. What gear do underwater photographers need?
Underwater photographers must have a waterproof camera, dive lights for clarity, and sometimes lenses designed for marine life shots. These tools ensure photos come out clear, even in the deep blue.
2. How do you manage lighting in underwater photography?
Mastering light involves using external flash units or strobes to cut through murky water. Divers often position these lights off-camera to highlight fish and corals without washing out colors.
3. What’s the best way to approach marine animals?
Move slowly, stay calm, and avoid sudden movements. Most sea creatures scare easily; patience rewards photographers with natural-looking shots rather than tails swimming away.
4. Can beginners take good underwater photos?
Yes! Start shallow where sunlight helps your images shine. Practice framing scenes without disturbing the environment or its inhabitants—respect is key in underwater photography.