Struggling to capture those breathtaking wildlife moments? The Wildlife Photographer of the Year competition showcases top-notch skills in framing the natural world. This post will guide you through essential gear, camera settings, and techniques for stunning wildlife photography.
Get ready to level up your shots!
Key Takeaways
- Use a powerful camera and long lens to take clear photos of animals from far away. A tripod helps keep these shots steady.
- Learn how to set your camera’s shutter speed, aperture, and ISO. This lets you capture sharp images in different lights without scaring the wildlife.
- Understanding how animals behave can help you get better pictures. Stay quiet and don’t get too close so they act natural.
- Practice taking photos at different times like early morning or late afternoon for softer light. Try using backlighting for special effects.
- Include various types of photos in your portfolio to show off your skills. Capture action shots, peaceful moments, and small details.
Essential Gear for Wildlife Photography

To get those stunning wildlife shots, you need the right tools. A powerful camera and strong lens are key, along with a tripod to keep your shots steady.
Choosing the Right Camera and Lens
For wildlife photography, the camera and lens you choose matter a lot. A DSLR or mirrorless camera with high speed and precision is essential. They capture details fast. You need lenses that can zoom far to get close shots without scaring animals away.
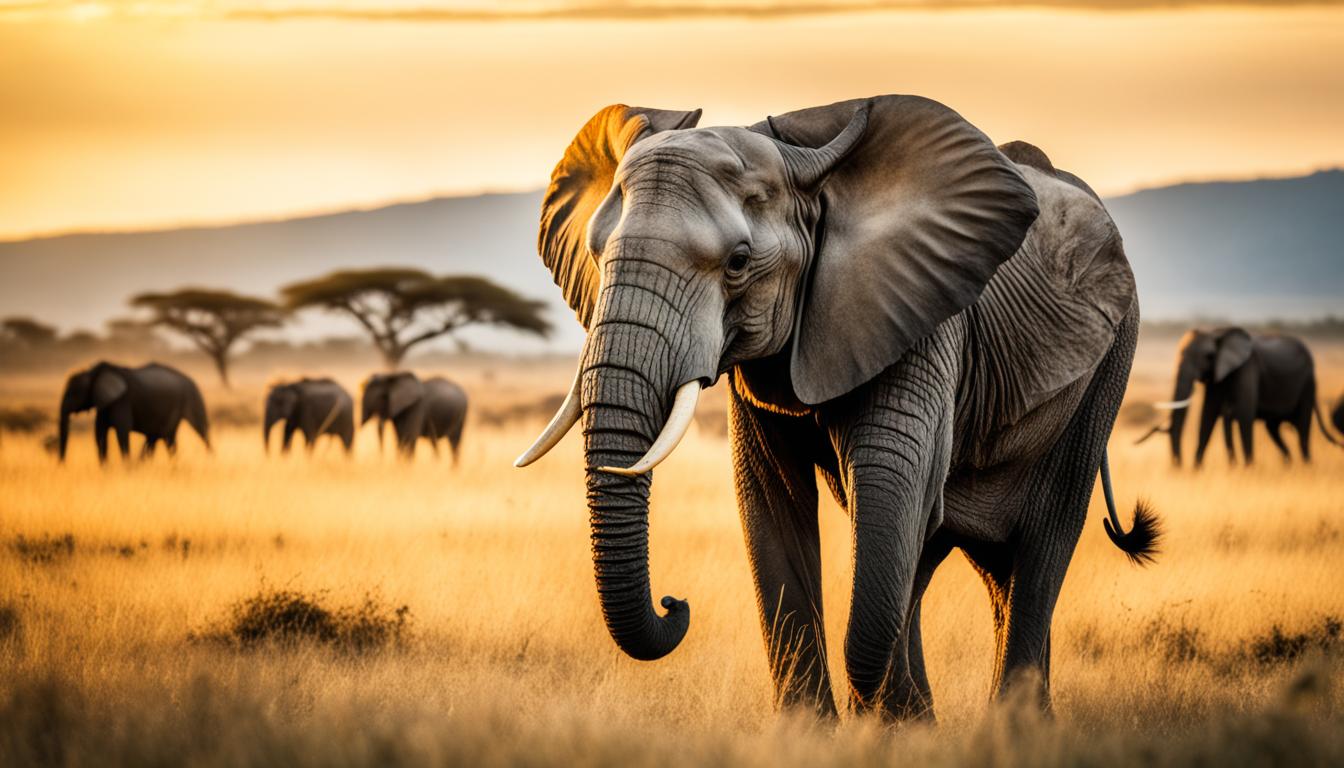
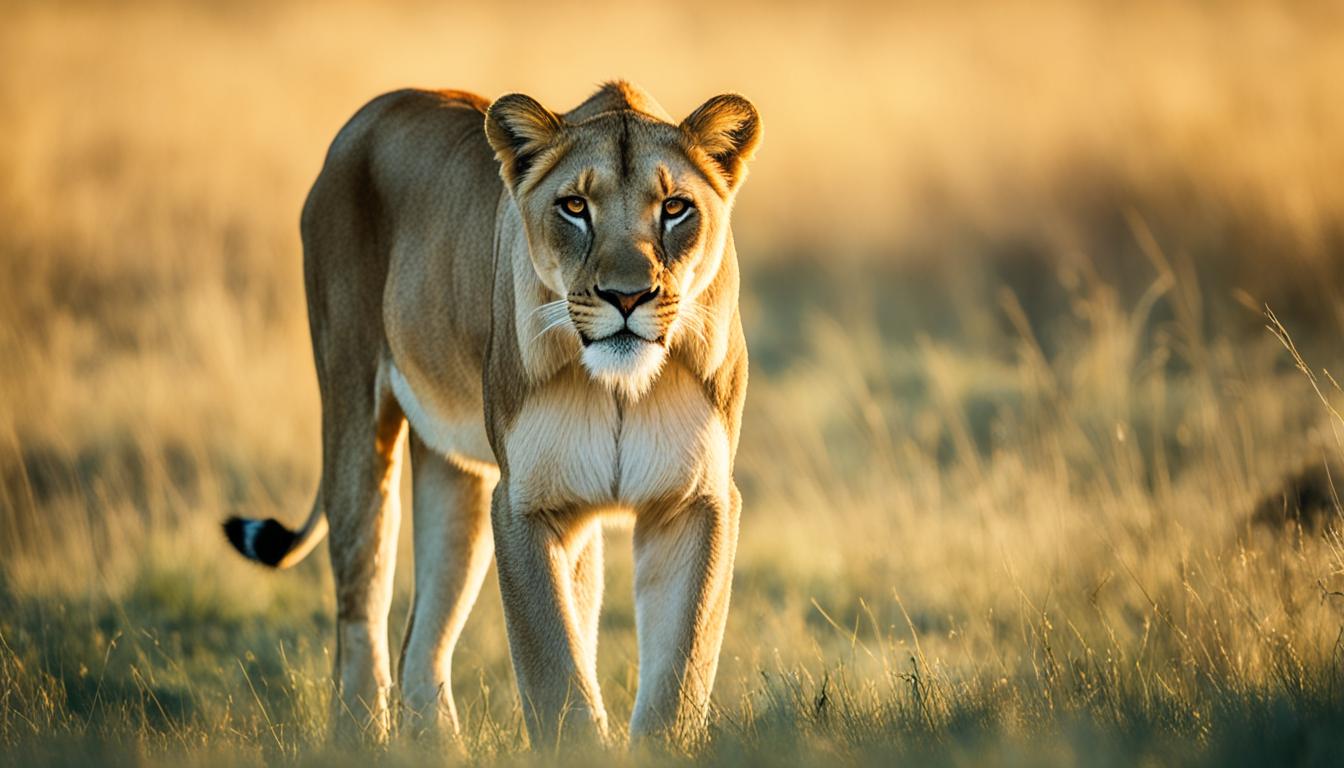
Telephoto lenses are your best bet here—they let you photograph lions in the Masai Mara National Reserve or birds in flight from a safe distance.
Using teleconverters with your lens extends its reach without losing image quality. This trick helps when shooting distant subjects like an Ethiopian wolf across the Bale Mountains National Park‘s valleys.
Experience shows that combining a sturdy camera body with a versatile telephoto lens and adding a teleconverter can cover most wildlife scenarios efficiently. These tools capture everything from quick movements to still portraits of animals in their natural habitat, making them key for stunning photographs.
Importance of a Stable Tripod
A stable tripod makes all the difference in wildlife photography. It gives you the support needed for long lenses, which are essential for getting close-up shots without disturbing animals.
Without a tripod, your photos may turn out blurry, especially with heavy gear or in low light conditions. Tripods also allow you to keep your camera steady for extended periods, perfect for waiting out that perfect moment.
Using a tripod means sharper images. You can experiment with different shutter speeds and aperture settings without worrying about camera shake. This is crucial when capturing fast-moving subjects like flying birds or running deer.
I’ve found tripods invaluable during early morning shoots when light is scarce but wildlife activity is high.
In my experience, a good tripod isn’t just an accessory—it’s a necessity for capturing the wild as it truly is.
Using a Teleconverter for Extended Reach
A teleconverter is a tool that makes your lens see further. It fits between your camera and lens, adding more zoom without you having to move. This is perfect for snapping shots of animals from far away so you won’t scare them off.
Adding a teleconverter means your pictures can show details of distant creatures clearly, like the patterns on a bird’s feathers or the spots on a deer.
Using these gadgets helps in capturing stunning scenes in nature photography, especially when subjects are not close. They boost the focal length of lenses, which means photographers can take photos from a safe distance without disturbing wildlife.
For example, with a teleconverter, capturing the flight of starlings or the quick movements of bees becomes easier because you have an extended reach. Now let’s talk about mastering camera settings to make sure those far-away shots look great.
Wildlife Photography Gear: Best Cameras and Lenses
Choosing the right gear is crucial for wildlife photography. Fast shutter speeds are a must for crisp images. Here’s a concise guide on the best cameras and lenses for wildlife enthusiasts.
| Camera Type | Best Models | Lens Type | Key Features |
|---|---|---|---|
| DSLR Cameras | Canon EOS-1D X Mark III, Nikon D850 | Telephoto Lenses | High speed, durable, excellent image quality |
| Mirrorless Cameras | Sony A9 II, Canon EOS R5 | Zoom Lenses | Lightweight, fast autofocus, great for moving subjects |
| Superzoom Cameras | Nikon Coolpix P1000 | Integrated Superzoom Lens | Extreme zoom capabilities, versatile, easy to carry |
| Action Cameras | GoPro HERO9 Black | Wide-angle Lenses | Compact, rugged, good for dynamic shots |
For crystal-clear shots of distant animals, telephoto lenses are essential. They let you stay far from the wildlife, keeping both you and the animals safe. Mirrorless cameras, with their fast autofocus and lightweight design, excel at capturing fast-moving subjects. The Sony A9 II and Canon EOS R5 stand out for their speed and image quality.
Superzoom cameras, like the Nikon Coolpix P1000, offer extreme zoom. They’re perfect for photographers who want versatility without changing lenses. Action cameras, though not typical for wildlife, offer unique angles and are ideal for harsh conditions. The GoPro HERO9 Black, for instance, captures wide-angle shots in dynamic settings.
The best gear depends on your specific needs and the wildlife scenarios you plan to capture. Test different cameras and lenses to find your perfect match.
Mastering Camera Settings
Getting your camera settings right is key for amazing wildlife photos. Learn how to adjust shutter speed, aperture, and ISO. Read on to find out more!
Adjusting Shutter Speed for Moving Subjects
To freeze a moving animal in your shot, crank up that shutter speed. Think of it like this: fast speeds capture motion without blur. Start with at least 1/500th of a second for animals at a slow pace.
For faster critters or birds in flight, go higher—1/1000th or even 1/2000th.
Fast shutter speeds ensure your subject stays sharp, no matter how quick they move.
In my own photo adventures, using these speeds has turned fleeting moments into epic stills—birds mid-flight, deer leaping, all crystal clear. But always be aware, high shutter speeds need more light.
So on cloudy days or in dusk hours, you might bump up your ISO to compensate. This balance is essential to capturing nature’s swift beauties without losing detail to the shadows.
Optimizing Aperture for Depth of Field
To control depth of field, play with the aperture size on your camera. A larger aperture (smaller f-number) blurs the background, making wildlife pop out. This technique isolates your subject from its surroundings perfectly.
For example, using an f/2.8 lets you focus sharply on a bird while turning trees and sky into soft bokehs.
In contrast, for shots where more detail is desired in both foreground and background—like capturing a deer among dense forest or a brood in their nest—choose a smaller aperture (bigger f-number).
This approach keeps everything sharp from front to back. From personal attempts, switching to an f/11 has given entire scenes clarity without losing focus on the main subjects like nests or animals wandering Serengeti plains.
Importance of ISO in Low Light Conditions
After discussing how to optimize the aperture, it’s crucial to talk about ISO’s role in photography, especially under low light conditions. ISO affects your camera’s sensitivity to light.
In dim settings, boosting your ISO setting helps capture clearer photos without adding artificial lights. This strategy is essential for night and wildlife photography where lighting can’t be controlled.
High ISO values make the camera pick up more detail in darkness but can introduce grain or “noise” into pictures.
To avoid too much noise, start with a low ISO and increase it slowly until you get a bright enough photo. Practice this technique during evenings or in shadowy areas where light is scarce but wildlife activity peaks.
Finding the balance between too dark and too noisy is key for stunning shots without harsh flashlights scaring away animals. I’ve found that keeping my camera set on an adaptable ISO range allows me quick adjustments when moving from sunny spots into shaded areas without losing precious moments hunting through menu settings.
Autofocus Tips for Fast-Moving Wildlife
Capturing fast-moving wildlife requires quick and precise autofocus. Modern cameras offer advanced autofocus (AF) settings that make this easier.
- Use continuous AF mode, also known as AI Servo AF on some cameras, to track moving animals. This mode adjusts the focus as the subject moves.
- Select a focus point where you expect the animal to be in the frame. Many nature photographers prefer using the center focus point for its accuracy.
- Engage dynamic-area AF mode if your camera has it. This lets you choose a primary focus point while the camera uses surrounding points to maintain focus on moving subjects.
- Implement back-button focusing. This technique separates focusing from shutter release, giving you more control over timing and focus.
- Increase your camera’s frames per second (FPS) rate to capture multiple shots quickly, ensuring at least one with perfect focus.
- Pre-focus at a certain distance where you anticipate action, especially useful for birds in flight or running mammals.
- Use high ISO settings in low light to keep your shutter speed fast enough for sharp images without blur.
- Apply fill-light with a flash or reflector when photographing under trees or in shadows to help your camera’s autofocus perform better.
- Experiment with wildlife photography during golden hours when natural light is soft and animals are active, enhancing autofocus performance.
Photographers achieve stunning shots of fleeting moments by mastering these autofocus techniques alongside patience and practice in various environments like forests, wetlands, or deserts through different seasons.
Techniques for Capturing Stunning Wildlife Shots
Learn the right ways to snap amazing photos of animals. Use light well, wait for perfect moments, and get creative with angles for shots that stand out.
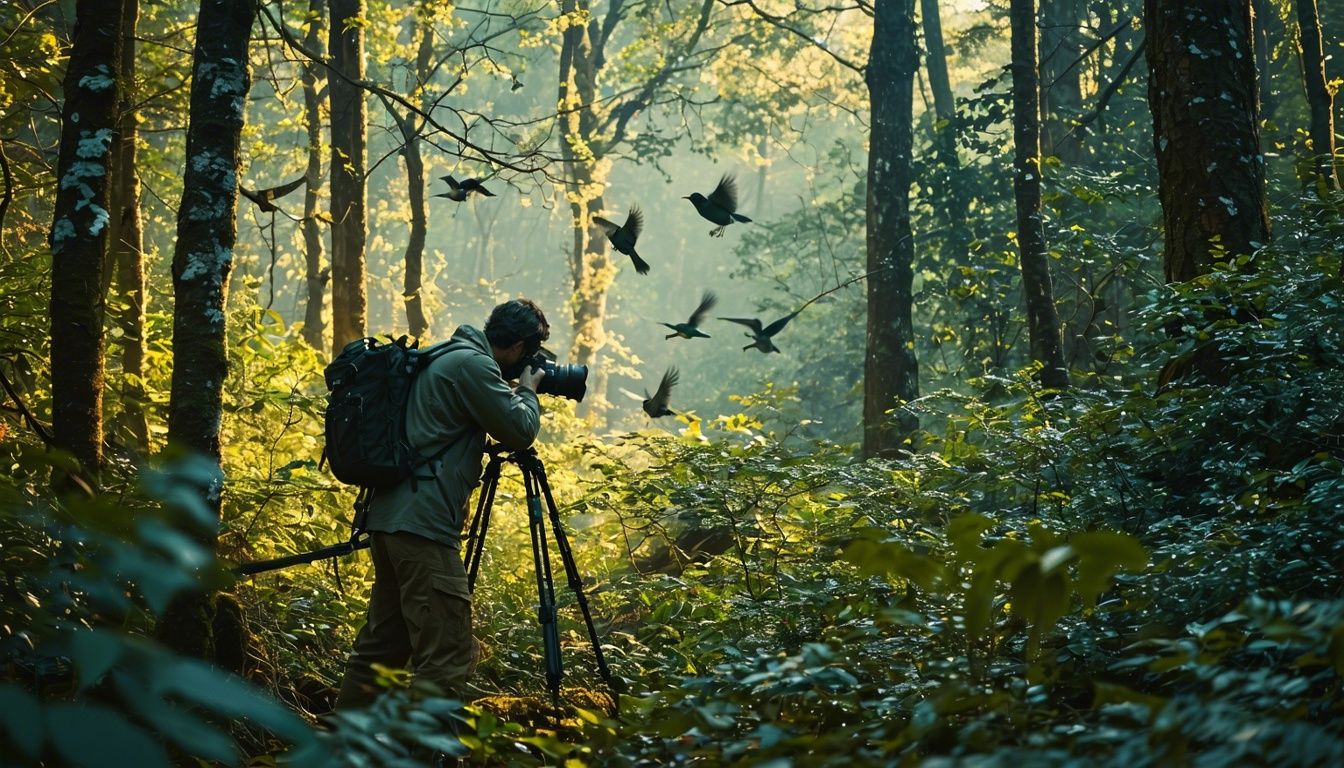
The Art of Photographing Birds in Flight
Capturing birds in flight is thrilling. It combines skill, patience, and the right gear to snap that perfect shot.
- Choose a camera with fast autofocus and high frame rate. These features let you track birds swiftly and capture them without blur.
- Use a telephoto lens for close-up shots from afar. Lenses like 400mm or 500mm bring distant birds into clear view.
- Set your shutter speed to at least 1/1000th of a second. This speed freezes the motion of flying birds, ensuring sharp images.
- Increase ISO in dim light but keep an eye on grain. High ISO lets you use faster shutter speeds in low light.
- Practice panning to follow the bird’s flight path smoothly with your camera, keeping it in focus against changing backgrounds.
- Observe bird species like Arctic terns and Atlantic puffins to predict their behavior and get ready for the best shots.
- Master backlit conditions for dramatic silhouettes by positioning yourself with the sun behind your subject.
- Use burst mode to take many photos quickly. This increases your chances of capturing that stunning moment.
- Adjust aperture to control depth of field; use a wider aperture (small f-number) to blur out busy backgrounds.
- Learn bird habitats and visit areas where sightings are common—forests, wetlands, or coasts offer diverse opportunities.
- Use macro photography techniques for close-up details on smaller birds or chicks still in the nest.
- Stay silent and minimize movements when near birds to avoid scaring them away before you can take your shot.
- Consider ethical practices by keeping a safe distance and respecting wildlife habitats—preserve nature as you capture its beauty.
- Create stories with your photos by capturing sequences that show hunting, feeding, or playful flights among flock members.
By following these tips, enthusiasts approach bird photography with confidence—capturing fleeting moments that thrill and inspire audiences worldwide.
Master Techniques for Capturing Birds in Flight
Moving from the art to mastering the techniques, capturing birds in flight requires more than just patience. Fast shutter speeds freeze the action; think 1/1000th of a second or faster.
This speed is crucial for sharp images of fast-moving species like the Pied kingfisher or Scarlet ibis. Autofocus (AF) should be set to continuous mode, allowing your camera to adjust focus as the bird moves.
For this, powerful optics and a high-quality telephoto lens are non-negotiable.
Using these settings has allowed me to capture murmurations with clarity and detail that stand out. It’s also essential to learn about your subject – understanding where and when they fly can hugely impact your success rate.
I’ve spent hours tracking species’ habits, which pays off when you get that perfect shot during golden hour, with natural light enhancing every detail.
The key is anticipation and knowing your gear inside out.
Creative Use of Backlighting
Backlighting changes how we see wildlife in photos. It adds a strong mood and feeling. To use backlighting well, you need the sun behind your subject. This lights up edges and creates a glow.
Think of birds at dusk or animals during sunrise. The light makes them stand out against dark backgrounds.
You’ll want to adjust your camera settings for this. Lower your exposure to keep detail in the light parts. Try this next time with different animals and times of day. You’ll see how much drama and beauty it adds to your shots, making even familiar creatures look new and exciting.
Capturing Wildlife in Low Light
In low light, wildlife photographers need fast lenses and high ISO settings. Fast lenses let more light hit the camera sensor. This is vital for sharp photos without a flash. High ISO numbers make cameras sensitive to dim light.
Yet, they can add grain to images. So, balance is key.
Night wildlife photography demands these settings too. For crisp shots in darkness, use an ISO of 800 or higher and lenses with wide apertures like f/2.8. A tripod keeps your camera steady for long exposures under stars or moonlight, capturing animals’ movements without blur.
To catch tiny wonders in macro photography, pick lenses that magnify small subjects even in shadows.
Expert Tips for Night Wildlife Photography
Night wildlife photography demands high ISO settings. This manages low light without flash. Flashes can scare animals, altering natural behaviors. High ISO captures details in darkness but watch for noise—grainy textures that reduce photo quality.
Use noise-reduction software to clean your shots.
A tripod is vital at night. It keeps your camera still for sharp images, even with slow shutter speeds necessary under the moonlight. For even clearer pictures, add a teleconverter to your lens.
This extends your reach without moving closer and disturbing nocturnal creatures.
Macro lenses reveal tiny night wonders like insects and flowers under starlight. Set aperture wide to let in more light; aim between f/2.8 and f/4 for best results.
Now, adjusting autofocus is tricky in the dark. Cameras struggle to find focus without enough light. Use manual focus or set autofocus points on areas with slight contrast changes—edges where dark meets light.
Next up: capturing underwater dwellers presents unique challenges…
Macro Wildlife Photography: Capturing Tiny Wonders
Macro wildlife photography shines a light on small insects and tiny creatures, revealing a world unseen by the naked eye. It demands special lenses to bring these minute wonders into focus.
Mastering lighting is crucial; it breathes life into your shots of delicate spiders or vibrant butterflies. Choose macro lenses for close-ups with sharp details.
To capture these tiny subjects, you need patience and precision. Set up in an area where such creatures frequent, using a tripod to keep your camera steady. Adjust your aperture to control the depth of field, making sure your subject stands out against a soft background.
Fast shutter speeds freeze their quick movements.
Now, moving beyond tiny creatures…
Composition and Environment
In “Composition and Environment,” you’ll learn how to pick spots that make your wildlife photos pop. This part covers everything from choosing the right foregrounds and backgrounds to knowing how animals behave.
It even talks about taking pictures in different places like forests and wetlands during various seasons. So, if you want your wildlife photos to tell a story, this section will show you how.
Keep reading for more tips!
Selecting the Best Foreground and Background
Choosing the right foreground and background turns a good photo into a great one. For wildlife photographers, this often means finding elements that don’t just frame the subject but also tell a story.
Look for natural lines in the landscape—like rivers or tree branches—that can guide the viewer’s eye to your main focal point, the animal. Make sure these elements are clear and add depth without cluttering your shot.
Foregrounds should complement your subject. This could be colorful leaves around a bird or rugged rocks near a mountain goat. Backgrounds need to be simple yet powerful, ensuring they highlight rather than hide your wildlife star.
A blurred backdrop works well to make your subject stand out sharply. Use aperture settings like f/2.8 to achieve this effect efficiently.
To sum up, select backgrounds that are smooth and undistracting while picking foregrounds that offer context and interest without stealing focus from the wild animal you’re photographing.
Understanding how animals behave is key to getting better shots…
Understanding Animal Behavior for Better Shots
After picking the best foreground and background, understanding animal behavior takes your wildlife photography to the next level. Knowing how animals act gives you better shots. Birds might fly from one tree to another for food or safety.
Deer have times when they eat or rest.
This knowledge helps you predict their next move. Use a teleconverter to get close without disturbing them. This means less waiting for the perfect moment. Always watch quietly and respect their space.
With this approach, you capture natural behavior—birds in flight, deer grazing, or rabbits hopping. Each photo tells a true story of wildlife, making your work stand out.
Capture the Wild: Composition Techniques for Wildlife Photography
Wildlife photography lets you show the beauty of animals in their natural settings. Mastering composition is key for standout photos. Here’s how:
- Use the rule of thirds to place your subject off-center for more dynamic images.
- Pay attention to both foreground and background, ensuring they don’t distract from your subject.
- Capture animals in action, such as birds flying or fish swimming, to add life to your shots.
- Look for contrast in colors between the subject and its environment for visual interest.
- Shoot during golden hours—early morning or late afternoon—for soft, warm lighting.
- Include elements like water, trees, and mountains that hint at the animal’s habitat.
- Spot patterns and lines in nature, such as a row of trees or the curve of a river, to guide the viewer’s eye.
- Adjust your vantage point; sometimes shooting from low down can make your subjects appear grander.
- Wait for unique moments, like an animal interacting with its environment or showing unusual behavior.
- Ensure sharp focus on the eyes; this connects viewers to the wildlife portrait photographers strive for.
By applying these techniques and considering angles, light, and color, you can create compelling compositions that bring viewers closer to nature’s wonders.
Crafting Our Wildlife Photography Portfolio
Crafting a wildlife photography portfolio shows off your best work. Include diverse shots: animals in motion, quiet moments, and tiny wonders. Pick photos that stand out for their clarity, creativity, and the story they tell.
Your aim? To grab attention at first glance.
Showcase your skills with images from forests, deserts, to wetlands across seasons. This variety proves you understand different environments and animal behavior. Be sure to add captions that share where and when you captured these moments, adding depth to your portfolio.
A great wildlife photo captures the essence of the moment – it’s about being there.
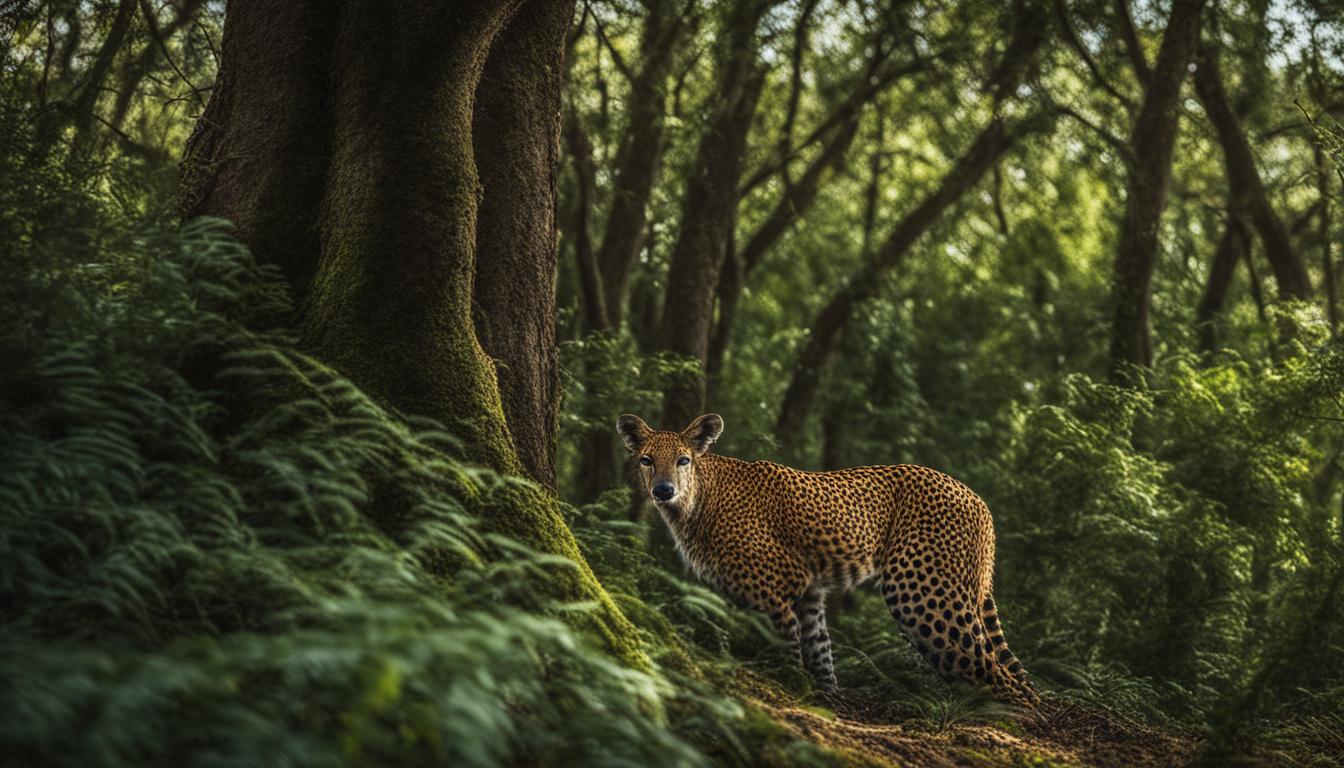
Capturing Wildlife: Forests, Deserts, Wetlands
Wildlife photography captures the beauty of forests, deserts, and wetlands. Each environment offers unique challenges and rewards for photographers.
- Forests provide dense vegetation and varied light conditions. Use a lens with wide aperture to capture details in dim light.
- Deserts offer vast, open spaces with dramatic lighting. Early morning or late afternoon are the best times for soft light and shadow play.
- Wetlands feature rich ecosystems. A telephoto lens helps photograph birds and animals from a distance without disturbing them.
- In forests, seek out clearings or streams where animals come to drink for unobstructed shots.
- Desert wildlife is often most active during cooler temperatures at dawn and dusk, making these ideal shooting times.
- Waterproof gear is essential for wetlands photography to protect against moisture and unexpected weather changes.
- Pay attention to seasonal migrations in all three environments, especially wetlands, to capture unique species interactions.
- Utilize blinds or hides in forests and wetlands for close-up shots without scaring wildlife away.
- In deserts, minimize your presence by using natural cover and moving slowly to avoid startling animals.
10, For capturing fast-moving subjects like birds in flight across all terrains, adjust shutter speed to at least 1/1000th of a second.11 Explore macro photography in forests and wetlands to highlight the small wonders of wildlife, such as insects on leaves or frogs in ponds.
12 Use remote camera traps in all three environments to capture natural behavior when you can’t be there.
13 Understanding animal behavior is crucial; knowing when they eat or rest helps plan your sessions around their routines.
Each environment demands different skills and patience but offers endless opportunities for stunning wildlife photography.
Capturing Nature: Seasonal Wildlife Photography Guide
Seasonal changes offer unique opportunities for wildlife photography. Understanding these patterns ensures captivating shots throughout the year.
- Spring brings newborn animals and blooming flowers. Use a macro lens to capture intricate details of tiny wonders, like dew on petals or feathers of baby birds just learning to fly.
- Summer offers vibrant landscapes and active wildlife. Fast shutter speeds freeze the motion of creatures in action, from birds swooping for prey to underwater photographers capturing the dynamic life beneath lakes and oceans.
- The fall season paints forests in golden hues. Teleconverters extend your camera’s reach, allowing you to photograph deer from afar without disturbing their natural behavior.
- Winter’s snow provides a stunning contrast for wildlife shots. Adjust ISO settings to manage low light conditions without losing image quality.
- Early morning or late afternoon light enhances natural colors; plan shoots during these golden hours for soft lighting that makes your subjects glow.
- Observe animal behavior closely; knowing when animals are most active helps in planning your shoot around their routines, leading to more natural and engaging photos.
- Use blinds or hides for discreet observation, ensuring you respect wildlife habitats while getting close-up shots without being seen.
- Capture animals in their environment by selecting backgrounds that complement their features; a snowy owl against a wintry white background creates a harmonious scene.
- Remote camera traps discover nocturnal or shy creatures, revealing aspects of wildlife rarely seen by humans.
- Telling stories through your photos connects viewers with nature conservation efforts, highlighting the importance of preserving habitats season by season.
Incorporating these tips into your photography adventures will improve your skills and deepen your appreciation for the changing beauty of nature captured through each season’s unique lens.
Ethical Considerations in Wildlife Photography
When taking photos of animals, always show them respect. Follow rules to make sure you don’t harm their homes or lives.
Respecting Wildlife and Habitats
Respecting wildlife and their homes is a must. Stay far enough away to avoid scaring animals. Always use your zoom lens or teleconverter for close-up shots. This way, you won’t disturb them in their natural activities.
Keep quiet and move slowly around wild areas. Our actions should never make animals feel threatened or force them to flee.
Follow ethical guidelines every time you’re out taking photos of nature. Avoid using flashes since they can startle or harm animals, especially at night. It’s also important not to feed wildlife because it can change their natural behaviors and how they interact with humans.
Stick to paths and areas meant for visitors to protect sensitive habitats from damage. By doing these things, we help ensure that the beautiful scenes and creatures we photograph will be there for future generations too.
Ethical Wildlife Photography Guidelines
Taking photos of animals in their natural habitat is a big responsibility. We must do it in ways that keep them safe and respect their homes. Here are the guidelines to follow:
- Always keep a good distance from wildlife. This avoids stress and disturbance, letting them behave naturally.
- Never feed the animals to get a better shot. It can harm their health and change how they act.
- Use long lenses for close-up shots without getting too close. A teleconverter might help for extra reach.
- Stay quiet and move slowly to not scare away or stress the animals.
- Respect the rules of wildlife reserves and national parks, including staying on marked paths.
- Leave no trace behind. Make sure not to leave any trash or disturb natural landscapes.
- Be aware of your surroundings, including other photographers and spectators, to ensure you’re not blocking animal pathways or creating unnecessary noise.
- Use blinds or hides when possible, minimizing your visibility and impact on wildlife.
- Research animal behavior before going out; knowing when they are most active can result in better photos with less disturbance.
10.Control your flash usage; avoid using it during nighttime shoots as it can disorient animals.11.Share your photos responsibly by highlighting conservation messages and avoiding locations that are sensitive or at risk from increased human activity.
12.Foster an ethic that prioritizes animal welfare over capturing images.
Using these strategies, I’ve successfully captured moments in nature without causing harm or distress to its inhabitants, showing we can enjoy photography while maintaining our ethical obligations towards wildlife.
Special Techniques and Considerations
In wildlife photography, playing with sunlight and shadows can make your photos pop. Waiting quietly for hours and using special hiding spots gets you those rare, intimate animal pictures.
Harnessing Natural Light in Wildlife Photography
Natural light plays a key role in wildlife photography. Good lighting makes photos look alive and sharp. Early morning and late afternoon offer the best natural light. This light adds warmth and depth to pictures.
The angle of the sun creates long shadows that give animals shape and character.
Photographers use this natural light to capture stunning shots without flash. They adjust their position to make sure the sun lights up their subject just right… not too bright, not too dark.
They pay close attention to how sunlight touches the landscape, changing through hours, seasons…. Smart photographers know each moment offers a unique chance for perfect shots—like underwater scenes glowing under morning light or birds taking flight at sunset’s golden hour.
Patience & Persistence in Wildlife Photography
After harnessing natural light, the next step is focusing on patience and persistence. These traits are vital for wildlife photographers. Getting the perfect shot means waiting, sometimes for hours or days.
Wild animals won’t pose for a camera. They appear and act on their schedules, not ours. This wait tests patience but also sharpens our skills in observing animal behavior.
Knowing an animal’s routine helps us predict its next move—a key to capturing compelling images without disturbing them. Persistence pays off too. Many attempt to photograph a rare bird or elusive creature but give up too soon.
Those who stay committed often get rewarded with unique shots that less persistent folks miss out on. In wildlife photography, your persistence sets you apart, turning good photos into unforgettable ones.
Wildlife Photography from Blinds and Hides: Tips
Blinds and hides are key for capturing wildlife without disturbance. They offer a unique way to photograph animals in their natural habitat.
- Choose a hide that blends with the environment. This makes it less likely for animals to spot you.
- Set up your hide at dawn or dusk when many animals are most active. This increases your chances of sighting.
- Use a camera with a long lens to take photos from far away. It helps you stay hidden while capturing clear images.
- Stay silent inside the blind or hide. Even small sounds can alert wildlife.
- Wait patiently for wildlife to appear. Sometimes, it takes hours to get the perfect shot.
- Keep windows or openings minimal to avoid detection by animals.
- Use remote triggers for cameras to take photos without being in the blind, allowing for even less disturbance.
- Cover your scent as some animals can smell humans from far away.
- Position your hide near water holes or feeding areas but at a safe distance to respect animal space.
- Bring essentials like water and snacks, but ensure they’re quiet to open and eat.
Using these tips will help you capture stunning wildlife photographs while ensuring animals remain undisturbed in their natural surroundings.
Unveiling Secrets with Remote Camera Traps in Wildlife Photography
Remote camera traps offer a sneak peek into the hidden lives of wildlife. They let us capture images without disturbing the animals.
- Choose strategic locations for your camera traps, such as waterholes, game trails, or feeding areas where animals often visit.
- Set up the camera trap at a distance that ensures safety for both you and the wildlife. Keep it camouflaged to blend with the environment.
- Adjust settings to match the conditions: high shutter speeds for capturing fast-moving species and low ISO to minimize grain in low light.
- Use multiple camera traps to cover more ground and angles, capturing different aspects of animal behavior.
- Check your gear regularly for proper functioning but avoid frequent disturbances that might deter wildlife from returning.
- Employ motion sensors wisely; they trigger your camera when an animal crosses their path, ensuring you don’t miss a shot.
- Experiment with different heights based on your subject – ground level for small creatures like frogs and eye-level for larger mammals like deer.
- Analyze the behavior and patterns of local wildlife to predict their movements and increase your chances of successful captures.
- Review captured images frequently to adjust strategies and settings for better results next time.
- Share findings with conservation groups; your photos can aid research without risking stress or harm to animals.
Using remote camera traps enriches our understanding of nature while maintaining a respectful distance from wild inhabitants.
Capturing Tales: Storytelling Through Wildlife Photography
After exploring the use of remote camera traps, we capture tales through wildlife photography. This approach transforms simple images into compelling narratives.
- Story matters in every shot. Use your lens to share the journey of a migrating bird or the daily struggles of life in the wild.
- Know your subject. Spend time understanding the behavior and patterns of animals you wish to photograph. This knowledge lets you anticipate moments worth capturing.
- Position yourself wisely. Consider the background and plane of focus to make your subject stand out while telling a broader story about their environment.
- Play with light for mood. The way light plays on your subject can turn a regular scene into a dramatic one, highlighting details otherwise missed.
- Master timing and patience are key. Wildlife doesn’t perform on cue, so being patient ensures you’re ready when the perfect moment unfolds.
- Choose gear that goes unnoticed. Stealthy equipment like silent cameras helps capture natural behavior without disturbing the scene.
- Employ different perspectives for depth—photograph from high angles for an expansive view or get down low to meet your subject at eye level.
- Adjust settings for clarity and detail—fast shutter speeds freeze motion while wide apertures blur backgrounds, emphasizing your focal point.
- Capture actions and interactions to show more than just static beauty; depict life happening, from hunts to playfulness among young animals.
- Keep ethical practices front and center by respecting wildlife and habitats, ensuring your quest for a great story does not harm your subjects or their homes.
- Frame with purpose using elements in nature to guide viewers’ eyes towards the main subject, adding layers to the tale being told.
- Incorporate signs of the environment like blooming flowers or changing leaves to anchor your story within a specific time or place.
- Experiment with underwater photography for unique stories beneath surfaces where land dwellers rarely venture but life teems in mystery and beauty.
- Use storytelling techniques such as building tension with impending action shots or creating relief with peaceful coexistence scenes among species.
- Lastly, always leave room for surprises – unexpected moments often tell the most memorable stories in wildlife photography, showing nature’s unpredictable side.
Capturing Nature Conservation in Wildlife Photography
Moving from storytelling through images, nature conservation becomes a critical theme. Wildlife photographers play a key role in sharing stories of conservation efforts. By focusing their lenses on how habitats are preserved and animals are protected, they highlight the importance of these actions.
Photos can show forests regrowing, animals returning to areas once lost to them, and people working hard to protect these places.
To do this well, photographers use gear that lets them capture shots without disturbing the wildlife. They might choose cameras with long lenses and employ tripods for stability—allowing close-up shots from a distance.
Understanding animal behavior helps too; knowing when birds take flight or where certain creatures gather at dawn brings life to their conservation tales. These images serve as compelling evidence of why we must keep fighting for these wild spaces and their inhabitants.
Essential Safety Tips for Wildlife Photographers
Capturing the beauty of nature through conservation photography leads us naturally to prioritize safety. Photographers must be vigilant, both for their well-being and the subjects they capture.
- Always check weather reports before heading out. Sudden changes can affect both your safety and your gear.
- Keep a safe distance from wildlife. Use long lenses to capture close-ups without disturbing animals.
- Inform someone about your location and expected return time. If anything goes wrong, help can find you.
- Pack essential survival items—water, food, first-aid kit, and a charged phone are must-haves.
- Wear appropriate clothing for the environment. Protect yourself from elements, insects, and rough terrain.
- Know the wildlife you might encounter. Understanding behaviors reduces risks of surprising or provoking animals.
- Stay on marked paths and respect barriers in protected areas to minimize impact on habitats.
- Secure your gear with straps to prevent accidents or damage while moving through rugged landscapes.
- Learn basic first aid for bites or stings common in the wild areas you photograph.
- Use email alerts or apps that track your location when venturing into remote areas for added security.
- Ensure your point-and-shoots or any camera equipment is insured against damage or loss in wild settings.
These tips ensure personal safety and uphold ethical photography practices by minimizing disturbance to wildlife and their homes.
Conclusion
Use the right camera and lens for sharp photos. Adjust shutter speed, aperture, and ISO to match light and movement. Learn animal behavior for better shots. Respect wildlife while shooting.
With these tips, stunning wildlife photography is within reach.
FAQs
1. What’s the best time to capture wildlife photos?
The golden hours—just after sunrise and before sunset—offer soft light that can make your wildlife shots stand out.
2. How do I get close enough without scaring animals away?
Use a telephoto lens; it lets you zoom in from a distance, keeping you hidden while capturing detailed shots.
3. Can my email address help me with wildlife photography?
Yes, sign up with photography forums using your email address. You’ll receive tips, updates on animal movements, and locations flown over by seasoned photographers.
4. What should I focus on for stunning wildlife photographs?
Focus on the eyes of the animal to bring life to your shot—it connects viewers directly with the subject.