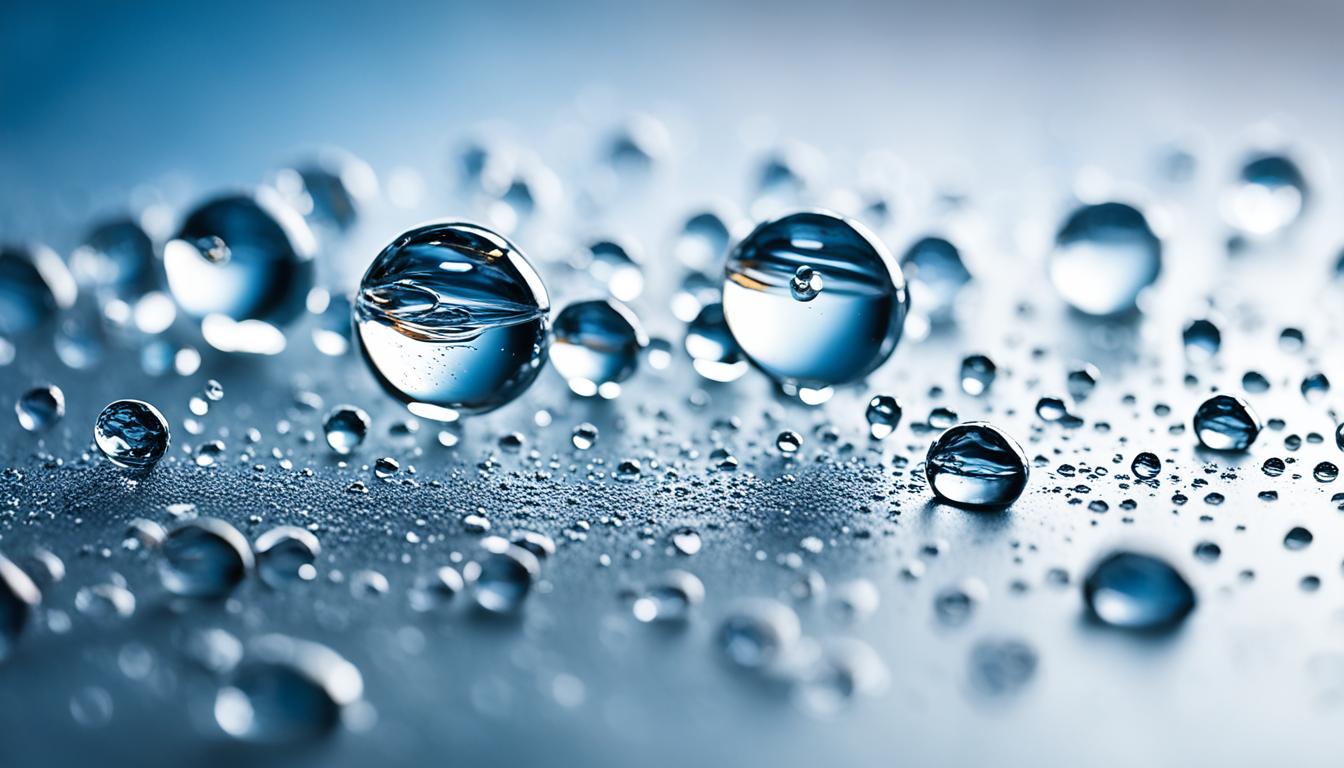
Welcome to our essential guide on water droplet macro photography! If you’re fascinated by close-up images and want to capture the beauty of water droplets, you’re in the right place. In this guide, we will provide you with techniques and tips to enhance your water droplet macro photography skills. From equipment and camera settings to composition and post-processing, we’ve got you covered. Let’s dive in and explore the mesmerizing world of water droplet macro photography!
Key Takeaways:
- Water droplet macro photography allows you to capture stunning close-up images of water droplets.
- Essential equipment for water droplet macro photography includes a digital SLR camera with a macro lens, a shallow bowl filled with water, and good lighting.
- Setting up a home studio for water droplet photography involves placing the bowl on a sturdy surface, ensuring proper lighting, and using a colored background.
- Camera settings should be adjusted to manual mode or shutter priority mode, with a manual focus for precise control over the image.
- Prefocusing your camera on the area where the droplets will fall and using burst mode can help capture the perfect shot.
Equipment and Setup for Water Droplet Macro Photography
To get started with water droplet macro photography, you’ll need some essential equipment. Here is a breakdown of the items you’ll need to capture stunning close-ups of water droplets:
Macro Photography Equipment
- Digital SLR camera with a macro lens: A dedicated macro lens allows you to capture intricate details and achieve a higher magnification ratio.
- Shallow bowl filled with water: This will be the backdrop for your water droplets, so choose a clean and clear bowl without any scratches.
- Tripod (optional): Though not necessary, a tripod can provide stability and help avoid camera shake, especially if you’re shooting at slower shutter speeds.
- Good lighting: Proper lighting is crucial for water droplet macro photography. You can use natural light or artificial lighting, such as a speedlight or continuous lights, to illuminate the scene.
Setting up a home studio for water droplet photography is relatively simple:
- Place the bowl on a sturdy surface: Ensure that the surface is level and can withstand any movement or vibrations.
- Ensure proper lighting: Position your light source(s) in a way that illuminates the water droplets effectively. You can experiment with different lighting techniques, angles, and diffusers to achieve the desired effect.
- Use a colored background: To add visual interest and enhance the overall composition, consider using a colored background behind the bowl. This can be achieved by using colored paper or fabric.
With the right equipment and a well-prepared setup, you’ll be ready to capture stunning water droplet macro photographs.
Camera Settings for Water Droplet Macro Photography
When it comes to capturing awe-inspiring water droplet macro photos, setting the right camera parameters is crucial. By adjusting your camera settings to prioritize manual control and focusing, you’ll have the power to create impactful and visually stunning images.
For optimal results, we recommend switching your camera to either manual mode or shutter priority mode. These modes allow you to take full control over essential settings, such as shutter speed, aperture, and ISO. Manual mode empowers you to fine-tune each aspect, while shutter priority mode automatically adjusts the remaining settings to ensure ideal exposure.
Now, let’s focus on the key setting that can make or break your water droplet macro photos―manual focus. Switching to manual focus mode is essential in this genre, as it allows you to direct the camera’s attention precisely where you want the droplets to fall. By doing so, you ensure that the droplets are in sharp focus, resulting in crisp and detailed images.
Getting the Perfect Focus
Here’s a simple step-by-step process to achieve the perfect focus for your water droplet macro shots:
- Set up your camera on a tripod to minimize any unwanted movement.
- Position a recognizable object, such as a ruler or a small figurine, at the desired spot where you want the droplets to fall.
- Switch your lens to manual focus mode.
- Look through the viewfinder and adjust the focus ring until the object in the frame appears sharply in focus.
- Once the focus is set, remove the object from the frame to allow the droplets to fall naturally.
By following this process, you ensure that your camera is precisely focused on the area where the droplets will land, resulting in stunning and intricate macro photos.
Remember, experimenting with different camera settings and refining your technique is key to achieving outstanding water droplet macro photography. Practice and patience will help you master the art of capturing mesmerizing images of these tiny, reflective wonders.

| Camera Settings | Benefits |
|---|---|
| Manual Mode | Full control over shutter speed, aperture, and ISO for precise exposure |
| Shutter Priority Mode | Automatic adjustment of remaining settings for ideal exposure |
| Manual Focus | Sharper focus on the desired area where droplets will fall |
Capturing the Perfect Water Droplet Shot
To capture the perfect water droplet shot, we need to focus our camera precisely and capture the fleeting moment when the droplets fall. Here are some focusing techniques and camera settings to help you achieve stunning water droplet photographs.
Focusing Techniques
When it comes to water droplet photography, precise focus is key to capturing the intricate details of each droplet. One effective technique is to prefocus your camera on the area where the droplets are likely to fall.
Here’s how you can do it:
- Place an object, such as a ruler or a small figurine, at the desired spot where the droplets will fall.
- Set your camera’s focus on the object, ensuring it is sharp and clear.
- Once you’ve achieved the desired focus, remove the object and get ready to capture the droplets.
By pre-focusing your camera, you eliminate the risk of missing the focus on the fast-moving droplets, resulting in sharper and more detailed images.
Burst Mode
Water droplets are often unpredictable, and capturing the perfect moment requires precision and speed. One way to achieve this is by using burst mode on your camera.
Burst mode allows you to capture a rapid series of shots in quick succession. By holding down the shutter button, your camera will take multiple photos in a fraction of a second, increasing your chances of capturing the ideal water droplet shot.
Here’s how you can use burst mode effectively:
- Ensure your camera is set to continuous shooting or burst mode.
- Position yourself and your camera in a stable position, ready to capture the droplets as they fall.
- Release the shutter button as soon as the droplets start to fall.
- Review your images and select the best shot from the series.
Using burst mode allows you to capture the precise moment when the droplets form interesting shapes or splash against a surface, giving you a range of options to choose from when selecting the perfect water droplet shot.
Remember, practicing these focusing techniques and utilizing burst mode will enhance your chances of capturing breathtaking water droplet photographs.
| Focusing Techniques | Burst Mode |
|---|---|
| 1. Prefocus on the expected area of droplet fall | 1. Set camera to continuous shooting or burst mode |
| 2. Use an object as a reference point for focus | 2. Position yourself and the camera stably |
| 3. Remove the object and be ready to capture | 3. Release the shutter as droplets fall |
| 4. Review and select the best shot from the series |
Lighting Techniques for Water Droplet Macro Photography
When it comes to water droplet macro photography, lighting is a key element in creating stunning and captivating images. The right lighting not only illuminates the droplets but also enhances their details and creates mesmerizing reflections. In this section, we will explore various lighting techniques that you can employ to take your water droplet macro photography to the next level.
To achieve the desired lighting effects for your water droplet images, two popular options are using a speedlight or continuous lights. A speedlight provides a burst of powerful light, allowing you to freeze the motion of the droplets and capture their intricate details. Continuous lights, on the other hand, offer a constant light source that gives you more control over the lighting setup and enables you to experiment with different effects.
Experimenting with different lighting techniques can add depth and creativity to your water droplet macro photographs. Here are a few techniques to consider:
- Backlighting: Placing the light source behind the water droplets creates a beautiful glowing effect, emphasizing the translucent quality of the droplets and highlighting their shape and contours.
- Side lighting: Positioning the light source at an angle to the droplets creates interesting shadows and adds depth to your images. This technique can bring out the textures and details of the droplets in a unique way.
- Colored lighting: Using colored gels or filters in front of your light source can introduce a creative and vibrant element to your water droplet macro photography. Experimenting with different colors can evoke different moods and enhance the visual impact of your images.
- Diffused lighting: Softening the light by using diffusers or light modifiers helps create a softer and more even illumination. This technique reduces harsh reflections and allows for a more subtle and delicate capture of the water droplets.
By mastering these lighting techniques and incorporating them into your water droplet macro photography, you can unleash your creativity and capture breathtaking images that showcase the beauty and intricacy of water droplets.
| Lighting Technique | Description |
|---|---|
| Backlighting | Placing the light source behind the droplets to create a glowing effect and highlight their shape and contours. |
| Side lighting | Positioning the light source at an angle to create interesting shadows and add depth to the images. |
| Colored lighting | Using colored gels or filters to introduce vibrant colors and enhance the visual impact of the droplets. |
| Diffused lighting | Softening the light to create a softer and more even illumination, reducing harsh reflections and enhancing delicate details. |
Composition Tips for Water Droplet Macro Photography
Composition plays a crucial role in water droplet macro photography, allowing you to create visually striking and captivating images. By experimenting with different composition techniques, you can elevate your macro photography and capture stunning shots of water droplets. Here are some composition tips to enhance your water droplet macro photography:
- Rule of Thirds: Divide your frame into a 3×3 grid and place the water droplets along the gridlines or at the points where the lines intersect. This technique adds balance and interest to your composition.
- Leading Lines: Use leading lines, such as a blade of grass or a droplet trail, to guide the viewer’s eye towards the main subject. This creates a sense of depth and directs attention to the water droplets.
- Symmetry: Capture symmetrical water droplet patterns by aligning them along a central axis or reflecting them in a mirror-like surface. Symmetry adds a sense of harmony and balance to your composition.
If you’re looking to get even more creative with your water droplet macro photography, consider these ideas:
- Reflections: Experiment with capturing the reflection of the water droplets in a reflective surface, such as a mirror or a shiny object. Reflections add a unique and artistic element to your composition.
- Contrasting Elements: Incorporate other elements, such as flowers, leaves, or colorful backgrounds, into your composition to create an interesting contrast with the water droplets. This juxtaposition adds visual appeal and complexity to your macro photos.
Remember, composition is subjective, and the possibilities are endless. Don’t be afraid to experiment, break the rules, and trust your creative instincts. Keep practicing and refining your composition skills, and soon you’ll be capturing breathtaking water droplet macro photographs that stand out from the crowd.
Post-Processing Techniques for Water Droplet Macro Photography
After capturing stunning water droplet macro photographs, it’s time to take them to the next level through post-processing. With the right editing techniques, you can enhance the visual impact and create unique, eye-catching images that showcase the mesmerizing details of water droplets. Let’s explore some post-processing techniques that can elevate your water droplet macro photography:
Adjusting Basic Settings
Firstly, start by adjusting the basic settings of your water droplet macro photographs using software like Adobe Lightroom or Photoshop. These tools offer a wide range of controls for brightness, contrast, sharpness, and color. Experiment with these settings to find the perfect balance that brings out the finest details of the droplets.
Applying Filters and Presets
To create a specific mood or style in your water droplet macro photographs, you can apply filters and presets available in editing software. These allow you to instantly transform the overall look and feel of your images, adding more depth and creativity. Try out different filters and presets to find the ones that resonate with your artistic vision.
Sharpening and Clarity
To further enhance the details of the water droplets, use the sharpening and clarity tools in your editing software. These tools help bring out the intricate patterns and textures by enhancing the edge definition. Be cautious not to overdo it, as excessive sharpening can lead to unnatural and pixelated results.
Color Correction and Saturation
Color plays a crucial role in water droplet macro photography. Adjusting color balance, temperature, and saturation can significantly impact the mood and visual appeal of your images. Experiment with different color correction techniques to find the right balance that accentuates the beauty of the water droplets.
Highlight and Shadow Adjustments
To achieve a balanced exposure in your water droplet macro photographs, make use of highlight and shadow adjustment tools. These tools help recover details in overexposed highlights and underexposed shadows. By refining these areas, you can bring out the full dynamic range and create a more visually pleasing image.
Adding Creative Effects
If you’re looking to add a touch of creativity to your water droplet macro photographs, try experimenting with creative effects such as vignetting, selective coloring, or adding a texture overlay. These effects can infuse your images with a unique style and make them stand out from the crowd.
“Post-processing is not about altering the reality, but rather enhancing the beauty that already exists in your water droplet macro photographs.”
Remember, post-processing should complement and enhance the inherent beauty of your water droplet macro photographs. Experiment with different editing techniques, but always strive to maintain the authenticity and integrity of the original image.

| Post-Processing Techniques | Description |
|---|---|
| Adjusting Basic Settings | Modify brightness, contrast, sharpness, and color to enhance the overall look and feel. |
| Applying Filters and Presets | Instantly transform the mood and style of your images with pre-designed filters and presets. |
| Sharpening and Clarity | Enhance the intricate details and patterns of the water droplets with sharpening and clarity adjustments. |
| Color Correction and Saturation | Adjust color balance, temperature, and saturation to create the desired visual impact. |
| Highlight and Shadow Adjustments | Refine the exposure by recovering details in overexposed highlights and underexposed shadows. |
| Adding Creative Effects | Experiment with vignetting, selective coloring, or texture overlays to add a unique touch to your images. |
Tips for Perfecting Your Water Droplet Macro Photography
Perfecting water droplet macro photography requires patience and practice. As photographers, we understand that capturing the perfect shot takes time and effort. Don’t get discouraged if you don’t achieve the desired results immediately. With dedication and perseverance, you can master this highly technical and experimental genre.
Here are some helpful macro photography tips to enhance your water droplet images:
- Refine Your Techniques: Continuously refine your approach to water droplet macro photography. Experiment with different camera angles, lighting setups, and focusing techniques to find what works best for you.
- Experiment with Setups: Don’t be afraid to try different setups for capturing water droplet shots. Whether it’s adjusting the height of the water source, adding props, or introducing colored backgrounds, experimenting can lead to unique and striking images.
- Master the Timing: Timing is crucial when it comes to capturing water droplets in action. Practice your timing by understanding the characteristics of the droplets and anticipating their movements. This will help you capture that perfect moment.
- Explore Different Compositions: Composition plays a key role in creating visually pleasing water droplet macro photographs. Experiment with different compositions, such as symmetrical arrangements, leading lines, or the rule of thirds, to add interest and balance to your images.
- Take Advantage of Natural Light: Natural light can bring a unique charm to your water droplet images. Use the soft, diffused light of a window or the gentle sunlight of the golden hour to create captivating and ethereal effects.
Remember, practice is key to improving your water droplet macro photography skills. The more you practice, the better you’ll become at understanding the nuances of this genre and capturing breathtaking images. So, grab your camera, set up your equipment, and dive into the fascinating world of water droplet macro photography.
“Patience and perseverance have a magical effect before which difficulties disappear and obstacles vanish.”
Exploring Creative Variations in Water Droplet Macro Photography
Water droplet macro photography offers an exciting opportunity to channel your creativity and experiment with different techniques. By exploring variations such as droplet reflection photography and colored water droplets, you can add a unique and striking touch to your macro images.
Capturing Reflection in Water Droplets
One captivating variation in water droplet macro photography is capturing reflections within the droplets themselves. Positioning your subject or a captivating scene behind the water droplets can create stunning visual effects. As light passes through the droplets, it refracts, creating captivating reflections and adding a mesmerizing element to your photographs.
To capture reflections effectively, pay attention to the lighting and composition. Experiment with different angles and positions to achieve the desired reflection effect. Play with the colors and shapes of the reflected objects to add depth and intrigue to your images.
Adding Colored Water Droplets
An innovative way to enhance the visual impact of your water droplet macro photographs is to add colored dyes to the water. By introducing vibrant hues, you can infuse a sense of artistry and creativity into your images.
Start by using food coloring or water-based dyes to create a colored water mixture in your droplet setup. Experiment with different colors to achieve the desired effect. You can also mix colors to create unique combinations that complement your subject or setting.
When capturing colored water droplets, consider the interplay of light, the refractive properties of the droplets, and the surrounding elements. The resulting images can showcase a captivating interplay of colors, adding a dynamic and visually appealing element to your shots.
Unlock Your Creativity in Water Droplet Macro Photography
Water droplet macro photography provides endless opportunities for creative exploration. Whether you choose to capture captivating reflections or experiment with colored water droplets, these variations will elevate your macro images and make them stand out.
Remember, the key to successful water droplet macro photography is to experiment, learn, and adapt. Allow your creativity to guide you as you explore the possibilities within this unique genre. With each click of the shutter, you’ll unlock new levels of artistic expression and create truly captivating water droplet macro photographs.
Conclusion
Water droplet macro photography is an incredibly captivating genre that allows us to capture the intricate details of water droplets in close-up. By implementing the techniques and tips outlined in this guide, you can elevate your skills in capturing stunning water droplet photographs.
Remember, practice and experimentation are key to mastering the art of water droplet macro photography. Take the time to refine your camera settings, explore different compositions, and play with lighting techniques to create visually striking images.
With patience and persistence, you’ll soon be able to produce beautiful and captivating close-up photographs of water droplets. So grab your camera, set up your equipment, and let your creativity flow as you delve into the fascinating world of water droplet macro photography!
FAQ
What equipment do I need for water droplet macro photography?
To get started, you’ll need a digital SLR camera with a macro lens, a shallow bowl filled with water, a tripod (optional), and good lighting.
What camera settings should I use for water droplet macro photography?
It’s important to set your camera to manual mode or shutter priority mode to have full control over the shutter speed and other settings. Additionally, switch to manual focus mode to ensure the camera focuses on the desired area where the droplets will fall.
How can I capture the perfect water droplet shot?
To capture the perfect shot, prefocus your camera on the area where the droplets are likely to fall. Use burst mode to capture multiple shots as the droplets fall.
What lighting techniques should I use for water droplet macro photography?
Experiment with different lighting techniques, such as backlighting or side lighting, to illuminate the droplets and create interesting reflections.
How can I improve the composition of my water droplet macro photographs?
Experiment with composition techniques like the rule of thirds, leading lines, symmetry, and capturing the reflection of the droplets. Incorporating other elements into the composition can also add visual interest.
What post-processing techniques should I use for water droplet macro photography?
Use software like Adobe Lightroom or Photoshop to adjust brightness, contrast, sharpness, and color to enhance the visual impact of your images.
How can I perfect my water droplet macro photography skills?
Perfecting your skills requires patience, practice, and experimentation. Keep practicing, refining your techniques, and trying different setups and compositions to improve your skills.
Are there any creative variations I can explore in water droplet macro photography?
Yes, you can explore variations such as capturing reflections in water droplets or adding colored dyes to the water for added visual impact.
What is water droplet macro photography?
Water droplet macro photography is a genre that allows photographers to capture close-up images of water droplets, showcasing their intricate details and beauty.
How can I capture water droplets in my photographs?
By following the techniques and tips in this guide, you’ll be able to capture beautiful and creative shots of water droplets.
How Can Composition and Framing Techniques Improve Water Droplet Macro Photography?
When it comes to macro photography composition framing is crucial in capturing stunning water droplet shots. Using techniques like the rule of thirds and leading lines can add visual interest and draw the viewer’s eye to the main subject. Experimenting with different angles and perspectives can also result in more dynamic and engaging photographs.


