Are you ready for a celestial journey? With astrophotography without a telescope, you can capture the beauty of the night sky in stunning detail, all without the need for expensive equipment. In this quick start guide, we’ll show you how to begin your journey into astrophotography, from selecting the right equipment to mastering camera settings and techniques.
Key Takeaways:
- Astrophotography without a telescope allows you to capture breathtaking images of the night sky without expensive equipment.
- With the right camera lens and settings, there’s an endless array of celestial targets you can shoot.
- Essential equipment for astrophotography includes a DSLR camera, tripod, tracking mount, and optional autoguiding systems for improved accuracy.
- Choosing the right target depends on your lens’s focal length, and Stellarium is a helpful tool for selecting the perfect focal length.
- Proper mount and tripod setup, including polar alignment, is crucial for stable and precise tracking.
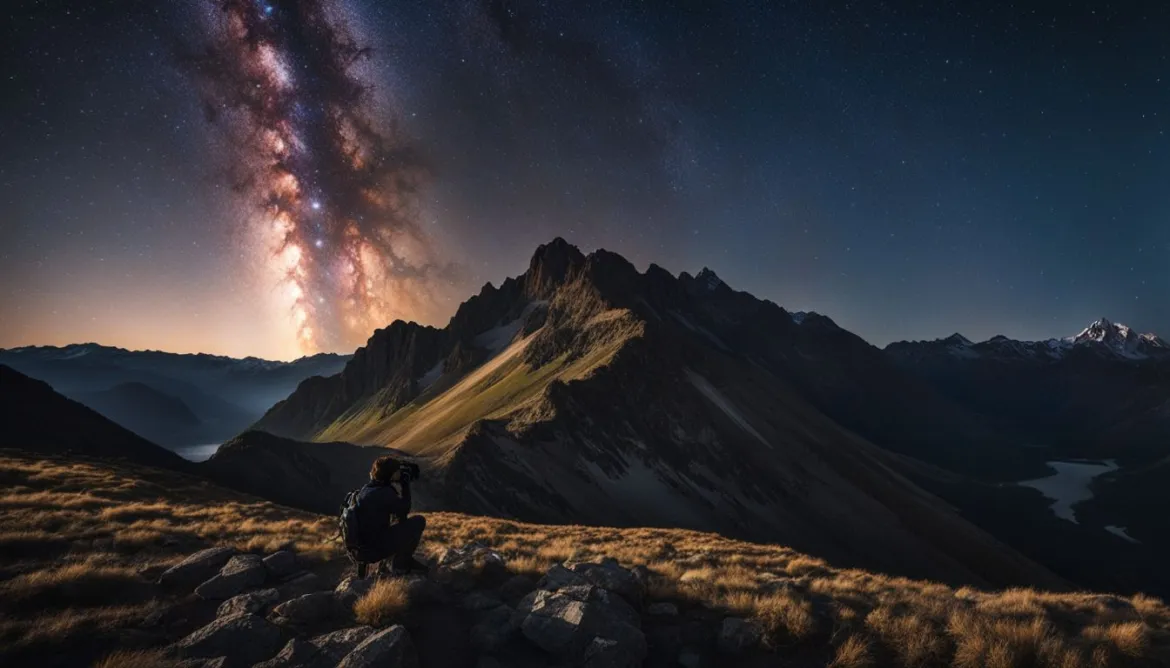
What can you shoot without a telescope?
When it comes to astrophotography, shooting without a telescope opens up a world of possibilities. Don’t worry if you don’t have a telescope yet because many celestial objects can be captured using just your trusty camera lens. The range of available targets worth shooting is vast, offering numerous options for stunning astrophotography subjects.
With just a camera lens, the possibilities for astrophotography are almost endless. You don’t need a telescope to capture breathtaking images of the night sky.
Whether you’re a beginner or a seasoned astrophotographer looking to try something different, shooting without a telescope allows you to explore various targets that are within reach. Here are some of the fascinating astrophotography targets you can capture:
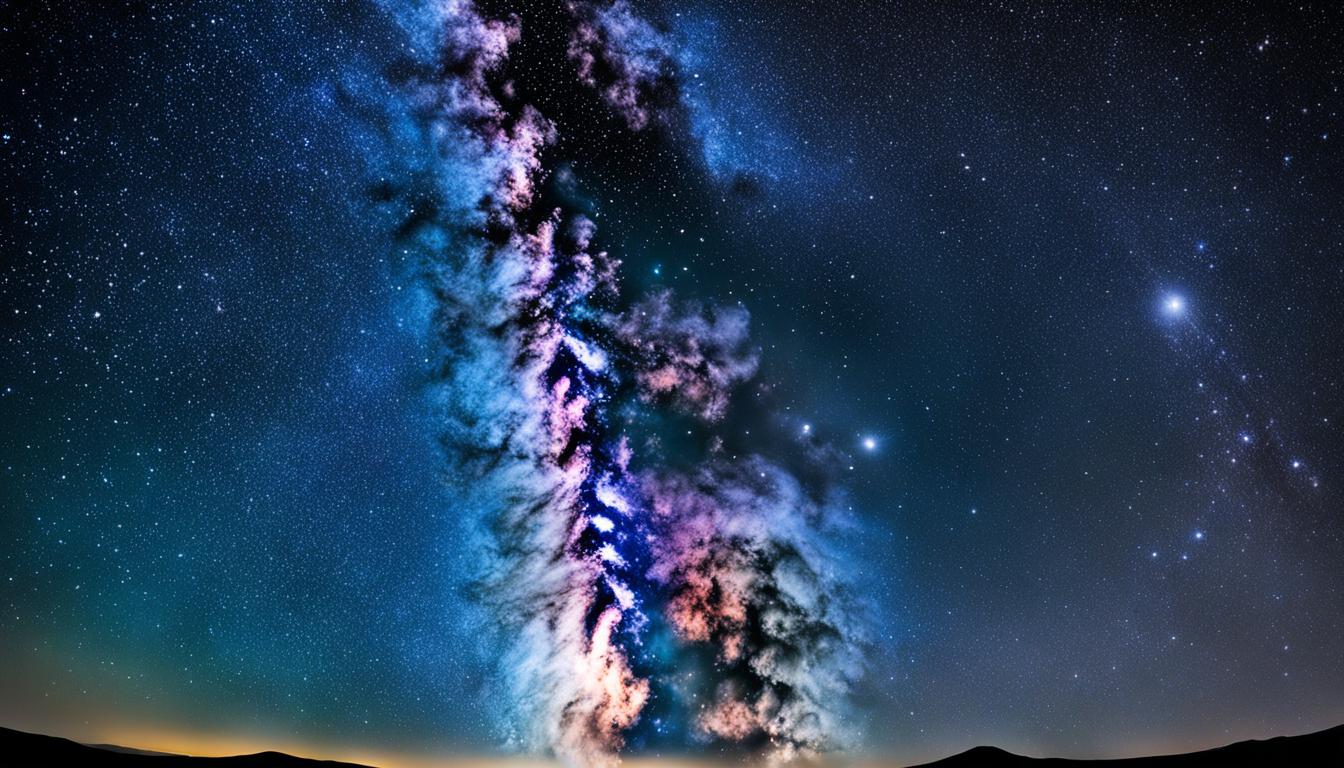
- The Moon: Capture the intricate details of our closest celestial neighbor. Its craters and maria make for captivating shots.
- The Milky Way: Marvel at the galaxy we call home. With a camera lens, you can capture its stunning patterns and structures.
- The Northern Lights: Witness the breathtaking dance of colorful lights in the night sky. Capture the vibrant hues of the Aurora Borealis.
- Deep-Sky Objects: From star clusters like the Pleiades to nebulae like the Orion Nebula, these astronomical wonders can be captured without a telescope.
Sample Table showcasing astrophotography targets:
| Astrophotography Targets | Description |
|---|---|
| The Moon | Capture the details of lunar craters and maria. |
| The Milky Way | Photograph the mesmerizing patterns and structures of our galaxy. |
| The Northern Lights | Capture the stunning colors of the Aurora Borealis. |
| Deep-Sky Objects | Capture star clusters and nebulae without the need for a telescope. |
With a camera lens, you can unleash your creativity and capture unique perspectives of the night sky. Experiment with different compositions, exposure settings, and post-processing techniques to create awe-inspiring astrophotography.
Be sure to check the weather conditions, plan your shoot in dark sky locations away from light pollution, and practice patience as you explore the wonders of astrophotography without a telescope.
Gather your equipment
To get started with astrophotography without a telescope, you’ll need some essential equipment. Let’s take a look at what you’ll need to capture stunning images of the night sky.
1. Camera
The key component of your astrophotography setup is a high-quality camera. The most common choice is a DSLR camera, known for its versatility and excellent image quality. Alternatively, if you’re looking to take your astrophotography to the next level, you may consider using an astronomical CCD camera. These specialized cameras offer enhanced sensitivity and lower noise levels for capturing the faint details of deep sky objects.
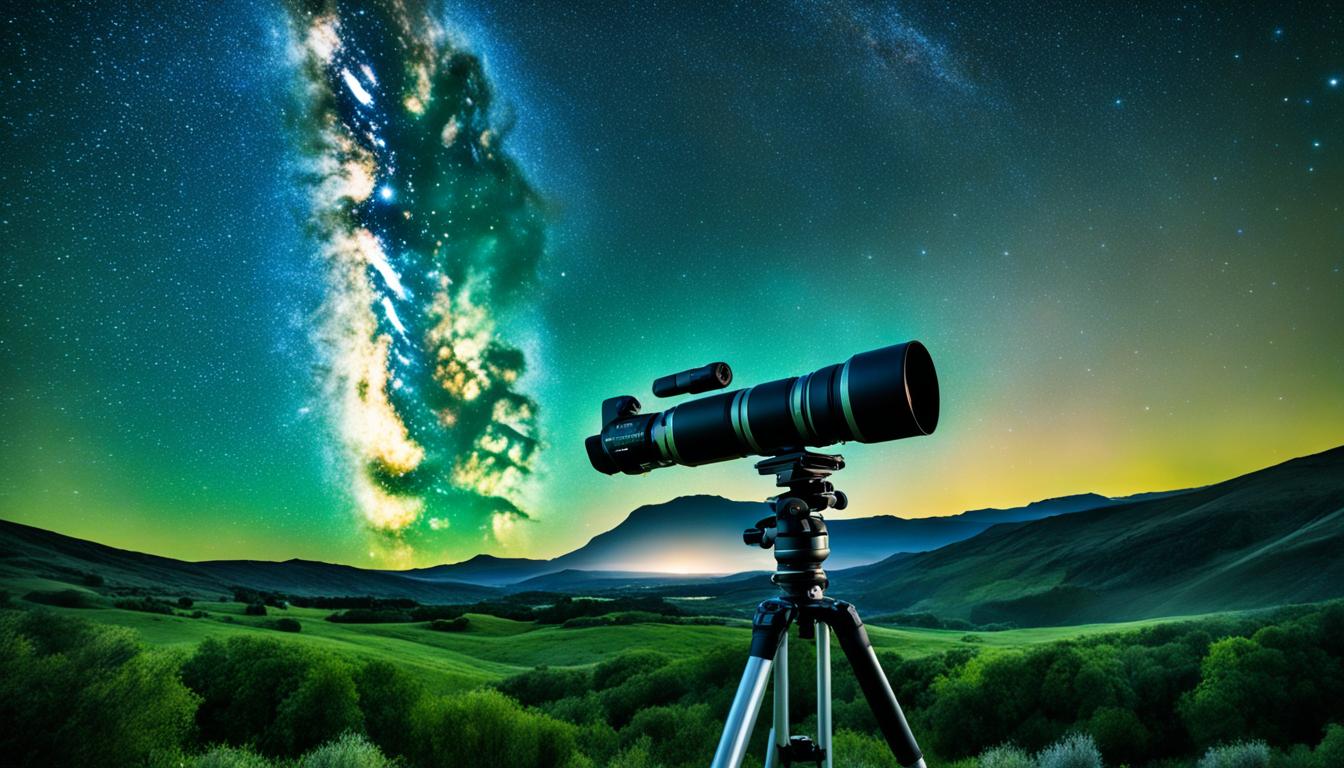
2. Lens
A camera lens is another crucial element for astrophotography without a telescope. Choose a lens with a wide aperture, such as f/2.8 or wider, to gather as much light as possible. A wide-angle lens is ideal for capturing expansive views of the night sky, while a telephoto lens allows you to zoom in on specific celestial objects.
3. Tracking Mount
A tracking mount is essential for capturing long-exposure images without star trails. This device compensates for the Earth’s rotation, ensuring that your camera stays aligned with the stars during lengthy exposures. Look for a reliable tracking mount that provides accurate tracking and smooth motion to capture stunning, sharp images of the night sky.
4. Tripod
To keep your camera and tracking mount stable, a sturdy tripod is a must-have accessory. Choose a tripod that can securely hold the weight of your equipment and withstand outdoor conditions. Stabilizing your setup eliminates any unwanted vibrations, resulting in crisp and clear astrophotography images.
5. Autoguiding (Optional)
If you’re aiming for prolonged exposures and utmost precision, consider incorporating an autoguiding system into your setup. Autoguiding systems track the motion of guide stars and make adjustments to keep your camera precisely aligned with the stars. This feature is particularly beneficial for capturing intricate details of deep sky objects over extended periods of time.
Remember, investing in high-quality equipment ensures better results in your astrophotography endeavors. However, you can start with a basic setup and gradually upgrade as you gain experience and refine your skills.
Now that you have a clear understanding of the essential equipment required, you’re ready to move on to the next step: choosing the perfect target for your astrophotography adventure.
| Equipment | Recommended Brands |
|---|---|
| DSLR Camera | Canon EOS Rebel T7i, Nikon D7500 |
| Astronomical CCD Camera | ZWO ASI294MC Pro, QHY 268C |
| Camera Lens | Sigma 35mm f/1.4 Art, Rokinon 14mm f/2.8 |
| Tracking Mount | Sky-Watcher Star Adventurer, iOptron SkyGuider Pro |
| Tripod | Manfrotto MT055CXPRO3, Vanguard Alta Pro 263AB |
| Autoguiding System | Orion Magnificent Mini AutoGuider, ZWO ASI120MM-S |

Pick a target
When it comes to astrophotography, choosing the right target is key to capturing stunning images. The target you select will depend on the focal length of your lens, as different objects require different focal lengths to be effectively captured.
For wide-field astrophotography, where you want to capture large objects such as galaxies or star clusters, wider lenses with shorter focal lengths are ideal. The Andromeda galaxy and Pleiades, for example, are popular targets that can be beautifully captured with a wide-angle lens.
On the other hand, smaller and more detailed objects like planets or individual stars may require longer focal lengths to bring out their intricate features. In these cases, a telephoto or zoom lens with a longer focal length would be more appropriate.
One useful tool to help you choose the perfect focal length for your target is Stellarium. This software allows you to explore the night sky and simulate different focal lengths, giving you a clear idea of how your chosen target will appear through your lens.
The Andromeda galaxy and the Pleiades are two popular targets in astrophotography. While the Andromeda galaxy is a sprawling spiral located 2.5 million light-years away, the Pleiades is an open star cluster, also known as the Seven Sisters, found in the constellation of Taurus.
| Target | Recommended Focal Length |
|---|---|
| Andromeda galaxy | ~50-200mm |
| Pleiades | ~20-50mm |
By considering the focal length of your lens and the characteristics of your target, you can make informed decisions to capture awe-inspiring images in your astrophotography adventures.
Set up your mount and tripod
Proper setup of your mount and tripod is crucial for successful astrophotography. Without a stable and well-aligned mount, capturing sharp and accurate images of the night sky can be challenging. Follow these steps to ensure optimal mount setup, tripod stability, polar alignment, and tracking quality.
Level and balance the mount
Before setting up your mount, ensure that it is level. Use a bubble level or the built-in electronic level if available. A leveled mount reduces strain on the gears, allowing for smoother tracking and improved tracking quality. Once level, balance the mount by adjusting the weights or positioning the optical tube assembly. Proper balance minimizes strain on the motor, resulting in more stable tracking for longer exposures.
Polar alignment for accurate tracking
Polar alignment is essential for precise tracking and reducing star trails in your astrophotography images. Aligning your mount with the Earth’s axis is accomplished by polar aligning the mount’s equatorial head. There are several methods available to achieve polar alignment, including the polar scope built into many mounts or using a smartphone app. Ensure precise alignment by taking your time and making small adjustments until the alignment is accurate. Polar alignment significantly improves tracking quality and is a crucial step for successful astrophotography.
Sturdy tripod legs and added weight
When choosing a tripod, stability is key. Opt for sturdy tripod legs that provide a solid foundation for your mount and camera setup. Lightweight tripods may introduce vibrations during long exposures, compromising image sharpness. Additionally, consider adding weight to the tripod for increased stability. Hanging a bag or attaching weights to the tripod center column can help minimize vibrations caused by wind or accidental bumps.
Bear in mind that tripod stability is crucial for capturing high-quality astrophotography images. A stable tripod ensures that your camera and mount stay steady throughout the exposure, resulting in sharper images with fewer motion artifacts.
By properly setting up your mount and tripod, you lay the foundation for successful astrophotography. The stability, balance, and accuracy achieved through mount setup, tripod stability, polar alignment, and tracking quality will greatly enhance your ability to capture stunning images of the night sky.

Capture the data
When it comes to astrophotography, capturing breathtaking images requires more than just pointing your camera at the night sky. To achieve stunning results, you need to master the art of camera settings.
Adjusting the right camera settings based on the conditions and target is crucial for capturing the beauty of celestial objects. Here are some key settings to consider:
ISO
The ISO setting determines the sensitivity of your camera’s image sensor. In low-light conditions, you’ll want to increase the ISO to capture more light. However, be mindful of increasing it too much as it can introduce noise into your images.
Aperture
The aperture determines the amount of light entering your camera’s lens. A wider aperture (smaller f-number) allows more light and creates a shallow depth of field, while a narrower aperture (larger f-number) lets in less light, resulting in a larger depth of field. Experimenting with different aperture settings can help you achieve unique effects in your astrophotography.
Exposure Length
The exposure length refers to the duration of time your camera’s shutter is open. Longer exposures are ideal for capturing faint details in the night sky, but be cautious of extended exposure times, as they can introduce star trails. Finding the right balance between capturing enough light and avoiding motion blur is key.
Aside from camera settings, there’s another crucial step in astrophotography: capturing calibration frames. These frames, such as darks and biases, are essential for image processing and reducing noise. Take a series of calibration frames before and after your imaging session to enhance the quality of your final images.
Lastly, shooting in RAW format is highly recommended for astrophotography. RAW files contain uncompressed and unprocessed data, allowing for greater flexibility during post-processing. This format preserves all the details and gives you more control over the final output of your images.
Remember, every astrophotography session presents unique conditions, and there’s no one-size-fits-all approach. Experimentation is key to finding the perfect camera settings that suit your desired results. So, grab your camera, adjust those settings, and capture the wonders of the cosmos!
Conclusion
Astrophotography without a telescope offers a fantastic opportunity for beginner astrophotographers to capture the awe-inspiring beauty of the night sky. By following a few essential tips and techniques, you can achieve stunning results and create mesmerizing images of the cosmos.
Capturing the night sky is an accessible and rewarding hobby that requires the right equipment and camera settings. Invest in a quality DSLR camera or an astronomical CCD camera to capture the intricate details of celestial wonders. Experiment with different lenses and focal lengths to capture a wide range of targets, from expansive star clusters like the Pleiades to distant galaxies like Andromeda.
When capturing the night sky, it’s crucial to set up your mount and tripod correctly. Ensure stability by leveling your mount, balancing it properly, and using a sturdy tripod. Polar alignment is essential for accurate tracking and minimizing star trails, providing you with clean, sharp images.
To achieve the best results, don’t be afraid to practice, experiment, and refine your techniques. Adjust camera settings such as ISO, aperture, and exposure length to suit the conditions and target you’re photographing. Additionally, capturing calibration frames like darks and biases can greatly enhance your image processing and noise reduction. Remember, astrophotography is a journey that should be enjoyed, so take the time to immerse yourself in the wonder of the cosmos and capture its breathtaking beauty.
FAQ
What can you shoot without a telescope?
When shooting astrophotography without a telescope, you can capture many celestial objects using just a camera lens.
What equipment do I need for astrophotography without a telescope?
Essential equipment includes a DSLR camera, a tracking mount for long-exposure photography, and a stable tripod. Optional equipment includes autoguiding systems.
How do I choose a target for astrophotography without a telescope?
The focal length of your lens determines the appropriate target. Larger objects like the Andromeda galaxy can be captured with wider lenses, while smaller objects may require longer focal lengths.
How do I set up my mount and tripod for astrophotography?
Proper setup involves leveling and balancing the mount for smooth tracking and achieving polar alignment for accurate tracking and minimal star trails. Sturdy tripod legs and added weight ensure stability and reduce vibrations.
What camera settings should I use for astrophotography without a telescope?
Camera settings such as ISO, aperture, and exposure length depend on the conditions and target. Capturing calibration frames and shooting in RAW format are also important for image processing and quality.
Is astrophotography without a telescope accessible for beginners?
Yes, astrophotography without a telescope is an accessible and rewarding way for beginners to capture stunning images of the night sky. With the right equipment, camera settings, and techniques, impressive results can be achieved.