You want to capture the night sky but don’t know where to start. Astrophotography can seem overwhelming, with its technical demands and equipment needs. This guide will walk you through everything from choosing your camera to finding the perfect dark sky location, breaking down complex concepts into easy-to-understand steps.
Let’s begin this exciting journey together!
Key Takeaways
- Start with basic equipment like a DSLR camera and experiment with manual settings to capture the night sky. You don’t need expensive gear to begin astrophotography.
- Plan your shoots by choosing dark locations away from city lights, focusing on the right timing for celestial events, and picking interesting subjects like the Milky Way or constellations.
- Use essential tools like a tripod for stability, a star tracker mount to prevent blurred stars during long exposures, and an intervalometer for time lapses. A headlamp helps you see in the dark while setting up.
- Learn how to adjust camera settings such as ISO sensitivity, shutter speed, aperture, and white balance manually to get clear images of stars without too much noise or incorrect colors.
- Practice patience and keep experimenting with different techniques such as capturing reflections or using foreground elements for more captivating astrophotography images.
Understanding Astrophotography

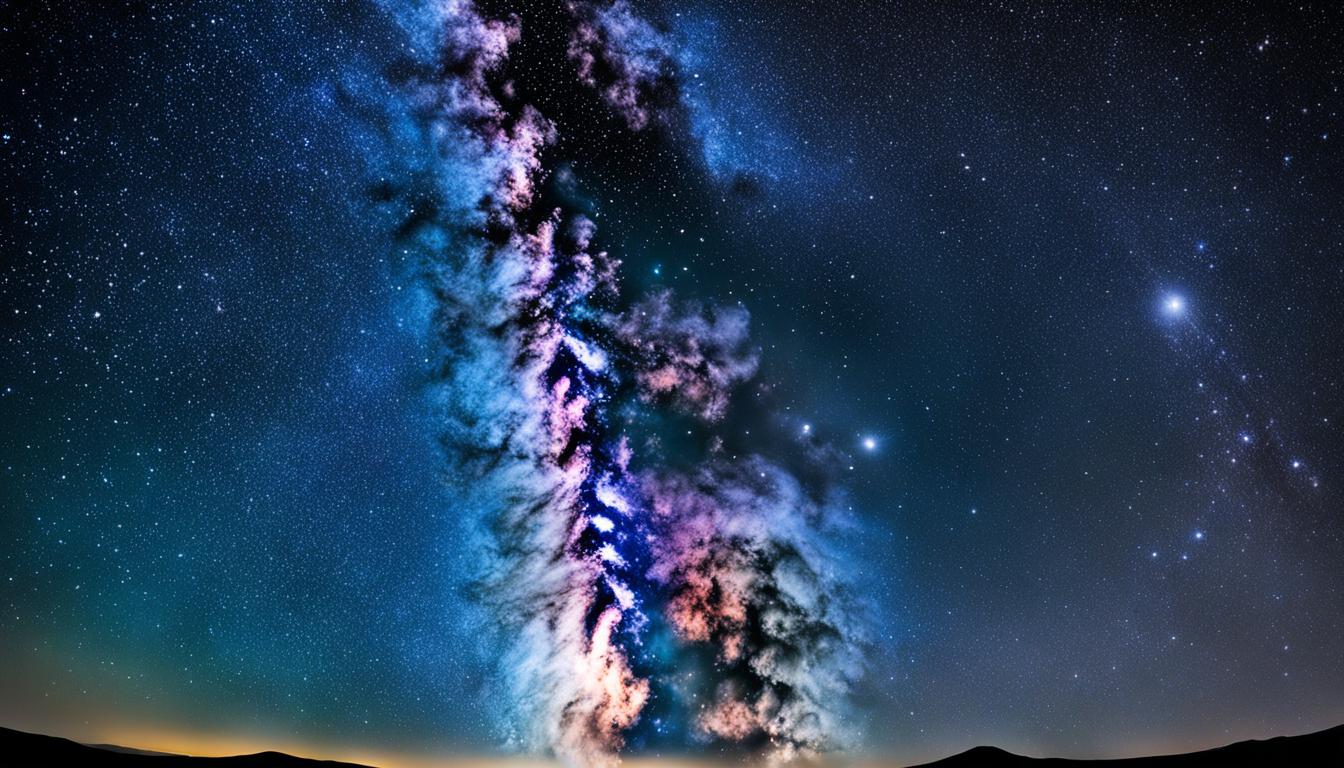
Astrophotography takes the art of photography beyond Earth, capturing stunning images of the night sky. It mixes basic techniques with creative ways to photograph stars, galaxies, and nebulae.
Both financial investments and patience play big roles here. Beginners often start with the Milky Way because it’s a beautiful feature that doesn’t require high-end gear.
To get those amazing shots, knowing your equipment is key—this means understanding terms like focal length, shutter speed, and ISO sensitivity. But astrophotography isn’t just about having the best camera or lens; it’s also about using what you have in smart ways.
Even smartphones can now capture parts of our galaxy! This field encourages photographers to push boundaries and explore new methods to bring distant cosmic wonders down to earth for everyone to see.
Essential Equipment for Astrophotography

To capture the stars, you need the right gear. Let’s dive into what makes or breaks your journey into capturing the cosmos.
Camera Bodies and Lenses
Choosing the right camera body matters a lot in astrophotography. Full-frame cameras are ideal but don’t worry if you have a crop-sensor model; it can still capture stunning night skies.
Both DSLR and mirrorless cameras work well, offering advantages such as high ISO settings for better low-light performance and long exposures needed to photograph stars and galaxies.
Lenses play a crucial role too. Wide-angle lenses are great for capturing vast stretches of the Milky Way, while telephoto lenses help zoom in on distant objects like Jupiter or Saturn.
Fast lenses with wide apertures (low f-number) allow more light to reach the sensor, making them perfect for shooting in dark conditions. Now, let’s move on to discussing the importance of a star tracker mount for keeping your shots sharp during those longer exposures.
Star Tracker Mount
A star tracker mount is your ticket to capturing the night sky in all its glory. It lets you take long exposures without the stars turning into blurred trails across your photos. This tool is a game-changer for photographing panoramic views of planets, star clusters, and galaxies.
By aligning with Polaris using smartphone apps, setting up becomes a breeze.
Preparation meets precision with this piece of equipment. Aligning the tracker and orientating the polarscope ensures your shots are on point. Whether it’s expanding your portfolio or diving deep into astrophotography, a star tracker mount elevates your images from good to breathtaking.
It bridges the gap between amateur and professional quality by stabilizing your camera for perfect captures of celestial wonders.
Remote Shutter Release
After setting up your star tracker mount, the next step is to focus on capturing sharp images without any shake. A remote shutter release becomes critical here. It lets you take pictures without touching the camera, reducing the chances of moving it during long exposures.
Especially under dark skies where every detail counts, this tool ensures your setup remains perfectly still.
Using a remote shutter release cable improves control over exposure times and helps in achieving flawlessly crisp nightscapes. Whether you’re capturing the Milky Way or zooming in on distant nebulas, this gadget minimizes blurriness.
It’s essential for any astrophotographer aiming for high-quality shots of celestial wonders.
Intervalometer
An intervalometer is a game-changer for anyone diving into astrophotography. It gives you control over long exposures and time-lapse sequences—key tools for capturing the night sky’s beauty.
With this device, setting the exact timing and duration of your shots becomes a breeze, making it easier to get consistent, high-quality images. Whether you’re tracking stars or documenting the movement of planets, an intervalometer can help bring your celestial visions to life.
This handy tool isn’t just for professional-grade cameras; it works with DSLRs, mirrorless models, and some smartphones too. That means no matter what gear you have, you can start creating stunning time-lapses of meteor showers or the Milky Way’s majestic crawl across the heavens.
Next up: don’t forget to light your way in the dark with a reliable headlamp.
Headlamp
A headlamp stands as a crucial piece of gear in astrophotography, lighting the way for setup and adjustments in the velvet cloak of night. Its hands-free design lets photographers focus on framing the perfect celestial shot, not fumbling with flashlights or other light sources.
The right headlamp slices through the darkness, ensuring you can navigate treacherous terrains and tweak camera settings without missing a beat. Especially under cold skies where your breath turns to mist, it’s indispensable for attaching lens heaters or swapping batteries without juggling extra equipment.
Investing in a durable headlamp pays off by making nighttime photography safer and more convenient. You’ll want one that withstands outdoor rigors—water-resistant, reliable, and capable of casting a wide beam to cover your immediate surroundings.
This simple tool does more than just light up the dark; it transforms night shoots into smoother, hassle-free experiences where capturing stars feels almost second nature. Let’s move on now to how careful planning can elevate your astrophotography adventures further.
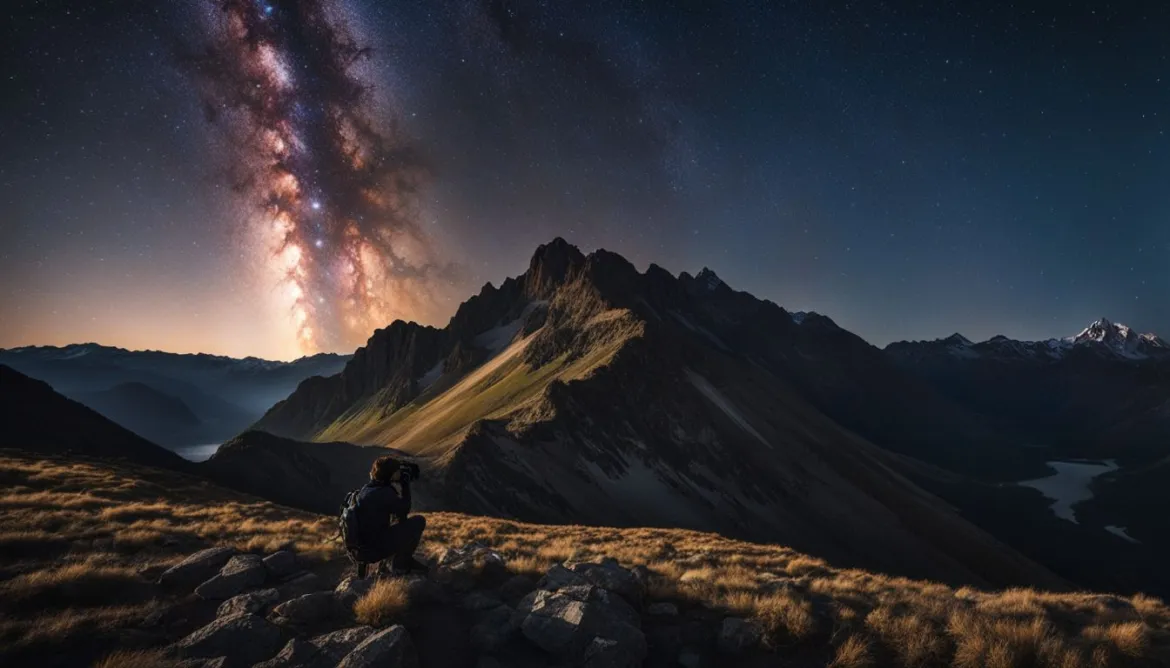
Planning for Astrophotography
Picking the right spot makes all the difference in astrophotography. You’ll want a dark, clear sky to snap those stunning celestial shots.
Location
Choosing the right location is crucial for astrophotography. You’ll want a clear night sky, far from city lights that cause light pollution. A dark site enhances your chances of capturing stunning astrophotos by allowing more stars and galaxies to be visible.
Use tools like a dark site finder to locate the best spots near you for astronomical photography.
Consider the accessibility and safety of your chosen spot. Some locations might require a bit of hiking, so prepare accordingly. Also, check weather conditions before heading out to ensure a successful session under the stars.
Clear skies are essential, as clouds can obstruct your view and affect the quality of your images.
Timing
The night sky is always changing, which makes timing everything in astrophotography. You need to catch the right moment for meteor showers or when comets pass by since these events are unpredictable.
Using planetarium programs helps plan your shoot with precision. This way, you won’t miss out on capturing stunning celestial events.
Balancing light and focus between the stars and the foreground isn’t easy—it demands multiple exposures at just the right times. Practice polar alignment to ensure your star tracker mount follows the sky’s rotation accurately.
With careful planning and attention to timing, those magical moments when everything aligns perfectly become more than just luck—they’re achievements that highlight your skill as an astrophotographer.
Subject
After figuring out the best timing, choosing the right subject is crucial for capturing stunning astrophotography images. With a vast night sky full of stars, planets, and galaxies, your options are endless.
Beginners might start with larger targets like the moon or constellations which are easier to find and photograph even with basic setups. The Orion Nebula, Andromeda Galaxy, and various star clusters offer more challenges but are highly rewarding subjects that showcase the beauty of our universe.
Capturing these celestial treasures requires patience and practice. Experimenting with different focal lengths can bring distant nebulas or the sprawling Milky Way into view. Use a sturdy tripod and long exposure settings to reveal details invisible to the naked eye.
Remember, each object in the sky has its unique charm; selecting a subject that excites you will make the learning curve enjoyable.
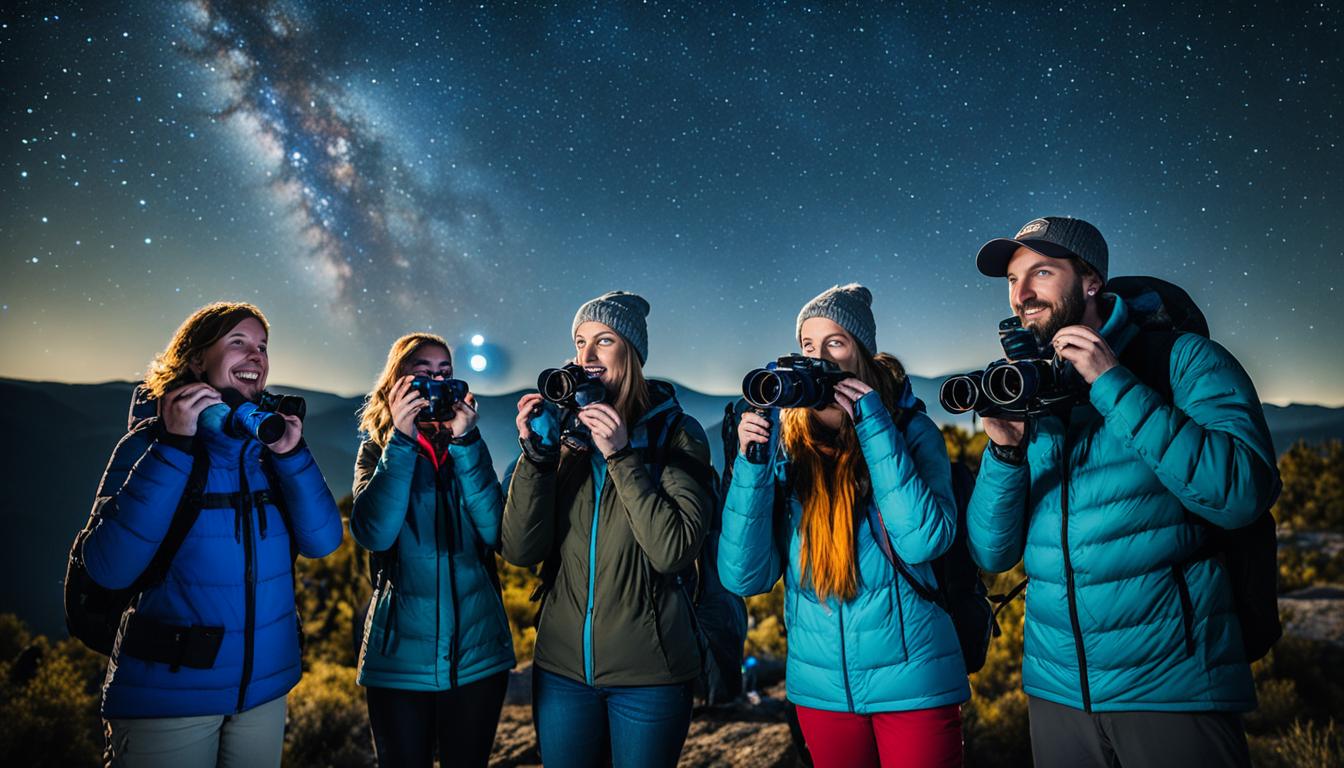
Safety and Etiquette for Nighttime Photography
Always let someone know where you’re going before heading out for a nighttime photo shoot. It’s not just about being safe; it ensures that in case of an emergency, people know where to find you.
Pack light but carry essential gear like a headlamp with a red-light option to preserve night vision, and keep your phone fully charged.
Respect the environment by sticking to marked paths and leaving no trace behind. Even when setting up your equipment, be mindful of the landscape and wildlife around you. Share space generously with fellow photographers – everyone is there to capture the beauty of the stars, after all.
Keeping noise levels down helps maintain the tranquility of dark sky sites which are prime spots for astrophotography according to important facts noted earlier.
Astrophotography on a Budget: Maximizing Limited Equipment
You don’t need the most expensive gear to capture the stunning beauty of the night sky. Start with what you have, even if it’s a basic DSLR camera. For astrophotography, a wide or super-wide angle lens is suggested because it can gather more light and offer a broader view of the stars.
Look for lenses with an aperture of f/4 or lower—f/2.8 is ideal—to let in as much light as possible. This setup helps tackle one of the biggest challenges in astrophotography: shooting in low-light conditions.
Embrace manual mode on your camera to gain full control over shutter speeds, aperture, and ISO sensitivity. Playing with these settings allows you to maximize whatever equipment you’re working with by adjusting them based on your surroundings and desired outcome.
Use a tripod to keep your shots steady and explore techniques like long exposure photography to capture star trails or the Milky Way. Remember, great astrophotography is about skillfully using your gear rather than relying solely on high-end equipment.
Weather and Seasonal Considerations for Astrophotography
Now that we’ve explored how to make the most of limited equipment, let’s dive into the crucial role weather and seasonal patterns play in astrophotography. Meteor showers and comets don’t wait for anyone, and a clear sky can quickly turn cloudy, ruining your plans.
This unpredictability means you need to be prepared and flexible. Checking the weather forecast becomes as important as setting up your DSLR or mirrorless camera.
Seasons change the night sky dramatically. Apps like Stellarium and Starwalk 2 are great tools for predicting celestial events. They help you plan by showing how the sky will look on any given night from your location.
A good, clear night far from city lights is essential for capturing stunning astro images. Avoid light pollution to see more stars and deep-sky objects like galaxies and nebulas clearer.
Always aim for nights with good seeing—this means the atmosphere is stable enough to allow crisp images of stars without blurring them together.
Advanced Composition Techniques in Astrophotography
Mastering advanced composition techniques in astrophotography transforms good shots into breathtaking ones. It all starts with investing time and patience, alongside selecting the right gear.
For stellar results, dive into Manual mode on DSLR or mirrorless cameras and focus manually to capture the cosmos at its best. Aim for lenses that are wide or super-wide angle and ‘fast’, crucial for gathering as much light as possible.
Play around with white balance settings to see how they affect the colors of stars and galaxies, making each photo unique.
To truly make those stars pop without trailing in your photos, a star tracker mount becomes your best friend for longer exposures. Embrace image stacking to enhance detail and reduce noise—key steps for clarity in your night sky images.
Experimentation leads to mastery here, especially with techniques like the 500-rule which helps avoid star trails by calculating optimal shutter speed based on lens focal length. This mix of technology and technique opens up a universe of possibilities, allowing you to create mesmerizing images that celebrate the beauty of our galaxy and beyond.
Astrophotography Camera Settings
Getting the right shot in astrophotography means knowing your camera settings inside and out. Let’s dive into how you can tweak your settings to capture the night sky like never before.
Camera Shooting Mode
Set your DSLR or mirrorless camera to Manual mode for astrophotography. This setting gives you full control over shutter speed, aperture, and ISO sensitivity—key factors in capturing the night sky effectively.
Unlike automatic modes that rely on the camera’s algorithms, Manual mode allows you to adjust settings based on real-time feedback from the scene you’re shooting.
Focusing manually ensures sharp stars and celestial bodies. Auto-focus often struggles in low light conditions, making manual focus not just recommended but essential for clarity in your astro shots.
This technique requires patience and practice but pays off with stunning images of the cosmos. Now, let’s talk about adjusting your aperture for optimal results.
Aperture
Aperture plays a key role in astrophotography, almost like picking the right lens for your camera. Think of it as the eye of your lens—how wide it can open to let light in. For stars and galaxies far away, you want an aperture at f/4 or lower; f/2.8 is even better.
This allows more light to hit your camera sensor, capturing those faint celestial bodies.
Choosing the correct aperture also means balancing with ISO settings. A high ISO gets more details from dark skies but watch out—it adds noise to your photos too. Experimenting with different apertures can give unique tints and twists to your shots, adding depth to the night sky’s beauty.
Remember, mastering aperture takes practice, so don’t be afraid to try different settings under the stars!
Image File Type
Choosing the right image file type is crucial in astrophotography. You want to capture and keep as much data from your night sky shots as possible. RAW format shines here, standing out as the champion for this task.
Unlike JPEGs, which compress and lose some data to make files smaller, RAW files save all the information your camera sensor sees. This means you get to hold onto every starry detail and have more flexibility in post-processing.
Switching your camera settings to shoot in RAW can seem like a small step, but it makes a big difference. It allows for better noise reduction, sharper images, and more detailed edits later on.
Think of it as giving yourself the best ingredients before you start cooking a meal—they’re essential for making sure the result is as good as it can be. Next up, let’s talk about setting the right shutter speed for capturing those awe-inspiring celestial events.
Shutter Speed
Shutter speed is crucial in astrophotography. It controls how long your camera’s sensor is exposed to light. For capturing the night sky, a rule of thumb is using the ‘500-rule.’ This means dividing 500 by your lens’ focal length to find the ideal shutter speed.
Say you have a 20mm lens; dividing 500 by 20 gives you a 25-second exposure time. This helps avoid star trails and keeps stars looking sharp.
A slow shutter speed of around 20 seconds works well for most night scenes. However, it’s essential to balance this with aperture and ISO settings for the best results. Using a remote shutter release can help prevent camera shake during these long exposures, ensuring your images stay clear and focused.
Experimentation is key—try different speeds to see what works best for your setup.
ISO Sensitivity
After setting your shutter speed, you’ll want to adjust the ISO sensitivity on your camera. This is a crucial step in astrophotography. By manually increasing the ISO, you allow your camera to capture more light from distant stars and galaxies.
High ISO settings are recommended for night sky photography because they make fainter objects visible. However, a higher ISO can also introduce noise, creating grainy images.
To find the perfect balance, start with a high ISO and gradually decrease it until you achieve clear shots without too much noise. Playing around with these settings is key—every night sky is different, and what works one evening may not work another.
Keep an eye on your results and adjust as needed to get those stunning celestial shots while minimizing image noise.
Focusing in the Dark
Once you’ve dialed in the ideal ISO sensitivity, your next challenge is focusing in the dark. This can seem daunting at first, but manual focusing is your best friend here. Use live view mode on your digital camera to magnify stars and achieve sharp focus.
It’s crucial to avoid relying on autofocus since it struggles in low-light conditions.
Switching to a lens that offers a wide aperture can also help by letting more light onto the camera sensor, making stars easier to see and focus on. Remember, patience is key—take your time adjusting until stars look like tiny pinpoints of light.
This method enhances clarity and detail in your astro shots, ensuring the night sky’s beauty is captured as crisply as possible.
Tips for Successful Astrophotography
Astrophotography takes patience, but with the right techniques, you’ll be capturing the stars in no time. Let’s dive into how to make your night sky photos stand out!
Foreground
Choosing the right foreground can turn a good astrophotography shot into an unforgettable one. Think of it as setting the stage for the stars. A compelling foreground might include earthly elements like mountains, trees, or water bodies.
These features add depth and interest, making your celestial photos stand out.
Using landmarks or unique natural formations as your foreground not only anchors your composition but also tells a story connecting the cosmic scale with familiar scenes. For example, capturing the Milky Way above a serene lake creates harmony between Earth and space, offering viewers an otherworldly experience through your lens.
Keep experimenting with different settings to see how they change the mood and impact of your shots.
Reflections
After discussing foreground elements, let’s dive into reflections. They add a magical touch to astrophotography. Water bodies act like mirrors, capturing the starry sky above. Position your camera lens close to the surface for an immersive effect.
Reflections enhance the beauty of night skies in photos. Lakes and rivers are perfect for this technique. Adjust your tripod lower to grasp that stellar reflection fully. This method works wonders with both smartphones and DSLR cameras, proving you don’t need high-end equipment to capture breathtaking images.
White Balance
White balance plays a crucial role after you’ve captured reflections in your astrophotography, bringing out the true colors of the night sky. It allows photographers to adjust the colors so they look more natural or create specific moods by experimenting with interesting tints and variations.
This setting can compensate for color casts caused by different light sources, ensuring stars and celestial bodies appear as they truly are or are artistically altered based on personal preference.
Experimenting with white balance settings opens up new avenues for creativity in night sky shots. Whether aiming for accuracy that reflects true cosmic beauty or looking to infuse images with a unique vibe, tweaking white balance can significantly impact your final results.
Keep in mind that achieving the desired effect might require playing around with these settings, but it’s all part of honing your skills in astrophotography.
Controlling Aperture
Controlling aperture in astrophotography is about mastering light and depth. Opt for wide or super-wide angle ‘fast’ lenses to get this right. These lenses allow more light to hit your camera sensor, which is crucial for night sky shots.
A fast lens with a low f-stop gives you the power to capture stars as sharp pinpoints of light against the deep black of space.
Switching to manual mode lets you tweak settings on the fly, ensuring each celestial object looks its best. Manual focusing becomes your friend here, helping avoid blurry stars or nebulae.
It’s all about balancing light intake with clarity—crucial for stunning astronomical imaging. Now, let’s dive into composition techniques that bring life to these celestial captures.
Composition
Nailing the perfect composition is key in astrophotography. Think about including interesting foregrounds to add depth and scale to your shots of the night sky. A lone tree, rock formations, or even a silhouette of a mountain can transform a simple star photo into an awe-inspiring landscape under the stars.
Pay attention to how these elements align with celestial wonders like the Milky Way for captivating imagery.
Experiment with different camera angles and perspectives for unique compositions. Don’t shy away from using wide-angle lenses to capture expansive night skies or narrow down on distant nebulas with telephoto optics.
Keep in mind, that balancing the vast darkness of space with intriguing terrestrial features often results in visually stunning photographs that draw viewers into the scene.
Overcoming Light Pollution: Tips for Urban Astrophotographers
Light pollution poses a big challenge for city-based astrophotographers, casting a glow that can wash out the night sky’s wonders. But fear not—with some smart strategies, you can still capture breathtaking celestial shots.
One effective approach is to seek out dark-sky sites on the outskirts of urban areas. These spots minimize light pollution and enhance your chances of photographing the stars in all their glory.
Also, using narrowband filters can work wonders by reducing unwanted wavelengths of light, allowing those stunning cosmic colors to shine through.
Investing time in planning your photography sessions around new moon phases significantly increases the visibility of the night sky’s treasures. This phase provides the darkest backdrop for your captures, making it ideal for snagging shots of distant galaxies or nebulae with less interference from urban glow.
Additionally, embracing longer exposures and experimenting with settings like ISO sensitivity and aperture can pull more detail from seemingly dim stars. With patience and creativity, even amidst city lights, you’re well-equipped to unveil the majesty overhead—turning obstacles into opportunities for unique astrophotography adventures.
Post-Processing Techniques for Astrophotography
After tackling the challenge of light pollution, enhancing your astrophotography images through post-processing becomes the next crucial step. Editing your photos can truly unlock their potential, revealing details that were not visible at first glance.
Programs like Adobe Photoshop and Lightroom are staples for photographers aiming to bring out the nebulosity in galaxies or emphasize the colors of a nebula. Adjusting contrast, brightness, and saturation helps in highlighting these celestial wonders against the dark sky.
Stacking multiple images is another powerful technique used by astrophotographers to reduce noise and increase detail. This involves taking several shots of the same scene and combining them using specialized software such as DeepSkyStacker.
By doing so, you enhance the signal-to-noise ratio significantly—making faint stars stand out more vividly without losing sharpness. Both beginners and veterans in astrophotography rely on stacking to achieve crisp and vibrant results from their night sky adventures.
Time-Lapse Astrophotography: Creating Star Trails and Meteor Showers
Moving from the detailed insights of post-processing in astrophotography, we delve into the captivating world of time-lapse astrophotography. This technique lets you capture stunning visuals like star trails and meteor showers.
You’ll need a camera with a good intervalometer to take shots at regular intervals. With patience and skill, these series of images combine to show the celestial movements across the night sky.
For star trails, fix your camera on a tripod, aim it at the North Star, and let it shoot over hours. The earth’s rotation makes stars appear as long streaks across your photos. Capturing meteor showers requires clear skies and timing during known events such as the Perseids or Geminids.
Set up away from city lights for best results. Both techniques demand experimenting with shutter speed, aperture, and ISO settings to perfectly capture the wonders above us.
Wide Field Astrophotography: Capturing the Milky Way
Wide-field astrophotography makes capturing the Milky Way accessible for beginners. You don’t need the most expensive equipment to start. Even with a smartphone, you can take amazing photos of the night sky.
Full frame or crop-sensor cameras paired with wide or super-wide angle ‘fast’ lenses work best for these stunning shots. This approach allows enthusiasts to enjoy the beauty of our galaxy without worrying about high costs.
For those eager to dive deeper, choosing the right lens is crucial. Models like prime focus refractor telescopes offer clarity and magnification suitable for both amateurs and more experienced photographers aiming at celestial bodies beyond just our Milky Way.
Patience and practice will improve your skills over time, making every star-studded photo shoot a rewarding experience.
Deep Sky Astrophotography: Nebulae, Galaxies, and Star Clusters
Deep sky astrophotography takes you on an adventure beyond our galaxy. It captures the awe-inspiring beauty of nebulae, galaxies, and star clusters. This type of photography requires a more significant investment in time and money, but the rewards are out-of-this-world images.
High-quality cameras and lenses become essential tools here to bring distant celestial objects into view.
Patience is your best friend as you dive into deep-sky astrophotography. Dark sky sites offer the perfect backdrop for these cosmic wonders, away from the blinding lights of urban landscapes.
With each shot, you’re peering through a window into the vast universe, capturing scenes millions of light-years away. The journey might demand dedication to master equatorial mounts and understand the nuances of long exposure times, but capturing something as grand as Andromeda or the Orion Nebula makes it all worthwhile.
Conclusion
Jumping into astrophotography might seem daunting at first, but remember, every expert was once a beginner. With patience and practice, you’ll capture the night sky in ways you’ve only dreamed of.
Start with what you have, be it a high-end camera or your trusty smartphone. The universe is vast and ready for its close-up—are you? Let this guide be your first step into a bigger world filled with stars, galaxies, and celestial wonders waiting to be discovered through your lens.
How Does Weather and Season Affect Astrophotography for Beginners?
When starting out in astrophotography, it’s important to consider the weather and season. Cloudy or hazy conditions can obstruct clear shots. Beginners should remember these astrophotography weather tips: choose clear nights, avoid full moon nights, and be mindful of cold temperatures affecting camera equipment.
FAQs
1. What do I need to start with astrophotography?
Starting astrophotography? You’ll need a camera capable of manual settings, and a sturdy tripod, and for solar photography, a solar filter is crucial. Remember, your smartphone or a camera with CCD sensors can also capture the night sky!
2. How does crop factor affect my astrophotography images?
Think of crop factors like zooming in without moving closer. Cameras with a high crop factor magnify distant objects, like galaxies and stars, making them appear larger in your photos.
3. Can I photograph the Andromeda Galaxy from my backyard?
Yes! Even amateur astronomers can capture the Andromeda Galaxy using basic equipment. With proper focal ratio and megapixel settings on your camera—plus clear skies—you’re all set to snapshots of our galactic neighbor.
4. Why is image processing important in astrophotography?
Image processing brings out hidden details from your captures—it’s like magic! Adjustments through photo editing software help reveal spectacular colors and structures in celestial bodies that are often too faint to see directly.
5. Is it possible to take good astrophotos in light-polluted areas?
Absolutely! Techniques such as lucky imaging and using hydrogen-alpha filters let you cut through light pollution. Plus, understanding the Bortle scale helps you find better shooting locations within urban environments for clearer stellar views.