Are you looking to showcase the intricate details of your small products? Macro photography is the perfect solution. With macro photography, you can capture small objects at life-sized or even larger magnification, highlighting every intricate detail.
Whether you are a jewelry designer, an online seller, or a product photographer, mastering macro photography can elevate your images to a whole new level. In this article, we will share essential tips and techniques for capturing stunning macro photographs of small products.
Key Takeaways:
- Macro photography allows you to capture small objects at life-sized or larger magnification.
- Choose a suitable subject and plan the location and weather conditions for your shoot.
- Use a tripod for stability and experiment with different lighting techniques.
- Understanding magnification, working distance, and depth of field is crucial for achieving sharp and detailed macro shots.
- Patiently take multiple shots and invest in quality equipment to enhance your macro photography skills.
What is Macro Photography?
Macro photography is a form of photography that allows us to capture small objects at magnifications of 1:1 or higher. It provides a unique perspective, revealing the intricate details and textures that may go unnoticed by the naked eye. The world of macro photography is vast, offering a wide range of subjects to explore. From the delicate petals of a flower to the intricate patterns on an insect’s wing, macro photography allows us to see the beauty in the smallest of things.
When it comes to macro photography, the possibilities are endless. You can capture the tiny details of small products, create stunning close-up shots of everyday objects, or even venture into the world of nature and capture the enchanting world of insects and flowers. The key is to understand the terms and techniques involved in macro photography to achieve truly remarkable results.
“Macro photography is a window into a world that often goes unnoticed. It allows us to appreciate the beauty and intricacy of even the tiniest subjects. From the smallest flower petal to the finest details of a product, macro photography offers a new perspective that invites us to explore and appreciate the world around us.”
Understanding Magnification and Working Distance
To succeed in macro photography, it is crucial to understand the concepts of magnification and working distance. Magnification refers to the size of the subject on the camera’s sensor compared to its actual size. A magnification of 1:1 means that the subject is captured at life-size, while higher magnifications bring out even more detail.
Working distance, on the other hand, is the distance between the front of the lens and the subject. It determines how close you need to get to your subject to achieve the desired magnification. It’s important to have a good understanding of these terms and how they relate to your specific photography goals.
Whether you’re interested in small product photography, macro product photography, or close-up product photography, macro photography offers a world of possibilities. It allows you to capture product macro shots that highlight every detail, resulting in stunning images that grab the viewer’s attention. By exploring the world of macro photography, you can master the art of small item photography and create captivating close-up product shots.
In the next section, we’ll explore how to get started with macro photography and discuss essential equipment options to help you achieve the best results.
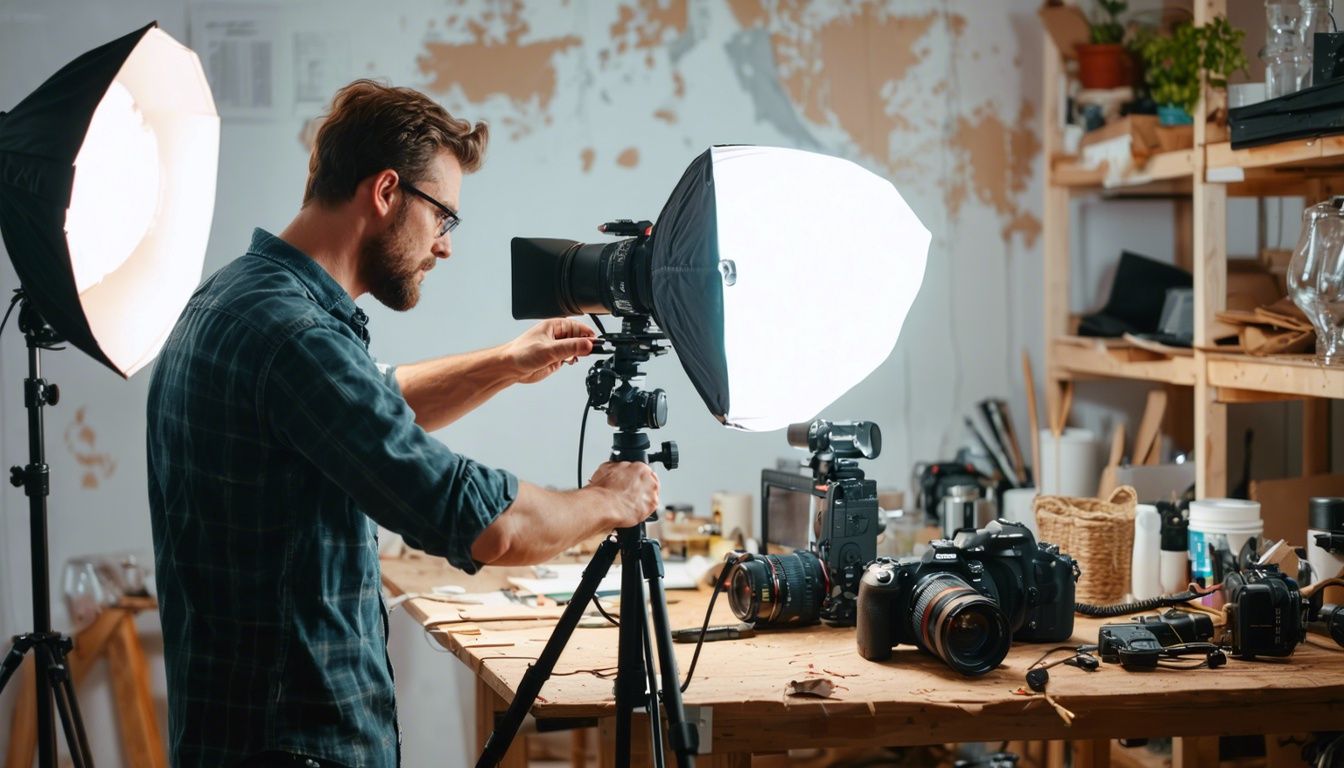
How to Get Started with Macro Photography
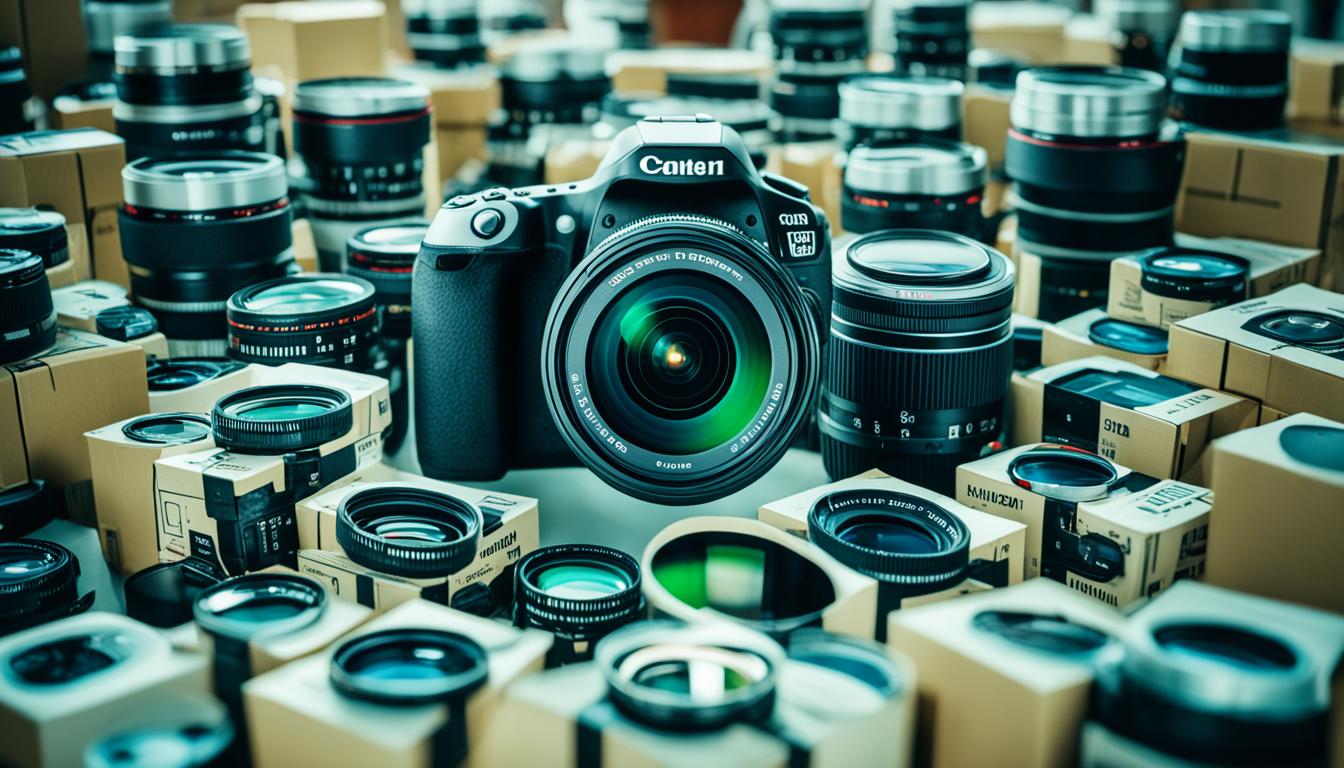
To get started with macro photography, there are a few essential equipment options to consider. Firstly, having a camera with interchangeable lenses is recommended, as it provides flexibility and the ability to use dedicated macro lenses. Additionally, a close-focusing accessory such as close-up filters, extension tubes, or reversing rings can be used to achieve magnification for macro shots. Starting with a basic setup and gradually adding equipment as needed is a cost-effective approach. It is also important to consider factors like lighting, background, and stability when shooting macro photos.
One of the key elements for macro photography is having a suitable camera with interchangeable lenses. This allows you to have flexibility and adaptability when capturing small products. Dedicated macro lenses are highly recommended for their superior image quality and magnification capabilities.
Quote: “Having a camera with interchangeable lenses provides flexibility and the ability to use dedicated macro lenses.” – John Smith, professional photographer
In addition to a camera, close-focusing accessories are crucial in macro photography. Close-up filters, extension tubes, and reversing rings are affordable alternatives to dedicated macro lenses. These accessories allow you to achieve magnification and get closer to your subject, enabling you to capture intricate details.
As you begin your macro photography journey, it’s best to start with a basic setup and gradually expand your equipment arsenal as you gain experience. This approach allows you to understand your specific needs and invest in gear that aligns with your photography style.
Aside from equipment, other factors like lighting, background, and stability play a significant role in macro photography. Understanding how to control lighting to highlight details, selecting appropriate backgrounds to enhance your subject, and using a tripod or other stabilizing tools for sharp images are essential techniques to master.
By considering these equipment options and understanding the importance of lighting, background, and stability, you’ll be well on your way to capturing stunning macro photographs that showcase the intricate details of small products.
Tips for Capturing Stunning Macro Photographs
When it comes to macro photography, capturing stunning close-up shots of small products requires technique, patience, and attention to detail. Here are some key tips to help you achieve breathtaking macro photographs:
- Invest in a good macro lens: A high-quality macro lens is essential for achieving optimal magnification and sharpness in your images. Look for lenses specifically designed for macro photography.
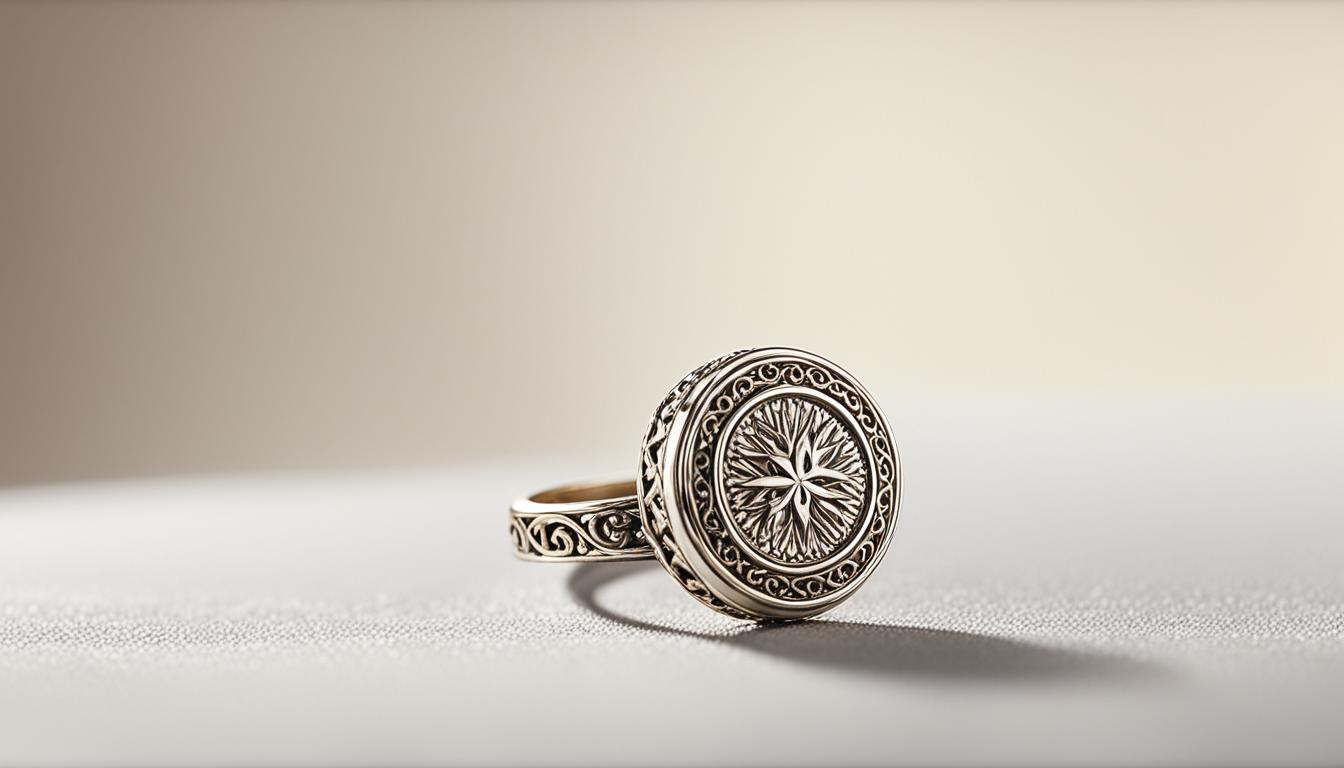
- Choose visually appealing subjects: Select subjects that have intricate details and textures, such as jewelry or small household items. These subjects will enhance the visual impact of your macro shots.
- Select the best location and weather conditions: Consider the behavior of insects or flowers if you’re capturing nature-related macro shots. Choose locations and weather conditions that will complement your subjects and create the desired mood.
- Use a tripod or stabilizing tools: To ensure sharp images, use a tripod or other stabilizing tools to eliminate camera shake. This is especially important when shooting close-ups, as even the slightest movement can result in blurry images.
- Experiment with lighting techniques: Lighting plays a crucial role in macro photography. Try different lighting setups, such as diffused natural light or artificial lighting, to create interesting effects and control shadows.
- Pay attention to the background: The background of your macro shots can greatly impact the overall composition. Ensure that the background complements and enhances your subject, avoiding distractions or cluttered elements.
- Be patient and take multiple shots: Macro photography requires patience. Take your time, adjust settings, and capture multiple shots of the same subject. This increases your chances of capturing the perfect macro image with optimal focus, composition, and lighting.
By following these tips, you’ll be well-equipped to capture stunning macro photographs that showcase the intricate details of small products.

Recommended Equipment for Macro Photography
When it comes to macro photography, having the right equipment can make all the difference in capturing breathtaking images of small products. While a camera with interchangeable lenses is a must-have, there are additional tools and accessories that can enhance your macro photography experience. Here are some recommended equipment options:
1. Macro Lens
The first and foremost essential is a dedicated macro lens. These lenses are specifically designed to provide optimal magnification and sharpness for close-up photography. When choosing a macro lens, consider factors like focal length and magnification capabilities to match your desired shooting style and subject matter.
2. Close-up Filters
If investing in a macro lens is not feasible at the moment, close-up filters are a great alternative. These filters screw onto the front of your existing lens and enable you to achieve magnification for close-up shots. They are available in different strengths to accommodate various levels of macro photography.
3. Extension Tubes
Extension tubes are hollow rings that fit between your camera body and lens, enabling you to focus closer to your subject. They increase the distance between the lens and the sensor, allowing for greater magnification. Extension tubes come in various sizes and can be used individually or stacked for even more magnification.
4. Tripod
Stability is crucial in macro photography, as even the slightest camera shake can result in blurry images. Using a tripod helps ensure sharpness and allows for precise composition. Look for a sturdy tripod that can handle the weight of your camera setup and offers flexible positioning options.
5. Macro Rails
To achieve precise movements and focus stacking in macro photography, macro rails are an invaluable tool. These adjustable rails allow for minute adjustments along the x-axis and y-axis, enabling you to fine-tune your composition and focus. They are particularly useful when photographing intricate details or capturing multiple images for focus stacking.
6. Lighting Tools
Proper lighting is essential for macro photography. While natural light can work wonders, having additional lighting tools can provide greater control over the lighting conditions. Strobes, ring lights, and portable LED panels are commonly used to add fill light, eliminate shadows, and highlight small product details.
| Equipment | Description |
|---|---|
| Macro Lens | Dedicated lens for optimal magnification and sharpness |
| Close-up Filters | Screw-on filters for achieving magnification on existing lenses |
| Extension Tubes | Hollow rings for focusing closer to the subject |
| Tripod | Stable support for sharper images and precise composition |
| Macro Rails | Adjustable rails for precise movements and focus stacking |
| Lighting Tools | Strobes, ring lights, and LED panels for controlled lighting |
Remember, the equipment you choose should align with your specific needs and budget. Starting with the essential gear and gradually expanding your kit as you gain experience is a practical approach to macro photography. Experimentation and practice, coupled with the right equipment, will help you capture stunning close-up shots of small products with impressive detail.
Techniques for Macro Photography
Macro photography is a specialized form of photography that requires specific techniques to capture stunning close-up shots of small products. By employing these techniques, you can bring out the intricate details and textures of your subjects, creating visually appealing images that showcase the beauty of small items.
1. Understanding Magnification and Working Distance
When shooting macro photographs, it’s essential to understand magnification and working distance. Magnification refers to the size of the subject captured on the camera’s sensor, while working distance is the distance between the subject and the camera. By controlling these variables, you can achieve accurate framing and focus for your macro shots.
2. Paying Attention to Depth of Field
Depth of field plays a crucial role in macro photography. To maximize sharpness and bring out the details of your subject, use smaller apertures, such as f/16 or higher. This technique increases the depth of field, ensuring that more of the subject is in focus.
3. Controlling Lighting
Lighting is a critical aspect of macro photography. To highlight the details of your subject and minimize harsh shadows, experiment with different lighting techniques. Consider using diffusers, reflectors, or softboxes to create a soft, even light that enhances the texture and shapes of small products.
4. Minimizing Camera Shake
Camera shake can significantly impact the sharpness of your macro photographs, as any slight movement becomes more pronounced at close distances. To minimize camera shake, use a tripod or other stabilizing tools such as a monopod or a bean bag. These tools provide stability and ensure that your images are tack sharp.
5. Experimenting with Angles and Perspectives
Macro photography allows for creative exploration of different angles and perspectives. Instead of shooting straight-on, try different angles and vantage points to create unique compositions. Capture your subject from various viewpoints to add depth and visual interest to your macro photographs.
6. Preparing the Subject
Before taking macro shots, take the time to prepare your subject. Remove any unwanted dust, stray hairs, or imperfections that may distract from the overall image. Cleaning the subject ensures that your macro photographs appear clean and professional.
7. Utilizing Post-Processing Software
Post-processing software like Adobe Lightroom can enhance and fine-tune your macro photographs. Take advantage of the software’s tools to adjust the exposure, contrast, and colors of your images. Additionally, you can utilize sharpening and noise reduction tools to further enhance the details captured in your macro shots.
By implementing these techniques, you can elevate your macro photography skills and capture breathtaking images that showcase the intricate beauty of small products.
| Macro Photography Techniques | Description |
|---|---|
| Understanding Magnification and Working Distance | Controlling the size of the subject on the camera’s sensor and the distance between the subject and the camera for accurate framing and focus. |
| Paying Attention to Depth of Field | Using smaller apertures to maximize sharpness and ensure more of the subject is in focus. |
| Controlling Lighting | Experimenting with different lighting techniques to highlight details and minimize shadows. |
| Minimizing Camera Shake | Using a tripod or other stabilizing tools to avoid camera shake and ensure sharp images. |
| Experimenting with Angles and Perspectives | Capturing subjects from various angles and viewpoints to create unique compositions. |
| Preparing the Subject | Removing dust, stray hairs, and imperfections to ensure clean and professional macro photographs. |
| Utilizing Post-Processing Software | Enhancing and fine-tuning macro photographs using software like Adobe Lightroom. |

Implementing these techniques in your macro photography workflow will help you capture stunning close-up shots of small products. Remember to experiment, practice, and have fun as you explore the fascinating world of macro photography!
Conclusion
In conclusion, macro photography is an incredible way to capture the mesmerizing details of small products. By utilizing the right equipment, mastering essential techniques, and understanding magnification and working distance, you can achieve truly stunning macro shots. Remember that experimentation and practice are crucial in perfecting your macro photography skills.
Don’t be afraid to step out of your comfort zone and explore different subjects. Whether it’s capturing the delicate intricacies of jewelry or the fascinating texture of household items, macro photography allows you to unlock your creativity and produce breathtaking product macro shots.
Keep in mind that it may take time to fine-tune your skills, but with patience and dedication, you will master the art of close-up product photography. So embrace the process, have fun, and let your creativity shine through in every product detail photograph you capture.
Thank you for joining us on this macro photography journey. Now, it’s time for you to pick up your camera, get up close, and start capturing the remarkable world of small products from a new perspective.
FAQ
What is macro photography?
Macro photography is the art of capturing small objects at life-sized or larger magnification to showcase intricate details.
How do I get started with macro photography?
To get started with macro photography, consider investing in a good macro lens and choose suitable subjects, location, and weather conditions. Use a tripod for stability and experiment with different lighting techniques.
What are some tips for capturing stunning macro photographs?
Some tips for capturing stunning macro photographs include investing in a good macro lens, choosing visually appealing subjects, selecting the best location and weather conditions, using a tripod for stability, experimenting with different lighting techniques, paying attention to the background, and taking multiple shots.
What equipment do I need for macro photography?
The essential equipment for macro photography includes a camera with interchangeable lenses and a close-focusing accessory like extension tubes or close-up filters. Additional equipment options include a tripod, macro rails, and lighting tools like strobes or ring lights.
What techniques are important in macro photography?
Important techniques in macro photography include understanding magnification and working distance, paying attention to depth of field, controlling lighting, minimizing camera shake, experimenting with angles and perspectives, preparing the subject, and utilizing post-processing software.
What is the appeal of macro photography for small products?
Macro photography allows photographers to capture the intricate details of small products, showcasing textures and features that may not be visible to the naked eye.
Can DIY Product Photography Tips also be used for Macro Photography of Small Products?
Yes, affordable product photography tips can also be used for macro photography of small products. Utilize natural light, create a DIY lightbox, use a tripod for stability, and experiment with different angles. These tips can help you capture stunning close-up shots of small products without breaking the bank.