Welcome to our guide on mastering the art of time-lapse astrophotography! In this article, we will explore the fascinating world of capturing star trails and meteor showers through the technique of time-lapse photography. Whether you are a seasoned astrophotographer or just starting out, this comprehensive guide will provide you with the essential knowledge and techniques to create stunning images of the night sky.
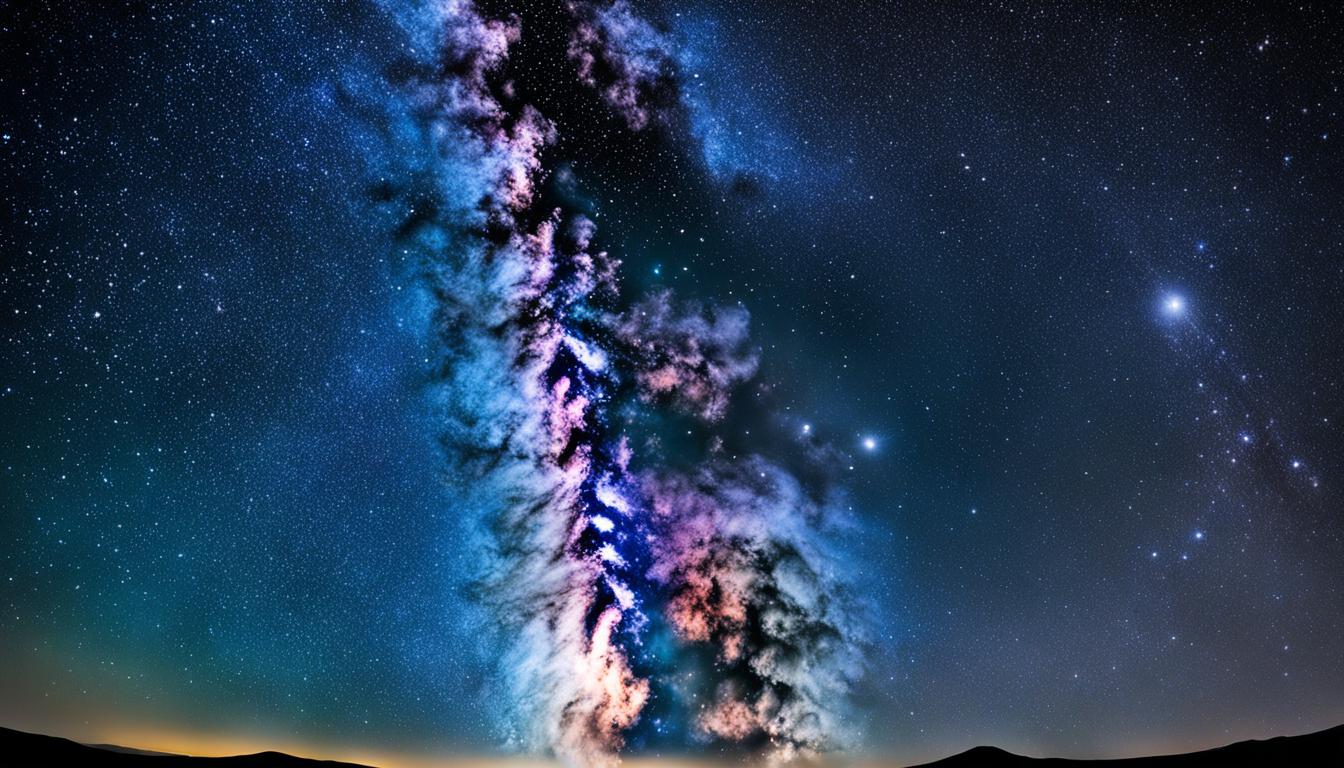
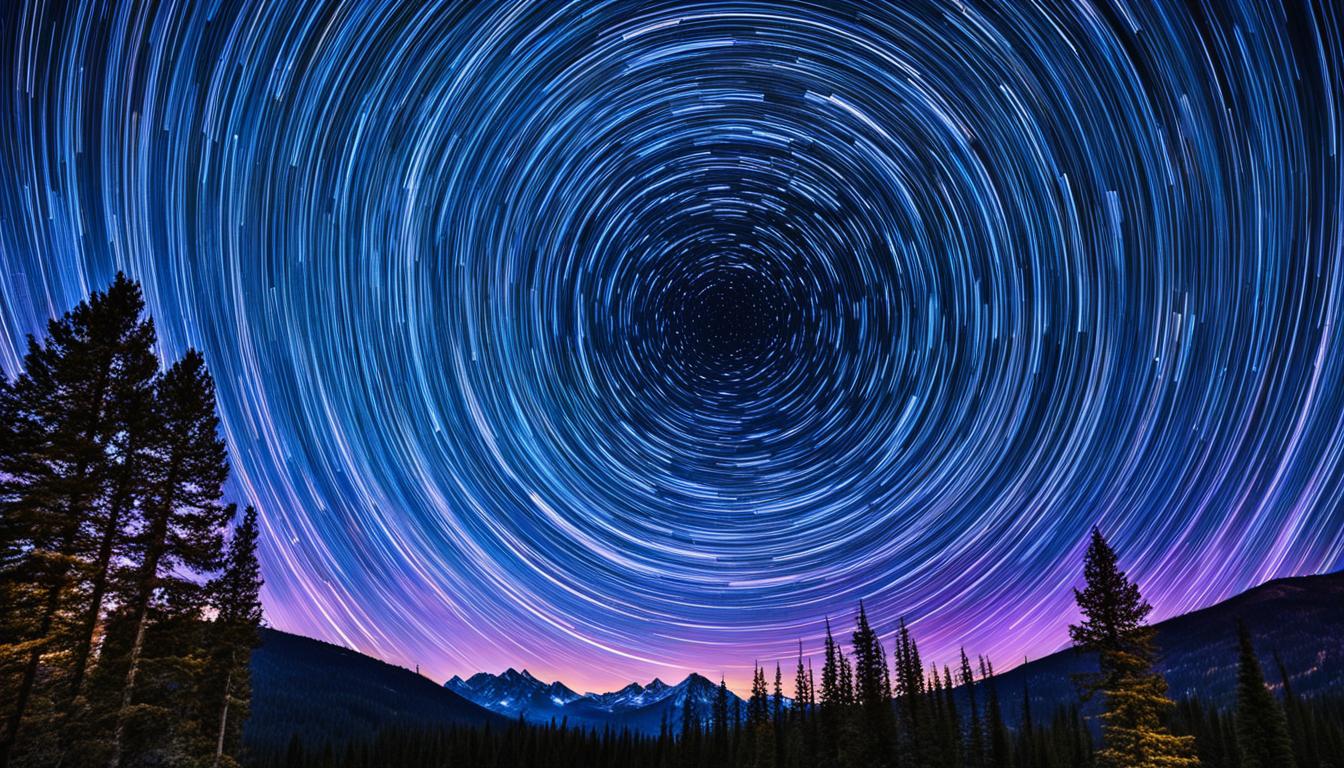
Time-lapse astrophotography is a powerful technique that allows photographers to capture the movement of stars over an extended period, creating mesmerizing trails of light across the sky. By using multiple short-exposure images stacked together, photographers can achieve the illusion of long exposure and bring the night sky to life.
To enhance your time-lapse astrophotography skills, we highly recommend using the “Advanced Stacking Actions” from Star Circle Academy. These Photoshop actions enable you to stack images at slightly lower opacity, resulting in star trails that resemble comets or fading streaks. Additionally, these actions can help you create captivating time-lapse movies of stars moving and drawing trails behind them.
Key Takeaways:
- Time-lapse astrophotography captures the motion of stars and creates stunning star trails and meteor shower images.
- Stacking multiple short-exposure images is the key technique for achieving the illusion of long exposure in time-lapse astrophotography.
- The “Advanced Stacking Actions” from Star Circle Academy are highly recommended for creating star trails and time-lapse sequences in Photoshop.
- Mastering time-lapse astrophotography requires understanding camera settings, equipment, and proper composition techniques.
- With the right knowledge and gear, you can create mesmerizing time-lapse sequences that showcase the beauty of the night sky.
Basics of Astrophotography
When it comes to astrophotography, getting started may seem overwhelming, but with the right knowledge and equipment, capturing breathtaking images of the night sky is within reach. In this section, we’ll cover the basics of astrophotography, including the essential tools and techniques needed to get started.
Finding the Perfect Location
Before diving into astrophotography, it’s crucial to find a location with minimal light pollution and no moonlight. These conditions will ensure your images capture the true beauty of the night sky. Look for remote areas, away from city lights, where the stars shine brightly. National parks, rural areas, or even your own backyard can provide excellent opportunities for astrophotography.
Essential Tools and Equipment
To capture sharp and detailed images of the night sky, you’ll need a few essential tools:
- A sturdy tripod: This will keep your camera steady and prevent motion blur during long exposures.
- A fast lens: Opt for a lens with a wide aperture, such as f/1.4 or f/2.8, to allow as much light as possible into the camera.
- A remote shutter release: This will minimize camera shake, ensuring sharp images even during long exposures.
Having these tools in your arsenal will set you up for success in capturing stunning night sky photography.
Mastering Manual Focus
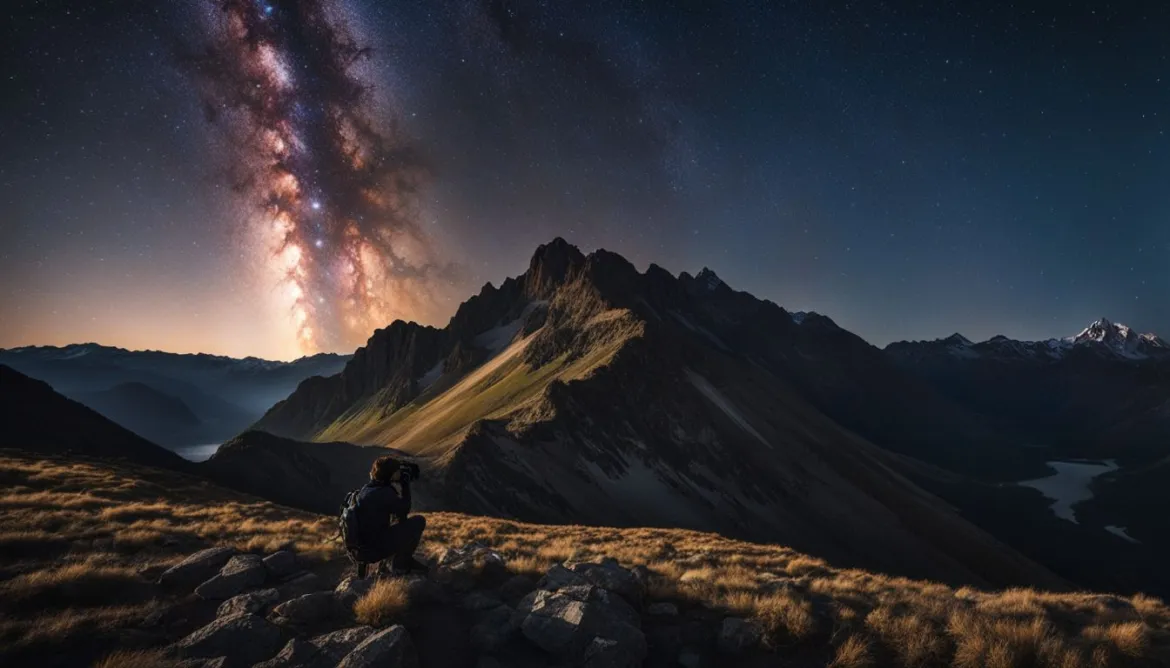
When photographing the stars, achieving sharp focus is crucial. Use the live view function on your camera to manually focus on a bright star. Adjust the focus ring until the star appears as small and clear as possible. Additionally, consider adding interesting foreground elements to your composition, such as trees, mountains, or a human subject. These elements can add depth and context to your astrophotography images.
Exploring Astrophotography Techniques
Astrophotography offers endless creative possibilities. Besides capturing single shots of the night sky, you can also experiment with time-lapse astrophotography. By using a remote shutter release or built-in intervalometer, you can capture a series of images at specific intervals. These images can then be combined to create mesmerizing time-lapse sequences of the stars moving across the sky.
Pro Tip: Adding visual elements to the foreground, such as trees or a human subject, can add interest to your astrophotography images and create a more compelling composition.
Gear for Astrophotography
When it comes to astrophotography, having the right gear can make all the difference in capturing breathtaking images of the night sky. Here are some essential equipment and gear to consider:
Motion Control Equipment
Good motion control equipment, such as a sturdy tripod and a remote shutter release, is crucial for astrophotography. A stable tripod ensures that your camera stays steady during long exposures, minimizing any blurriness or vibrations. A remote shutter release allows you to trigger the camera without touching it, further reducing the risk of camera shake.
DSLR Cameras
DSLR cameras are highly recommended for astrophotography due to their long-lasting battery life and ability to capture high-quality images. Brands like Canon and Nikon offer a wide range of DSLR cameras suitable for astrophotography, with features such as low noise performance and excellent dynamic range.
Fast Lenses
Fast lenses are a must-have for astrophotography, as they allow more light to enter the camera sensor. This is especially important when shooting in low-light conditions. Popular fast lenses for astrophotography include the Canon EF 16-35mm f/2.8L III and the Canon EF 35mm f/1.4L II. These lenses offer wide apertures that enable you to capture more stars and details in your images.
Having different focal lengths can also be beneficial when capturing different views of the night sky simultaneously. It allows you to experiment with various compositions and create stunning astrophotography images.
Here’s a table showcasing some popular astrophotography gear:
| Equipment | Brand/Model | Features |
|---|---|---|
| Motion Control Equipment | Sturdy Tripod | Provides stability for long exposures |
| Remote Shutter Release | Allows triggering the camera without touching it | |
| DSLR Cameras | Canon EOS 5D Mark IV | Long battery life, high image quality |
| Nikon D850 | Excellent dynamic range, low noise performance | |
| Fast Lenses | Canon EF 16-35mm f/2.8L III | Wide aperture for capturing more stars |
| Canon EF 35mm f/1.4L II | Fast aperture for detailed astrophotography |

Camera Settings for Astrophotography
When it comes to astrophotography, there is no one-size-fits-all approach to camera settings. The optimal settings can vary depending on the shooting conditions, such as the amount of available light and the desired outcome. However, there are some general guidelines that can help you get started and capture stunning images of the night sky.
In order to have full control over the exposure settings, it is recommended to shoot in manual mode. This allows you to adjust the aperture, shutter speed, and ISO according to your specific needs. By taking control of these settings, you can achieve the desired level of brightness, clarity, and depth of field in your astrophotography shots.
When it comes to aperture, using a wide aperture of f/2.8 or wider can help capture more stars in your shot. A wide aperture allows for more light to enter the camera, resulting in brighter and more detailed images of the night sky. However, keep in mind that using a wide aperture may decrease the depth of field, so make sure to focus properly on your subject.
The shutter speed is another crucial setting to consider. For most astrophotography shots, a shutter speed of around 20 seconds is recommended. This duration allows enough time for the camera to capture the light from the stars, while minimizing the risk of blurry images caused by the Earth’s rotation. To determine the ideal shutter speed based on the focal length of your lens, you can use the “500 rule.” Simply divide 500 by the focal length of your lens to get the maximum shutter speed in seconds.
The third important setting is the ISO, which determines the camera’s sensitivity to light. In astrophotography, using a higher ISO can help capture more details and brighter stars. An ISO of 6400 is a good starting point, but you can adjust it based on the ambient light and the desired outcome. Just keep in mind that using a high ISO can introduce noise or grain in your images, so find the balance that works best for you.
Focal Length Considerations
The choice of focal length can greatly impact your astrophotography results. Different focal lengths allow you to capture different views of the night sky simultaneously. A wide-angle lens, such as the Canon EF 16-35mm f/2.8L III or a prime lens like the Canon EF 35mm f/1.4L II, can capture a larger portion of the sky, showcasing more stars and celestial objects. On the other hand, a telephoto lens can help you zoom in on specific details, such as the moon or a particular constellation.
Experimenting with different focal lengths can give you a better understanding of the variety of shots you can capture in astrophotography. From wide, expansive views of the starry sky to close-ups of individual celestial objects, the choice of focal length opens up a whole new world of creative possibilities.
Remember, the camera settings for astrophotography are not set in stone. It’s important to be flexible and adapt your settings based on the shooting conditions, the specific scene, and your artistic vision. With practice and experimentation, you’ll find the perfect combination of settings that allows you to capture breathtaking images of the night sky.
Camera Settings for Astrophotography Time-Lapses
When capturing astrophotography time-lapses, it is important to choose the right camera settings to ensure optimal results. Whether you are using the camera’s built-in interval shooting function or a remote shutter release, here are some key considerations:
- Number of Shots: Shooting a large number of individual images is essential to create a smooth and captivating time-lapse sequence. The more shots you capture, the more dynamic and fluid the final footage will appear.
- Shooting Interval: To achieve a seamless flow of motion in your time-lapse, it is crucial to set the shooting interval as close together as possible. This will ensure that the transition between frames is smooth and natural.
- Buffer Time: Adding a three-second buffer between shots helps avoid gaps in the footage. This buffer allows for a seamless connection between frames and eliminates any potential interruptions in the time-lapse sequence.
Prior to starting the time-lapse sequence, it is important to establish proper focus and exposure settings. Ensure that your desired focal point is sharp and well-defined. Additionally, set your exposure settings based on the lighting conditions and desired effect. Experiment with different aperture, shutter speed, and ISO combinations to achieve the desired look for your time-lapse astrophotography.
Example Camera Settings:
To give you a starting point, here are some example camera settings you can try for your astrophotography time-lapses:
| Camera Setting | Recommended Value |
|---|---|
| Aperture | f/2.8 or wider |
| Shutter Speed | 20 seconds (adjust based on desired effect) |
| ISO | 6400 (adjust based on lighting conditions) |
Remember that these settings are just a starting point, and you may need to make adjustments based on your specific shooting conditions. Practice, experiment, and explore different settings to find the perfect combination for your time-lapse astrophotography.
By mastering camera settings for astrophotography time-lapses, you can create captivating footage of the mesmerizing night sky. Whether you are capturing star trails or meteor showers, the right settings will allow you to showcase the beauty and wonder of the universe in motion.
Camera Setup Tips for Creating Stacked Star Trail Images
Creating stunning stacked star trail images requires careful camera setup. By following these camera setup tips, you can capture mesmerizing star trails that will leave viewers in awe.
Shooting in RAW: When capturing star trails, shooting in RAW format allows for maximum flexibility during post-processing. RAW files retain more information and provide greater latitude for adjustments, resulting in higher-quality images.
Manual Mode: Manual mode is essential for astrophotography, as it gives you complete control over all camera settings. By manually adjusting the aperture, shutter speed, and ISO, you can achieve the desired exposure for capturing sharp and vibrant star trails.
Long Exposure Noise Reduction: Long exposures can introduce noise, especially during astrophotography. To minimize noise and ensure cleaner images, enable the long exposure noise reduction feature in your camera settings. This feature automatically reduces hot pixels that may appear in long exposure images.
For quick access to important functions while shooting, you can customize buttons on your camera. This allows you to easily switch to focus peaking mode, adjust exposure settings, and activate interval shooting without wasting time searching through menus.
Tips for Camera Setup:
- Shoot in RAW format for maximum flexibility in post-processing.
- Use manual mode to have full control over aperture, shutter speed, and ISO.
- Enable long exposure noise reduction to minimize noise in your images.
- Customize buttons on your camera for quick access to important functions.
Creating stacked star trail images takes patience and attention to detail. With the right camera setup and techniques, you can capture breathtaking images of the night sky that showcase the mesmerizing beauty of star trails.

| Camera Setup Tips | Description |
|---|---|
| Shooting in RAW | Shoot in RAW format for maximum flexibility in post-processing. |
| Manual Mode | Use manual mode to have full control over aperture, shutter speed, and ISO. |
| Long Exposure Noise Reduction | Enable long exposure noise reduction to minimize noise in your images. |
| Customize Buttons | Customize buttons on your camera for quick access to important functions. |
Conclusion
Time-lapse astrophotography offers a breathtaking way to capture the magic of star trails and meteor showers. By utilizing the right combination of gear, camera settings, and techniques, photographers can create awe-inspiring images and time-lapse sequences of the night sky.
Throughout this article, we have provided valuable tips and recommendations on how to master the art of time-lapse astrophotography. By finding a location with minimal light pollution, using a sturdy tripod and remote shutter release, and manually focusing on the stars, photographers can ensure sharp and captivating images. Additionally, the use of motion control equipment and fast lenses can enhance the quality and versatility of the astrophotography experience.
When it comes to camera settings, experimenting with manual mode, wide apertures, longer shutter speeds, and higher ISO settings can yield stunning results. For time-lapse astrophotography, utilizing the camera’s built-in interval shooting function or a remote shutter release can help capture a series of shots at specific intervals, ensuring smooth and seamless sequences.
With the knowledge and techniques shared in this article, we encourage you to embark on your own astrophotography journey. Capture the mesmerizing beauty of star trails and meteor showers, and let your creativity shine through in your time-lapse astrophotography. The night sky is waiting to be discovered and immortalized through your lens.
FAQ
What is time-lapse astrophotography?
Time-lapse astrophotography is a technique that allows photographers to capture the motion of stars and create stunning images of star trails and meteor showers.
How can I create star trails?
Star trails can be created by stacking multiple short-exposure images using tools like the “Advanced Stacking Actions” from Star Circle Academy in Photoshop.
What gear do I need for astrophotography?
Essential gear for astrophotography includes a sturdy tripod, a fast lens, and a remote shutter release. DSLR cameras and specific lenses like the EF 16-35mm f/2.8L III and EF 35mm f/1.4L II are recommended.
What are the recommended camera settings for astrophotography?
Camera settings for astrophotography vary, but generally, a wide aperture of f/2.8 or wider, a shutter speed of around 20 seconds, and an ISO of 6400 are a good starting point. The “500 rule” can be used to determine the ideal shutter speed based on the focal length of the lens.
How can I create time-lapses of the night sky?
Time-lapses of the night sky can be created using the camera’s built-in interval shooting function or a remote shutter release. Setting a close shooting interval and capturing a large number of shots is necessary.
What are some camera setup tips for creating stacked star trail images?
Camera setup tips for stacked star trail images include shooting in RAW, using manual mode, and enabling long exposure noise reduction. Custom buttons can be set for quick access to important functions.
Can I Learn Time-Lapse Astrophotography Techniques During a Star Gazing Workshop?
Yes, you can definitely learn time-lapse astrophotography techniques during a star gazing workshop. Many astrophotography workshops offer hands-on experience and practical tips for capturing stunning time-lapse footage of the night sky. Attending a workshop can provide valuable guidance and insight into this specialized photography technique.